Showing posts with label That Special Touch Masks. Show all posts

Sunday, 30 March 2014

Sunday Stamper - Week 301 - Brown Girl In The Ring

Gooodly Morning Stampers and a very happy Sunday to you all!  Cor! Blimey! A hoooge thank you to everyone who entered into last week's challenge.  I had a whopping 45 entries!  Seriously, that is the most entries I have ever seen... like ever!  I will let you know more about the candy winner in a few moments... but first, on with this week's challenge.  The theme is BROWNS... my fave colour combo's!   To join in with the challenge is simples: make a little something, it can be anything you fancy.  Add in the theme AND some stamping and then pop back here, leave me a comment with a linky to the place you are showing your entry and I will hop on over to visit. If you don't have a blog, you can email me your entry by attaching a small res. pic or alternatively, you can join in via Facebook - simply tag my name.  The challenge will remain open until 21:00 Saturday 5th April 2014 (April! Already!)


So, I have kept you in suspense long enough.... you wanna know the winner of the mega candy?   So, I fed the number of entrants into Random.org.... pressed the button and the number he chose is.... #30  which tallies with the comment and entry from Barbara Cady!  Congratulations Barb, please pop me and email with your address and I will have your goodies into the post for you.


My entry this week is a little MDF heart that I have covered with scrapbook papers and then jazzed up with Distress Inks.  The papers are Teresa Collins Creative Expressions ones and my fave ones in the pack are the neutral tones.  This background paper is fabby for just that, using it as a background.  I used a couple of That Special Touch stencils, blending Frayed Burlap and Vintage Photo DI's through them... I love overlaying stencils and using more than one design to add extra interest.  The stamping behind the floral bunch is a dandelion stamp from Butterfly Wishes Eco Green set... and then I got crazy with the Heartfelt Creations flowers... stamping lots of different sizes onto the papers, cutting them out, edging with Vintage Photo and then layering up.


The sentiment is from a Creative Expressions stamp set (think it is Thoughtful Ssentiments but I can't remember lol) and look at the scribbles around the edges... it makes me very happy to see sewing on paper projects.. but as I am a very lot rubbish with a sewing machine, I use a fine liner pen to do them myself.  One day, I will be able to thread a sewing machine, get the stitches to stitch and not break it... one day lol And do you see the buzzy buzzy bee?  He is a Studio 490 Embellish Your Art fella... I love him, along with the Crow, he is my fave EYA piece.


I shall away now... today has me very muchly excited!  Oh yesh, it is the first meet up of the British Touring Car Championship 2014.  We were thinking of driving down to Brands Hatch and spending the day watching it live.  Then we both came to the conclusion that whilst it is a great day out, both of us have an enlarged Idle Bone at the moment  and decided that the day, spent indoors watching it on ITV4, whilst consuming several hundredweight of snacks and nibbles and spending some of the ££ we have saved on a rather delicious looking leg of lamb, is a much better idea.  And.  We didn't fancy the 5am set off to get there in time to get a decent place to park and view!   Thanks for looking...have a great day... TTFN

Hels...

PS.... GO PLATO!!!

Saturday, 1 March 2014

Orange Blossom...

...tis a super schpeedy post from me today!  Oh yesh, I am doing some schedulage of my blog because first thing this morning I am away to Crafty Bunch in Telford for a weekend of teaching.  So, being as I am uber organised and have got everything ready and all I needs to do now is sleep, I thought I would pop a quicky post on here today.  Actually, it is really last night, which is so confusing because it is now... erm.. now.. so... erm... quite!   This is the last demo piece from the Stitches trade show the other week.  Another Pronty MDF heart, this time painted with Chalk Paints in paler colours and stencilled with my new fave That Special Touch Fleur stencil, using Wendy Vecchi's Ranger Archival Orange Blossom... this is a beauty of a colour and to make the design really pop, I coloured the flowers with it too... tis easy to blend Archival inks... just use Cut & Dry foam.


Right then... time for bed... well, it was then... it won't be now, it will be time for breakfast... right?  *wanders off scratching head.... *   I am still full of sneezles... I actually geniunely lost count yesterday the amount of sneezles I actually did... very lots that is how many!  My face is all puffed up like a big Moomin puffy thing - bunged sinuses I think. 


Aw, Moomin blowing snotty bubbles!

I see a lot of you commented that you too are suffering with this lurgy... get well soon!!!   Moving on, you don't want to hear all about me being a snot monster... there be a brand new Sunday Stamper for tomorrow = that too is scheduled - see, uber organised... for a change!  Thanks for looking, have a great Saturday! TTFN

Hels x

Friday, 28 February 2014

Schneezy Greetings!

...aaaatchoooo!!! Oh yesh, here we are at the end of February and I have my nose all a-bunged up and I am sneezing like Sneezy McSneezy from the little town of Sneezington in Sneezeshire!  Yikes!  So, not only am I all of a moan and a groan, my face has also taken on the appearance of a Moomin... just call me Moomin Mamma and let's have done with it lol   Anyways, a brief interlude in my bemoaning... here's another sample I made whilst demo-ing at the NEC trade show last week.  This is another Pronty MDF heart, again painted with the new Cosmic Chalk Paints.


I used a brayer to apply several layers of the paints to the heart.... btw, answering your questions: no, I never gesso the MDF before playing... am lazy like that :O) That isn't to say you can't, you can, if you want to :O)  I added circles using the top of a water mister bottle and lines using my Ranger scraper and then popped the new That Special Touch Fleur De Lys stencil over the heart and blended Jet Black Archival through it to add some details.  Next up, I stamped the Dandelion in Jet Black Archival and then applied the Cosmic Shimmer Crackle Glaze over the top of the image and then applied more paint over the top whilst it was still wet.  The butterflies were stamped onto cream card and then cut out, coloured with Distress Ink and added to the heart with some gems for the bodies.

 
Today I am getting my stuff together in preparation for my trip to Crafty Bunch in Telford this weekend.  I am so looking forward to returning to Crafty Bunch, the ladies are all brilliant - they love getting covered in ink and paint... and remember me talking about Margaret, the gorgeous lady whom I want to kidnap and bring home?  Well, she will be there too! Hurrah!!!   I couldn't mention Crafty Bunch without mentioning our Sue, the owner, who makes THE best salmon sammiches in the world *yep, best Jeremy Clarkson voice for that....* and who also kept me topped up with coffee and Creme Eggs during the trade show!  I shall away now, to my germ ridden Room of Stash, where, you will be gobsmacked to hear, tidiness prevails! Oh yesh!  It took me several long hours to get it resembling normality but... well, it will do, the desks are clean and tidy... just don't look at the floor!   Have a good day all!  TTFN

Moomin Mamma x


Tuesday, 28 January 2014

Oranges and...

...glitter!  Whatever next eh?  I have well and truly gone over to the Sparkly Side haven't I?  But then again, in my defence, Distress Glitter is rather delightful to use.   Here's another demo card from last week's tellybox shows.  This one uses Clear Texture Paste to hold onto the glitters and it was applied through the Flower & Butterfly That Special Touch mask.


I used several different colours on the main design so I got a nice light and shade look to the flower but if you don't want to have different colours, you don't have to... just use the one.   The little flower cluster was made using the Heartfelt Creations stamps on the shows, stamped onto cardstock, with Jet Black Archival, cut out and then coloured with Distress Inks with a smidge of DG in the middles using Glossy Accents to help them stick.


A short and sweet post today...  Thanks for looking, hope you having a great day! TTFN

Hels x

Monday, 27 January 2014

Sunday Stamper - Week 292 - Orange Crush

Goooodly Morning Stampers and a very happy...erm.. Monday (!) to you all!  Big thanks for all the entries to last week's challenge and apologies that I haven't had chance to visit you all yet, life has a way of sending in a big old rock to climb over sometimes  but hopefully things are getting back to normal (soon!).  The new challenge for this week (and apologies for the late posting of the new theme - please see post below for the reason) is... ORANGE.   To join in with the challenge is simples: make a little something - it can be anything you fancy.  Add in the theme and some stamping and then pop back here, leave me a comment with a link to the place you are showing your entry and I can come visit.  If you haven't got a blog, you can also join in via Facebook (just tag my name on your upload) or via email by attaching a small res. pic to the email.  The challenge will remain open until 21:00 Saturday 1st February 2014.  (Feb! Already!)


This week my entry is one of my sample cards from last weeks tv shows.  I love using lots of different masks and stencils on one project, layering the designs with different colours and making my own background papers.  Here I have used Eyetlet Lace, Chicken Wire and Small Polka Dot That Special Touch masks, colouring with Antique Linen, Broken China and Seedless Preserves Distress Inks to make a patterned design.   I stamped out lots of the Heartfelt Creations Sunkissed Fleur images, cut them out and coloured with the same Distress Inks, layering them all up and adding a splash of orange in the form of Spiced Marmalade Distress Glitter (did I say, I loves this stuff!) into the centres of the flowers.  A few little embellies half hidden behind the flower clusters adds some little bits and bobs of sparkles and I also added some flourishy bits using Jet Black Archival ink.


Sorry I am late posting the challenge - as I said, the internet access in the hotel this weekend was plain weird... it was an unsecured network and Lionel Laptop was having none of it.    I shall away now... busy day ahead!  Thanks for looking, have a good week folks... TTFN

Hels x


Monday, 20 January 2014

Dandelion Butterflies

...cor blimey, I don't know about you but this year is whipping past super fast already!  Tomorrow I shall be on Create & Craft again with two stamping shows - times are 11am and 7pm and the deets on how to view are over there *points left*   I have been busily beavering away in the Room of Stash making some samples for the shows.


Today sees my fave of the bunch so far... this one I have called Dandelion Butterflies.  I love the word dandelion - and I loves dandelion & burdock too... Morrie's do a lovely diet version of it too.  anyways, enough of the waffles... this card has been made using the Dandelion stencil from That Special Touch... and some Texture Paste... and a bit of Distress Ink and a brace of 490 butterflies... and... something else!


Can you guess what it is yet???  Something very unusual for me you know... but I am on the turn!  Oh yesh!  Glitter!  Distress Glitter in fact.  Mind you, I did have a wee mishap yesterday afternoon... when my clumsy elbow knocked the Seedless Preserves pot off my desk... and onto the carpet below.   A few curses and bleepy words followed... because I had left the lid off!  Yikes, the Room of Stash actually got a vacuum!  Well, it has to happen every so often right?   I shall away... more samples to make and demo's to prep... hope you having a great day!  Thanks for looking, TTFN

Hels x

Friday, 6 December 2013

Giveaway Time!!!

...yes indeedily, it is that time again.  As a thank you for all the lovely comments and messages and emails and stuff, I am giving away this little piece of artwork that was prepped as a demo and I didn't get chance to do it live on air... so I finished it off at home and here it is.  To be in with a chance of winning the plaque, simply leave a comment on this post (click on the "inky thinkings" button at the bottom of the post).  The closing date/time for the giveaway is 23:59 GMT tonight, 6th December 2013. The winner will be chosen at random and announced on tomorrow's post.  In the event of the winner not claiming their prize in the next seven days, I will do a re-draw and a new winner will be announced.


I love these MDF Rectangular Plaques.  This one is the largest one and I painted it with a layer of Lake Mist Dabber... and added the edging in Pitch Black Dabber to give it a frame.  The stencilling is the gorgeous Fuchsia That Special Touch mask... I loves this mask muchly seeing as I am collecting Fuchsia's at the moment and now I have my new greenhouse, I can keep them over winter too!  Anyways, once I had popped the mask into position, I spread a layer of Gold Pearl Texture Paste through it and then allowed it to dry.  I tend to pop things onto the radiator to dry - I am impatient!  You can gently heat dry the paste, just make sure it has formed a "crust"  on top of it to start with otherwise it can bubble and distort.


The decorations are made from flowers stamped onto the lush Teresa Collins Creative Expressions papers... the flower stamps are from the Studio 490 Live & Make Art set... loves them muchly because they have so many petals, you can make them more 3d.  I added some hand cut leaves that I lightly coloured with Forest Moss Distress Ink and then bunged a few embellies onto the plaque too... the buzzy bee is an Embellish Your Art resin piece (how cute!) and the key is a Creative Expressions Assorted Keys embellie... and the ickle bottles are Glass Vials which I filled with Persian Dawn Gilding Flakes to add a smidge of bling.  The words are a combo of stencilled (Always from the Classic Words Stencils for Art) and the Be You is a stamp from the Art For You 490 set.


Right, that is all from me for today... I am tackling my "to do" list ... starting with the dreaded trip to Morrison's... oh how I love doing the grocery shopping... not!!!  Wish me luck, I thinks it might be a bit busy in there!  Thanks for looking... have a grand day!  TTFN

Hels x


Sunday, 22 September 2013

Sunday Stamper - Week 276 - Lock & Key

Gooodly Morning Stampers and a very happy Sunday to you all!  Thank you for the gorgeous entries for last weeks challenge.  This week is going to be a slightly different than normal challenge... because it is going to be a TWO week challenge.  Oh yesh, for the first time in 4 years, the Sunday Stamper will be taking a week off... fear not though, it will be back again on October 6th.  On with this fortnightly challenge theme though which is... KEYS.  To join in is simples: make a little something, it can be anything you fancy.  Add in the theme AND some stamping.  Once you have made your creation, pop back here to leave me a comment with a link to the place you are showing your entry.    If you haven't got a blog, you can also join in via Facebook, simply tag my name on your upload... or by email and attaching a small resolution piccie for me to see.  My email addy is over there *points left* where my photo is, click on that and you can get the deets :O)  Remember, this is a two week challenge and will remain open until 21:00 Saturday 5th October 2013.


My entry this week is one of my show samples... I have been so busy making samples and such like that I didn't get chance to do any other art for the past couple of weeks.... and I know that sometimes we don't get a chance to see the samples close up so I thought I would share a few with you this week, starting with this one.  It is made from the 3 board hanging set and it is MDF based.  I love love love this set... perfect size and of course, being MDF is always going to be a winner.


The base was painted with Lake Mist Dabber and then I layered up some That Special Touch stencils... Scattered Straw blended through the Trellis stencil... then Broken China through the Flower mask and then the Sunburst stencil... LOVE this one... that is Seedless Preserves DI blended through that.  The stamping is done with Watering Can Archival Ink (LOVE this colour, tis my new fave.. thank you Wendy Vecchi for making this one happen!)  I used the Creative Expressions Textures stamps.. the top and bottom panel have the crackle background randomly stamped and the middle has that gorgeous french text stamped.


The flowers are stamped onto Foundations papers using Aquamarine and Blue Violet Archivals and then cut out, curled, layered and decorated with pearl middles.  I love adding lots of goodies into a bundle of flowers which is where the fabby Embellish Your Art pieces came in handy... and of course... glass vials filled with the delicious new Broken China Distress Glitter...well, it had to be done!  I LOVE that new glitter!  Shhh, don't tell anyone though... being as I am a non-glittery kind of person normally lol


Right, I shall away... hope you all have a great day planned... I am away to Telford to teach at Crafty Bunch today and tomorrow.  Thanks for looking!  TTFN

Hels x

Saturday, 21 September 2013

Dream Keeper

...COR!! Blimey!!! And!!! THRICE!!!   BIIIIG thanks to you all for your amazing support for yesterday tellybox shows!  I loved reading all your emails and thank you also for those who sent in photo's of your creations, I loves seeing the stuff you make!  Three whirlwind shows and lots of happy peeps who are now sitting on their doormats eagerly waiting to pounce on Postie... for those of you who managed to get your goodies, well done and... have fun playing!  I should also add that a couple of people who phoned their orders through and missed out on the Owl Clock were reliably told by customer services that I will be back on screen next week with more MDF goodies... erm... I won't be, so apologies for that... but I will hopefully be back soonly with more MDF loveliness :O))


Anyways... being as I like to be organised (who snorted?) I always get my demo's all prepped up and ready to go... and always make sure I have more than I needs.  Well, the demo's for yesterdays afternoon and evening shows were all prepped.  And then the Owl Clock sold out.  And then the birdhouses sold out.  So, I thought I would do a Shadow Box demo instead... and then that sold out too!  Yikes!  I spent a bit of extra time in the studio and prepped up this demo for the 4pm show but we ran out of time so I used it for the 7pm show instead.


If you managed to catch the shows then skip this next bit as I am repeating meself (haha)  I used a large plaque that Grim had very kindly drilled holes in (I just do not trust meself with a drill... I can do enough damage with a craft knife, let alone something that spins very fastly and would probably smart a bit if it came into contact with a hand)  Starting by covering the plaque with Lake Mist Dabber and then once dried, overlaying the Trellis mask and applying Scattered Straw DI though it.  Next up I popped the Grid mask on and used Forest Moss DI through it, making sure the ink only went on it patches.  Finally, I added the Blossom mask and popped Walnut Stain DI though it.  Now, you can see the DI goes almost pastel when it is applied to paint... I love this muted soft effect.   A bit of stamping using the crackle Texture stamp and Jet Black Archival Ink... and then the finishing flourish with ... erm.. a flourishy swirl from the Swirls stamp set.  Zap the stamping with a heat tool to set the ink and stop inky smudges.... always a good thing to remember to do that :O)  Decoration was provided by stamping Funky Flowers onto the gorgeous Teresa Collins papers (Oh how I LOVE these papers... and they were so cheap too!!!)  As you know, I have a bit of an addiction to all things Studio 490 and I added some of the fabby Embellish Your Art pieces.  Voila, done!  However, the stamped word I popped onto the piece fell off on the way home... so I used Alpha Parts instead as they happened to be on my desk... I do love an Alpha Part you know :O)


So, what you got planned for today?  I am getting ready for my classes at Crafty Bunch in Telford tomorrow and Monday and then I shall be seated in front of Lionel Laptop and Skyping with Ellen... not sure we will get any art made today though as she has a much more important appointment at lunch time... one which leaves me Peeled Paint in colour.  Oh yesh, she is going to Queen's Ink (I LOVE that place, shame it is 3700 miles away!) and she is seeing ... THE Wendy Vecchi.  Green? Moi?  hell yes!!!   Thanks for looking, have a great day!  TTFN

Hels x

Wednesday, 5 June 2013

Giveaway Day!

... oh yesh indeedily, today is giveaway day!   I am giving away this demo sample from Monday's shows... to be in with a chance of winning it, simply leave me comment before 23.59 today, 5th June and I will pick a winner and announce the name on tomorrows blog post.  


This was my first demo on Monday and I have had so much feedback about this one... and it seems you are all turning into Wombles just like me and nabbing all the cardboard before it goes into the bin... well, cardboard is fab to work with .... and... it is freeeeee... always a goodly thing!  The base is painted using Cut & Dry foam and Cool Peri and Eggplant Dabbers, there is a smidge of Texture Paste through my fave Foxgloves stencil and then a whole lot of Gilding Wax to jazz it up.   My fave embellies are the Studio 490 Embellish Your Art range... and these flowers are amongst my fave of those.  I only just noticed that the Small Star Knob on the left isn't in the right place... so they are a bit wonky there... whooops!   Anyways.. .if you would like to own this piece of artwork, just leave me a comment!


I am not stopping... I have just spent the last two hours faffing about cleaning!  I know!  I must be sickening for something!  And now it is time to get messy again in the Room of Stash as I have a few projects that need to be done... and being as the sunshine has deserted us, now is the time to stay indoors and play.  Thanks for looking... have a great day!  TTFN

Hels x

Saturday, 20 April 2013

For Demonstration Purposes...

...aha, did you see what I dids there huh?  Demonstration purposes... 'cos... these offerings today are actually a couple of the several demo pieces I made whilst at Ally Pally last Sunday.  I was fortunate enough to be playing with my very favourite Studio 490 stamps, stencils and other goodies... along with the new Distress Paints and some delish That Special Touch stencils. 


I wish I could say I thunked up this technique but no, all credit must go to the wonder that is Wendy Vecchi - seriously, she is a wonder woman!  Creating art, coming up with new ideas and making new designs... I take me hat off to her!  HERE's her blog, take a trip over there and you can see tonnes of inspirations.  Anyways... this technique... genius!   Take an Art Part base, I used a large heart and the back of a Rectangle Frame.  Coat generously with Rock Candy Cracklepaint (the clear flavour).   


Let it completely set and crackle... and then go in with a couple of Distress Paint colours... and blend the two together... I use Cut & Dry foam to do this but you can use your finger too.   The Distress Paint will drop into the crackles and it gives the overall look a really chalky outsidey feeling.  You can see from the close up shots that patches of crackle are deeper, this is just where I added more to the base... it is a self levelling product so no need to worry about brush strokes being left either.  The word HAPPY was popped onto there using a 490 Stencil and Black Soot DP (applied gently with Cut & Dry foam)


The butterflies are book pages applied to Clearly For Art Blackout... stamped, cut out, coloured with DP and Distress Stains... and then heated and moulded to shape the wings... a few pearly bits for the bodies and there you go... simples!  The scribble around the edge of the heart was done using a Sakura Micron Pen... and the ickle heart is an Embellish Your Art piece, coloured with Distress Paint... I have yet to find a surface that the Paints won't go onto!


Anyways... I shall have to get a wiggldy-piggldy on, I am away to Sheffield this morning for a Dabble Day with Busy Bee Crafts... I love the Dabble Days indeedily - three groups of lasses (and lad) and three crafty teachers, all going around the room in rotation so they all get to do three 2 hour classes... brilliant idea!   Right, enoughs of my wafflings... don't forget to scroll down to the next post to leave a comment and be in with a chance of winning my giveaway.   Thanks for looking... have a grandly day!  TTFN

Hels x

Sunday, 24 March 2013

Sunday Stamper - Week 250 (!) - Shiny Happy People **Plus Candy!**

Gooooodly Morning Stampers!  Wow!  Thrice WOW!  It is a milestone indeedily since the Sunday Stamper was first born, way back in January 2008 and I am calculating that we haven't had a break in weekly challenges for over three years now!  So a BIG & MAHOOSIVE thank you to all who have joined in and continue to join in with my l'il ol' challenge... seriously folks, I do appreciate every single entry very muchly.  So, as a thank you I am offering up some candy that I have put together.  But first! The theme!  Another nice and easy one this week... use something... SHINY!   To join in with the challenge AND to be in with chance of winning the candy, all you need to do is make a little something, it can be anything you fancy.  Add in the theme AND some stamping *yes, this is mandatory this week as it is the Sunday Stamper after all ;O))*  pop back here, leave me a comment with a link to the place you are showing your entry.  If you haven't got a blog/webphoto hosty thingy, fear not, you can join in via Facebook or by email but you MUST leave me a comment telling me where to find your entry.  This just makes it easier for me when I come to do the draw.  If you have joined in and haven't left a comment, I can't guarantee you will be entered.  The challenge will remain open until 21:00 GMT Saturday 30th March 2013 and the winner will be announced on next Sunday's post.


 I spent a lovely day yesterday with some fabulous ladies at Pickwell Farm Craft Shop in Southampton.  To say my drive down to Southampton was a bit a 'mare would be an understatement though.  Starting with the nightmare of trying to get Ferdy up the steep old hill that is the Close... after about fifty attempts (ok, exaggerating a smidge) to get him up the hill without bashing into neighbours, or their cars, or indeed their houses, I safely navigated onto the A roads, thinking "aha, the gritters will have been and the roads will be clear"  PAH!  Were they heckers like.  So I did a slow old trundle all the way to 30 miles north of Southampton (so that would be 100 miles in a blizzard!) when it stopped blizzarding and started to rain.  Anyways, that was all a distant memory once we got creative with our canvases.  This one is my demo canvas - the real Sunday Stamper piece for today is still laying, unfinished, neglected, unloved etc on my desk... just plain old ran out of time!


I have lots of different techniques going on, including paper blocking, stencil/pasting, beeswaxing with stamping (hidden under the....) faux porcelain rose making and the addition of a little butterfly - cos nothing looks perfect til it has a butterfly perching on it... especially this little Studio 490 butterfly which is my favest EVER butterfly!   He is on the Art For You set btw :O)


On with the goodies for the candy... I have picked up some goodies on my travels that are my fave things... and they include: a papier mache hanging board, Viva Terra texture paste, Viva Crocko clear cracklepaint, Ripe Persimmon Distress Stain, Squeezed Lemonade Distress Stain, Vintaj Patina "Earth" and "Sealer", Chain Tassels, Vintage Corners, Idea-ology Label Pulls, Book Plates, Prima Embellies and a selection of the gorgeous Studio 490 Embellish Your Art range...  and I will more than likely be putting a few extra bits into the package too.  The piccie below shows it all :O)    Just to recap the rules - make a little something, include the theme AND some stamping (it doesn't have to be a lot even... just some lol), leave a comment for me on this post with either a link to where you are showing your entry OR if you have emailed/Facebooked your entry just a comment to that effect. You can enter as many times as you like but each entry has to be different from the last...  hope that makes sense :O) If you can lift this photo and pop it into your sidebar too so all your blog readers can see the challenge too, that would be great!  (Just right click over the image, click "save as" and download it onto your computer and then upload it onto your bloggy sidebar)


Right, I shall away... I am planning a day of organising today... I have a pile of ironing that is taller than the tallest building in the World (of which the name escapes me lol) and I needs to get that done... and I also want to organise the old Room of Stash a wee bit too because it is looking very messy... oh and my WIP needs to be finished... I may be gone some time lol   Thanks for looking... have a great week!  TTFN

Hels x

Friday, 22 March 2013

Two Cards... Two Ways... One Mask

...yikes!  Where did this week go huh? I am working on a big project at the moment - you know, one of those that starts out pretty small and kind of grows as you are going along?   Well, I had intended to get it finished and blogged today.  HA! Not a chance, I am still a-faffing with the embellishments!   So, instead I have two more sample cards from last Thursdays show.  They are both using the gorgeous That Special Touch mask but used in a different way from each other.  Here's card numero uno *ooh get me going all foreign of a Friday morning!*   When I am inking/spraying through a mask, I tend to use re-po tape and stick the mask in place so there are no disappointing nudges going on.  Once in place, I lightly blended Scattered Straw, Forest Moss and Seedless Preserves DI through the mask, making sure I blended the colours nicely on the flowers.  Once done, I lifted the mask and gave the whole card a zap with a heat tool to set the ink.  Distress Ink stays wetter for longer so it is worth remembering to do the heaty bit.  I used Scattered Straw DI to blend around the edges of the card and then edged with Seedless Preserves to form a frame.  The butterflies were stamped in Jet Black Archival, cut out, then pounced with the same Distress colours but this time in Stains.  Another zap with a heat tool to dry them and a sentiment stamped in Jet Black Archival.  The little buzzy bee is an Embellish Your Art piece, how cute is he!


Card 2 was made by flipping the mask over to have a different orientation.  I taped it into place and misted Cosmic Misting Inks through the mask... I used Meadow Lime, Clover and Blue Cotton colours.  Before I lifted the mask I lightly dabbed over it with tissue paper to remove the excess and then carefully lifting the mask up so I didn't get any splodgey bits where I didn't want them.  The sentiment *Studio 490* is stamped onto an offcut of the cardstock that was over-sprayed.  The butterflies are coloured with Blue Cotton Misting Ink, applied with a paintbrush.  I added some little lines of fine black pen to make some faux stitching and another card was done.  Simples huh?


Anyways... I bet you are all *dying* to know about the Ukelele lesson (ok, I know you ain't but I can pretend rofl)  Well, I can report that I did, indeedily, play a whole tune!  Oh yesh, I am now capable of playing... Twinkle Twinkle Little Star!  I am thinking of changing my surname to Hendrix ... or maybe Slash... or perhaps even Weedon (ahem... quite!)  Ok, so I still have a loooong way to go before I will be leaning on a lamp-post but I am going to practice and master this little instrument that is just too cute!  I shall leave you with the song I am aiming to be, one day, able to play... HERE on YouTube.   Thanks for looking... have a FAB day!  **keep warm... brrrr... someone needs to have a word in old Mother Nature's shell-like, snow, in Spring... gah!**  TTFN

Hels x

Tuesday, 19 March 2013

And The Winner Is... Take I

...cor blimey and thrice! What a lot of wonderful comments you all left for my Giveaway Part I last week! Thank you all... muchly appreciated :O)   Without further ado, I shall announce the winner of my giveaway tag... so there were 70 comments in total... and Mr Random.org chose... Number 32... which tallies with a comment left by Denise.  


Thanks again all of you and if Denise could drop me an email with her addy so I can pop the tag into the post.  Also, there's still the rest of today to leave a comment HERE to win the card I am giving away :O)  I have had a lot of lovely emails and comments about the shows last week and the main theme is "can we see more of the samples..." so, being as I am like that, here are two more of the samples that I made using the Studio 490 goodies on the shows:  I have chosen two with similar colours so I don't have to talk right through everything... if you know what I mean...  Here's the card I made:


All of the colours used are: Scattered Straw Distress Stain and Ink, Wild Honey Distress Ink & Marker, Rusty Hinge Distress Ink & Marker, Vintage Photo Distress Ink & Marker.  Olive Archival and Jet Black Archival.   The Studio 490 Stamp sets used: Art For You, Wildflower Art & My Kind of Art.  For the card I cut a piece of card (cream in this case) and spritzed it liberally with water and then pounced the Scattered Straw Stain onto it and let the Stains drip... then dried it with a heat tool.   Next I smidged some Vintage Photo DI onto my craft sheet and spritzed with water, dipping the card into the inky mix and picking up little dotties of ink.  Another zap with a heat tool.  The honeycomb background was created by lightly scribbling the Vintage Photo Marker onto the large stamp... only in patches so it isn't an over-all image.


 Once stamped, I zapped with a heat tool to dry the ink.  Next came the masking - using the new Chicken Wire That Special Touch mask and Scattered Straw DI on some Cut & Dry foam, I blended patches of the mask to add extra detail to the background.  The butterflies are card covered Clearly For Art, stamped, coloured with Distress Markers and then heated and moulded.  The flower is a Wildflower Art Part, overstamped with the co-ordinating stamp and coloured with Distress Markers.   A smidge of jute to add a bit of extra texture to the card and the sentiment, stamped, coloured and chopped up to fit on the card and voila... finished card.... oh apart from the scribbles around the edges, done with a fine marker :O)


This next piece is the base of a Rectangle Art Part, coloured with Scattered Straw Stain and dried immediately - tis always the best way to operate when putting Stains onto Art Parts, so the paper fibres don't separate.  A smidge of blending around the edge of the Art Part with Rusty Hinge DI and another zap with a heat tool to set the ink.  Next I used a sanding block and lightly sanded the edges of the Art Part to shabby it up a bit.  The same application of Distress Marker for the honeycomb background to make a nice little something to see on the base of the Art Part... and then a smidge of flourish stamping with Olive Archival ink to add interest to the bottom of the Art Part.  Next came another Wildflower Art Part, stamped with the corresponding stamp and coloured with more of the Distress Markers.   The butterflies... they are book page covered Clearly For Art, stamped in Jet Black, coloured with Distress Markers and then cut and heated up and moulded.  To make the ickle hanging bit, I punched two holes in the Art Part base using a Crop-A-Dile and added in rusty wire for the hanger.   And there you have it.  I will be back tomorrow with a couple more cards that were samples on the shows... and also the winner of the card giveaway.  


Now, let me tell you... there was much mirth and utter excitement Chez Sheridan on Sunday evening.  I got back from my weekend of teaching at about 7pm and we decided to be very lazy and have some takeaway for tea... I know, lazyness indeedily but we had both been working all day... (any excuse right?)   Anyways... we settled down to our takeaway and a night of telly catching up.  After about three hours of telly catching up I needed a break.... you know, a *fresh air* break (hahaha) and went outside into the back garden.  Well, imagine the look on my chops when I saw something sitting in one of the trees in the Spinney at the bottom of the garden.  Guess what it was.... go on... guess.....    Nope, wrong... it was... AN OWL!!!  Oh yesh!!!! AN OWL!!!  At the bottom of the garden... like a REAL OWL!!!   See my excitement?  That is cos I LOVES Owls... very lots.  I have heard him callling a few times of late but hadn't actually seen him.   Anyways, I nipped back inside and called for Grim to come and see and then went back outside and walked veerrry slowly towards the bottom of the garden.  Every time he looked at me, I stood stock still... I was about five minutes looking at him.  Then Grim comes out and didn't adopt the one step at a time approach (rofl) and Mr Owl saw Grim and flew off.  Pah!  Never mind that though.  I saw a real OWL, you know, like a wild one, not one in a Raptor Centre.  I am still SO excited... to the point that I am going to let me hair grow wildly, buy a stick on beard and pretend I am Bill Oddie (rofl) and set up camp in the back garden again to see if Mr Owl comes to see us again.  Anyways.. enough wafflingtons from me for one day.  I have been visited by Mr Horrendously Evil Back-Pain so I am planning a day of rest...   Thanks for looking and have a fabby day!  TTFN

Hels x

Saturday, 16 March 2013

It's.... Giveaway Time... Again!

...teeeheeee... oh yesh, it is Giveaway Time... again!  But wait, wasn't it giveaway time yesterday?  Indeedily it was... and that giveaway is still open, so if you haven't entered, just scroll down and you can see how to :O)   So another giveaway today... as another thank you for all your lovely emails, tweets, messages etc on Thursday and yesterday. *makes me so happy that you love the stuff I have been showing you*  I love comments... so please do tell me what you loved about the shows on Thursday... and did you indulge and get any little crafty pressies.  To be in with a chance of winning this card, just leave me a comment (click the "inky thinkings" button at the end of the post) and if you aren't already, click to follow me :O)   The winner will be chosen, at random, and announced on Wednesday 20th March 2013.


This is one of my demo cards from Thursday 3pm show.... I do so love playing with Distress Stains and when I was making all my samples I was playing around with them to see if I could come up with a different way of using them.  I decided to see if I could pick them up on Cut & Dry foam and blend with them... but the first one I picked up was a tad smudgy for blending... but then I said to myself "I wonder if I could streak them..." and yesh, indeedilily, I could.  I loved the effect so combined this new to me technique with my "drippy stains" technique.  Drippy Stains is a cool way of covering a piece of card/paper with Stains but making them more watercoloured.  Simply spritz the cardstock with a good old layer of water before you apply the Stains... and apply them in a pouncy motion.  It's also a very good idea to "prime" your Stains before you apply the water as you need to work pretty quickly: do this by pressing the Stain down onto your craft sheet and gently squeeze the bottle... nice and juicy then :O)  Once you have the colours applied, lift the card upright and dry with a heat tool, allowing the stains to drip all over.   Applying the Stains with the Cut & Dry foam is easy too: squeeze some Stain onto your craft sheet, pick up the Stain with Cut & Dry foam and then lightly streak it across the cardstock.  I have found the best way to control the streaking is to drag the Cut & Dry towards you.  Heat up to dry between each layer of colour... so on this card I used Seedless Preserves ... dried that layer and then went in with the Forest Moss.   To finish the card I used the new That Special Touch Chicken Wire mask (ohhh, my new fave!) and blended Scattered Straw DI over patches of it.  Because we used the Scattered Straw Stain with water, the Ink will show up more.   Adding a few die cuts for embellishments and an Art Part for that extra dimension finished the card perfectly!


 And there you have it... simples!  I hope, if you did place and order, that you don't have to wait too long for your new goodies to arrive with you and you have a lovely time playing.  As ever, if you get your goodies home and can't remember how to use them or need any help, just pop me an email over and I will happily try to answer any questions you may have.   Right then, I shall away... I am just getting myself ready to drive down to Swindon for my weekend of inkyness at Snazzy's... you should see the amount of boxes I am taking, poor old Ferdy, he is only a diddy little car so I have to put the seats down in the back to get the boxes in... it is like Operation Jig-Saw getting them all in there lol    Thanks for looking and have a wonderfully crafty weekend!   TTFN

Hels x

Saturday, 9 March 2013

And The Word Is...

...Wish!  Oh yesh  indeedily, WISH is my word of 2013.  I have noticed I have some lovely new followers - thank you all - your appreciation is very muchly appreciated!   Anyways, I thought I would show you another piece I have made using the word WISH and recap why I chose this to be "the" word.  Well, it is simples really.  After several years of difficult and negative things happening, I decided to give myself a good old talking to over Xmas & New Year and came to the conclusion that we are all, indeedily, masters of our own destiny.  I often think that if you think that something bad will happen, it actually does.  I also often remind myself that "hey, this could be a whole lot worse missy...." and give myself the proverbial mental kick up the bum.  So, by chosing a positive word, such as "wish" I am pushing myself to see the positive in everything... plus the fact, if you make enough wishes, some are sure to come true... right?   Anyways... enough of the old melodrama and on with todays offering!


This was my first demo tag at Inspirations the other day... did I tell you I had a fabby time there?  Anyways... I have noticed of late that all things I seem to be doing involve bookpages... I am, it would seem, obsessed with using them.  So this tag is no surprise that yep, another bookpage!  I also used the scraped paint technique that I am in lurves with too... to be honest, I loves the scraped paint technique sooo much that the majority of the things I have made recently have been sporting this method too.  But, being realistic, it is a brill technique AND you don't use a ton of paint with it... because you only use what you scrape, which isn't that much... and there's no washy brushes running the excess paint down the sink.  See, I am being economical too!   Anyways... once I had scraped on the paint I wanted, I added a That Special Touch stencil over the top and popped some texture paste through it... I loves that stencil tooooooo much!  Once the texture paste was dry, I blended some Vintage Photo DI around the edges of the tag to make it a smidge grungier.  The letters are die cut and painted black and then glammed up with Treasure Gold and I added some Idea-ology bits for finishing touches... voila, uno tag.  Yep, very similar to previously made tags but...


Today is going to to "one of those days" I can feel it in my bones (literally)  I felt and heard something go crack and crunch last night in the lumbar bit of my back... which isn't a good thing to feel or hear so I shall be taking it easy and making sure that whatever it is that went crunchy crack doesn't cause me any more pain.  A trip to see Mr. Doctor is needed I reckon.   Ah well, could be worse, you see, being Mrs Positivity, it could be a whole lot worse and I am lucky that I have a Room of Stash brimming with goodies to play with.. so a sedate crafty afternoon is required methinks....   Thanks for looking, hope you have a fabby Saturday!  TTFN

Hels x

Friday, 1 March 2013

Just The Two Of Us...

...making a mess in the Room of Stash (well, three if you count AlfieCat who decided to come and investigate what Daddy was up to in "his" room...)   As promised, the results from my playdate with Grim in the Room of Stash.   We altered a little papier mache hanging, mine is my usual blue and green but Grim went for something completely different... and it even has a story to go with it!


So.  Grim is a life-long supporter of the football team that is Luton Town - otherwise known as the Hatters.  In the past 40 years he has been going he has only missed two home games - the first was eons ago and a family wedding (I have been reliably informed that ear buds and a radio were worn for that one) and the second time, totally my fault.  I very nearly did myself a fatal mischief when I came into contact with a rotten old coldframe and sliced my arm off (well, not off but very nearly... I had an ambulance and flashing lights and everything!)  Anyways, in recent years, Luton Town have not had the best of luck with managers, the latest fool having left just last week.  It was announced on Tuesday that a new chap was taking over and he be called John Still.   Luton's colours are orange and blue.  So you can see where Grim was going with his little work of art.  Using Distress Paints and the scraped paint method to pop Spiced Marmalade and Chipped Sapphire onto an old book page and once dry, blending Gathered Twigs over the top.  And to prove that he does indeedily watch me on the tellybox, I didn't even need to show him how to use a blending tool... oh ho, he is a fair natural indeed!


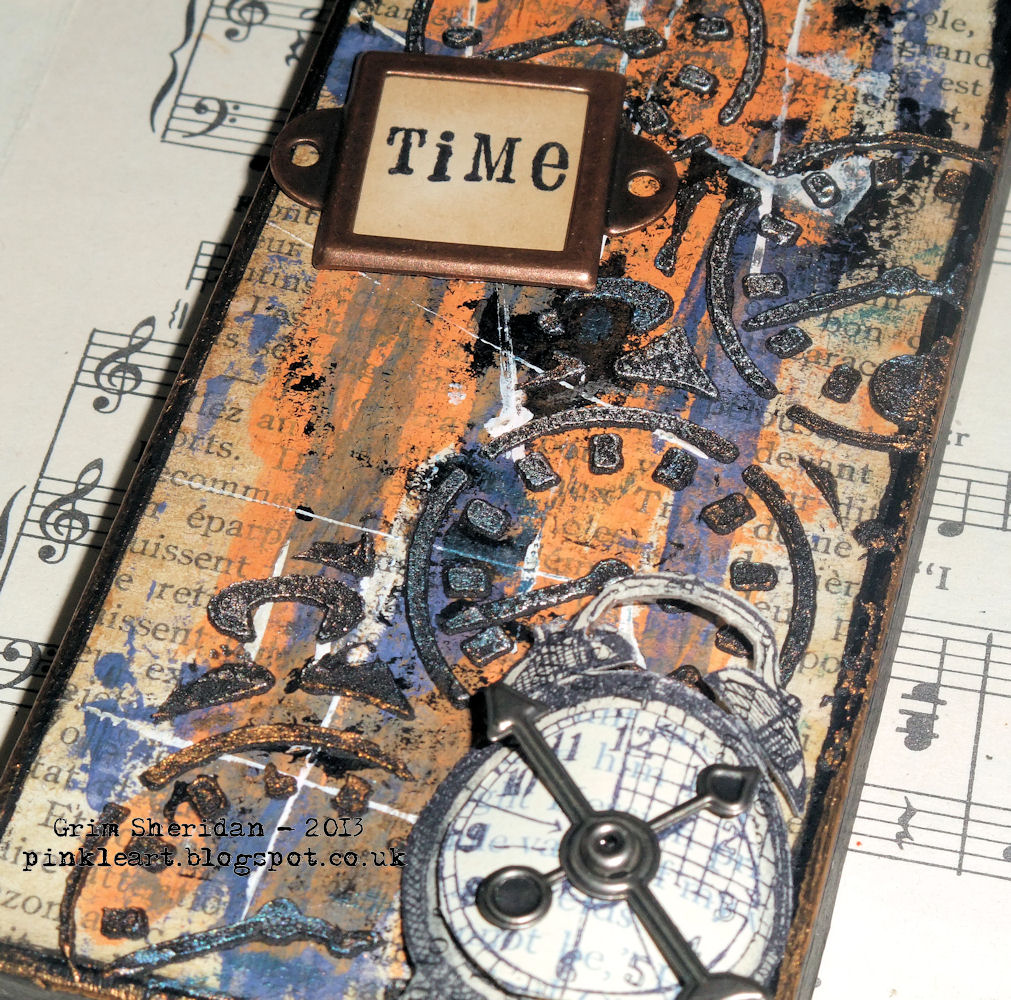
The next step in the creation was to add some Studio 490 texture paste through a stencil... Grim chose a That Special Touch clock stencil.  "Why you chose that one?"  I says... he says... "cos the theme is "time"    "oh ok, that works"  says I.   And then he went on to tell me that the colours are Luton, the theme is time... and... the clock... is Time Stood "Still"... cos of the new manager... verrrry clever right?


So, the theme of my creation is based... actually, there isn't a theme (ahem), I was doing a "demo" piece so I chose my comfort zone of blue and green and my fave mask of the moment, the Foxgloves That Special Touch... and butterflies (yep, if it ain't got a butterfly on it... and all that) and of course, my word of 2013 "wish".   Oh and we played with Treasure Gold too and got nice and mucky - not in that way (tsk lol)... which reminds me, Grim did make me laugh when he was trying to remove black gesso from under his nails... I told him "the Craft Scrubbie will clean it off" but it seems, unlike his slatternly wife, Grim is a clean crafter!


Right, time for me to get  a wiggle on, I am about to jump into Ferdy and travel off to Birds in the Barn for a weekend of Melt Potting fun... as ever, thanks for looking... have a fabby weekend yourselves... TTFN

Hels x

Wednesday, 20 February 2013

Izzy Whizzy...

...it was bizzy... mwahahaaa... I am trying *very* to do a nice snappy blog title and the only thing I can think of is a catchphrase from a 1970's hand-puppet lol   Anyways... what I wanted to say is "wow, that was a busy few days"  Which it was.   As promised a couple of pics from the Stitches trade show.  Now, readers of old will know exactly how useless I am with the whole "remembering to take a photo" thing.  And yep, even though the camera was right next to me, I ...erm... forgot!  So, these two are the only pics I got!  Whoops!  First up is my demo desk which as been home for the past three days...


*note... obligatory coffee cup in shot*


And second is a lovely piccie of the marvel that is Ali Reeve... her attention to detail and "out of the inkpad" thinking when it comes to making art are amazing... CLICK HERE to visit her blog.


And then a piccie of a demo tag I made.  I was messing with Distress Paints, thinking "I wonder if that will work..." And it did!  Remember my "drippy stains" technique a few months ago?  Well, the paints will do the same thing... pretty cool huh?


Colours used were Bundled Sage and Seedless Preserves, smooshes and spritzed and then once dry, I went over the top with a brand new That Special Touch mask (diamonds) and Seedless Preserves DI.   The flower is another new TST mask and I used Cut & Dry to blend Black Soot DP and then Bundled Sage DP over the top of it to make it milkier.   The sentiment is a new Studio 490 stamp, I cut the image into little blocks to change the orientation of the stanp and then added some Clearly For Art butterflies.  The ribbon is also coloured with Distress Paints... they are amazings to use btw... I loves them!


Right, I shall away.. I have awoken with a fuzzy head, sore throat and blocked schnozzle ... methinks I may have a cold coming... boohoo...   Thanks for looking and a big thank you to all you lovely followers.. I just saw that I am over the magic 1400 mark now.. WOW... awesome!! Thank you!!!   TTFN

Hels x

Related Posts with Thumbnails