Showing posts with label Faux Porcelain Flowers. Show all posts

Friday, 10 January 2014

The Key of Life...

...I was going to do another cheesy song thing again and decided against it today, my singing is even offending me at the moment lol   Anyways, another day, another demo sample from my Melt Art telly shows on Wednesday.  This creation was the main demo piece on the 5pm show.  As with the 12pm show, I decided to go with this new idea I have had... not making an "original" piece for the demo... you know, where I do the "here's one I made earlier" thing.  So, I prepped up this piece and just went for it.  I am still convinced it makes things feel a bit fresher...  


The base for this piece is a bit of cardboard that I ripped off some of the top layer to expose the corrugations.  Ooh, I likes that word... corrugations... it kind of rolls off the tongue doesn't it?  Anyways, once I had removed some of the top layer I set about colouring it with paint.  Starting with Mushroom Eco paint and then adding smudges of Cool Peri and Pool Dabbers applying the paints with Cut & Dry.  I also coloured a mini canvas in the same way so the piece had some 3d-ness to it.  A piece of cosmetic tissue, cut to size and then stamped with the Heartfelt Creations Tattered Blossom stamps and a few CE Newsprint Flourish stamps, adding a bit of a background design.  I did the same with the sentiment... a single layer of cosmetic tissue and some flowers and swirls.  The tissue was applied with beeswax, I just love the way the wax makes the tissue disappear.. meaning you can get a stamped image perfectly onto the corrugations... mm, am so gonna be saying that word all day!


I made roses out of the Posy Patch flowers stamps and scrapbook paper and stamped and cut the Classic Leaves out and these were dipped into UTEE for the Faux Porcelain effect.  I dragged the metal leaves through the clear UTEE too so they get completely coated... loves this effect too!  The ickle Hat Pin was filled with Tropic Violet, Lapis Sapphire, Olympic Gold and Black UTEE.  If you use your Melt Pot lid as a template, pop it onto a craft sheet, draw around it, cut it out leaving a couple of flaps sticking up at the sides, you have the perfect way of lifting stuff in and out of the Melt Pot.  Placing the Hat Pin on the craft sheet in the Pot heats up the metal, then when you add the powders, they melt and you can swirl them around and make patterns... look at the colours in this...


I am back on the tellybox on January 21st... and I have a new-to-me product... you will be a wee bit surprised when you sees me using it you know... but I have to say... I lurves it!  Thanks for looking.. have a fabby day! TTFN

Hels x

Tuesday, 7 January 2014

Sample Time...

... I really should stop saying that because now I am sitting here going "sample-time... dedededu de du"  you know, like Hammer Time but a bit more mental?   Sorry about that, I am in a state of excitement because tomorrow sees my first tellybox shows on 2014.  I am on at 12pm and 5pm on Create & Craft - all the deets on how to view are over there *points left* - with more Melt Pot Marvels shows.


This is a little 5" x 7" canvas I have put together as a sample.  The base has been painted using the scraped paint technique and then I did some stamping on tissue with a new gorgeous set of Heartfelt Creations stamps (yes, they are flowers, yes, I LOVES them!)  I have to add some Faux Porcelain in there... so that was taken care of using the same flowers I used for the background collage... they were stamped onto Teresa Collins/Creative Expressions papers... and I added a little Media Mixage Hatpin to jazz the whole thing up.


 I shall away now... I almost forgot to blog today - I did write a "to do" list but I have forgotten where I put it *see what I am up against here lol* so I have made another... and I just know there is something missing from it.  I can see that I am going to have to start writing two lists, one to lose and one to glue to my forehead lol  Thanks for looking, hope you can join me for the shows!  TTFN

Hels x 

Sunday, 7 April 2013

Sunday Stamper - Week 252 - Hip To Be Square

Gooodly Morning Stampfans and a very happy sunny Sunday to you all!  Many thanks for the gorgeous nature inspired entries for last weeks challenge... wow, you all made beautiful art.  This week is a nice simple theme... and it is... SQUARES.   To join in with the challenge is simples: make a little something - it can be anything you fancy.  Add in the theme and some stamping, pop back here with a link to the place you are showing your entry and then I can come visit you.  Those of you who don't have blogs/web-photo-hosty thingy's can join in via email (my email is in the sideybar... ) or on Facebook (just tag my name and I will be able to visit that way)  The challenge will remain open until 21:00 Saturday April 13th 2013.


Apologies for the later than normal posting of the challenge this week - being as Chez Sheridan appears to be living in the dark ages, our internet is still ADSL, which means, of course, that the slightest breeze takes away all possibilities of getting access to my blog, which is, I admit, incredibly irksome.  I was all set to do the post last night and saw the internet had gone red.  And no matter how many times I reset it, grovelled on my knees under the desk to unplug it and re-plug it, a copious amount of begging... nope, it wasn't playing ball.  Gah!   Anyways, it is back on now so on with my post!


This square is an Ikea mirror/frame that is the sample for my class at The Craft Den yesterday.  Lots of lovely paper-blocking going on (I do love a smidge of blocking) and there's some stencilling with Ferro texture paste... and some diecutting in the form of the Mini Tattered Florals and of course, being as I am mad crazy on the Melt Pot at the moment, there are some Faux Porcelain flowers, leaves and twigs.


The black bits are done with a Stabilo All pencil - I love this little bit of my kit soooo much! It acts almost like a charcoal pencil but it is, to me, darker and smudgier.  The papers are Prima's Almanac ones, I LOVE Prima papers and these are a top fave of mine too (see a pattern developing? lol)   And the stamping is the little sprigs across the bottom of the frame - this is an ancient Magenta stamp that I use as a little filler or to add some stamping without it being overbearing.  As ever, I used Black Archival ink to add the sprigs... just remember to heat set it if it is going on a surface that isn't absorbant.


So, yesterday saw me tootling off to Sheffield.  I had planned to get up at 5am so I could have a leisurely coffee and shower and allow my face to subside before make-up applications... I still believe that there is a troll living under my bed: during the night he gets a sink plunger and applies it to my face, repeatedly, making it all sticky outy and puffy!  *yuk*  Also, he has access to a pot of super strength hair gel which he puts onto my hair and then scrunches it up.  Either that or I have a very strange sleep habit lol   Anyways, said troll under the bed  worked his magic during the night and also, the little critter turned my phone alarm from Saturday to Sunday.  So that meant that I was reliant on the diddy alarm... which did, indeedily, awaken me.  What it failed to stop me doing was sitting on the edge of the bed and nodding off and snuggling back under the duvet again, which is what happened!   Until Grim said "Hels, what time are you leaving again?"  To which I replied "7"  And he said "It is 6.43"   "WHAT!!!!!!!!!!!!!!!!!!!!!!!!"  screeches I.  Next are scenes of me haring about the house, making coffee, slurping coffee at scald-the-tongue speed and attempting to apply make up to eyes that have been visited by the troll with the sink plunger.  And I was out and on the road in 20 mins!  And did you know, when you go over... ahem... a certain speed, Jane the SatNav makes a weird boinging noise?  No, I didn't know that either... ahem.... whoops!   Right, on that bombshell I shall say... thanks for looking, have a grand weekend!  TTFN

Hels x

Sunday, 24 March 2013

Sunday Stamper - Week 250 (!) - Shiny Happy People **Plus Candy!**

Gooooodly Morning Stampers!  Wow!  Thrice WOW!  It is a milestone indeedily since the Sunday Stamper was first born, way back in January 2008 and I am calculating that we haven't had a break in weekly challenges for over three years now!  So a BIG & MAHOOSIVE thank you to all who have joined in and continue to join in with my l'il ol' challenge... seriously folks, I do appreciate every single entry very muchly.  So, as a thank you I am offering up some candy that I have put together.  But first! The theme!  Another nice and easy one this week... use something... SHINY!   To join in with the challenge AND to be in with chance of winning the candy, all you need to do is make a little something, it can be anything you fancy.  Add in the theme AND some stamping *yes, this is mandatory this week as it is the Sunday Stamper after all ;O))*  pop back here, leave me a comment with a link to the place you are showing your entry.  If you haven't got a blog/webphoto hosty thingy, fear not, you can join in via Facebook or by email but you MUST leave me a comment telling me where to find your entry.  This just makes it easier for me when I come to do the draw.  If you have joined in and haven't left a comment, I can't guarantee you will be entered.  The challenge will remain open until 21:00 GMT Saturday 30th March 2013 and the winner will be announced on next Sunday's post.


 I spent a lovely day yesterday with some fabulous ladies at Pickwell Farm Craft Shop in Southampton.  To say my drive down to Southampton was a bit a 'mare would be an understatement though.  Starting with the nightmare of trying to get Ferdy up the steep old hill that is the Close... after about fifty attempts (ok, exaggerating a smidge) to get him up the hill without bashing into neighbours, or their cars, or indeed their houses, I safely navigated onto the A roads, thinking "aha, the gritters will have been and the roads will be clear"  PAH!  Were they heckers like.  So I did a slow old trundle all the way to 30 miles north of Southampton (so that would be 100 miles in a blizzard!) when it stopped blizzarding and started to rain.  Anyways, that was all a distant memory once we got creative with our canvases.  This one is my demo canvas - the real Sunday Stamper piece for today is still laying, unfinished, neglected, unloved etc on my desk... just plain old ran out of time!


I have lots of different techniques going on, including paper blocking, stencil/pasting, beeswaxing with stamping (hidden under the....) faux porcelain rose making and the addition of a little butterfly - cos nothing looks perfect til it has a butterfly perching on it... especially this little Studio 490 butterfly which is my favest EVER butterfly!   He is on the Art For You set btw :O)


On with the goodies for the candy... I have picked up some goodies on my travels that are my fave things... and they include: a papier mache hanging board, Viva Terra texture paste, Viva Crocko clear cracklepaint, Ripe Persimmon Distress Stain, Squeezed Lemonade Distress Stain, Vintaj Patina "Earth" and "Sealer", Chain Tassels, Vintage Corners, Idea-ology Label Pulls, Book Plates, Prima Embellies and a selection of the gorgeous Studio 490 Embellish Your Art range...  and I will more than likely be putting a few extra bits into the package too.  The piccie below shows it all :O)    Just to recap the rules - make a little something, include the theme AND some stamping (it doesn't have to be a lot even... just some lol), leave a comment for me on this post with either a link to where you are showing your entry OR if you have emailed/Facebooked your entry just a comment to that effect. You can enter as many times as you like but each entry has to be different from the last...  hope that makes sense :O) If you can lift this photo and pop it into your sidebar too so all your blog readers can see the challenge too, that would be great!  (Just right click over the image, click "save as" and download it onto your computer and then upload it onto your bloggy sidebar)


Right, I shall away... I am planning a day of organising today... I have a pile of ironing that is taller than the tallest building in the World (of which the name escapes me lol) and I needs to get that done... and I also want to organise the old Room of Stash a wee bit too because it is looking very messy... oh and my WIP needs to be finished... I may be gone some time lol   Thanks for looking... have a great week!  TTFN

Hels x

Thursday, 13 December 2012

It's Giveaway Time!

..Hurrah and thrice indeedily!  I am still buzzing after the Melt Art shows yesterday... WOW, you all are amazing with all the support that you gave me... thank you all... I so appreciate every single message, email, Tweet, comment... Indulge me do please; it means everything to me that you all like the demo's and samples that I make.  I do still have to pinch myself that I am fortunate enough to be able to share my enthusiasm and passion in this way... I am truly a lucky gal.  I wouldn't have said that a few years ago mind, in those dark days when everything was ever so slightly bleak, when it felt like I had had my future taken away from me.  For followers and readers new to my blog, you probably won't know that I am actually a Train Driver by profession.  A rather nasty collision with a 42 tonne truck (not my fault btw) put paid to that, leaving me with this degenerative injury... and after I had been medically retired, I really couldn't see a way forward.  I have always been a career girl and was a wee bit lost, floudering about wondering what to do next.  Without the support of Grim and my best friends (you know who you are) I would never have had the courage to find a new dream to follow.  Anyways, I guess what I am trying to say is that I am ever so humbled by your support, like I said, I treasure every single comment...  Which brings me to the giveaway bit:


So... there was a problem with the email system yesterday which meant that there wasn't a cup of chance winner on the 6pm show, so, I thought I would do a little giveaway here instead.  Remember the hairclip that I wore?  Well, that was to be the giveaway and ... it wasn't given away!   Then I figured that I would add a little something to the hairclip giveaway as a thank you to you all for your support, so I am also giving away this Studio 490 Art Part piece that I made for the show.   To be in with a chance of winning the clip and Art Part piece just leave me a comment here... simples as that.  I shall use Mr Random.org to pick a winner on Saturday 15th December.


The Art Part Circle is one of my fave samples from the shows... I loves Studio 490, as you know and I loves my Melt Pot... add the two together and I am uber happy!   There is a Faux Porcelain embellishment on there... if you missed the shows or haven't seen yesterdays post, CLICK HERE for a tut!


Right, I shall away... I have got my Tim Holtz Crafting shows tomorrow... 8am and 6pm on Create & Craft = all the channel deets are over there *points left* on my sidebar.  I am busy prepping samples and demo's in readiness so I really should stop waffling and get inky!   As ever, thanks for looking... have a good day! TTFN

Hels x


Wednesday, 12 December 2012

Faux Porcelain Tutorial

...Cor blimey, it is today!  Already!  I am SO excited today because I am going to be demo-ing the Ranger Melting Pot on Create & Craft - the show time is 9am, channel details are in my sidebar :O)  So, I thought that I would coincide this post to go live at the same time as I will be on the tellybox so you can see step by step pics on how to make Faux Porcelain things in your Melting Pot.  Firstly, I have made roses from paper and have used a fab Studio 490 stamp from Dimensional Rose Art.  HERE is a link to the paper rose tutorial I did a while back, the step by steps are exactly the same for making the paper rose I am using in my demo and this tutorial... hope that helps :O))   Here's the finished piece I have made....


And... here is the tut!

Ingredients:
Melting Pot
Clear UTEE
Tweezers
Heat Tool
Craft Sheet
Paper Roses & Leaves


STEP 1
Make your paper rose - I have used normal thickness paper but you can also use cardstock and ink it to colour it - just remember that when you dip it into the Melt Pot it will bubble a little - don't worry, this is the water content in the ink reacting with the UTEE.   In previous tutorials I have done for the Faux Porcelain roses I have always done them layer on layer but actually, dipping them once they are whole works a treat too... and is easier!   Simply pick your rose up with your tweezer, dip it into the molten UTEE and make sure it is completely covered.


STEP 2
Lift your rose with your tweezers... remember, the UTEE is molten, if you touch it or it touches  you it will hurt... very lots... there speaks the voice of experience lol   So, lift your rose with your tweezers and allow the excess UTEE to drip back into the Melting Pot.  Pop your rose onto your craft sheet and allow it to harden and cool.


STEP 3
You will see that sometimes the UTEE can be a little bit blobby or stringy.  To remedy this, simply aim your heat tool at it and allow the UTEE to re-melt... this will make the coverage smoother too.  Don't be tempted to touch the rose until it is nice and cold.


STEP 4
Stamp and cut out a leaf, crumple the leaves a bit and then dunk into the Melting Pot as before.  Allow to drip and then use a heat tool if necessary to smooth off the bobbly bits.


The picture at the top is the brooch I have made for the show... and I will be making another one - same style, different colours, during my demo and that will be the giveaway for the cup of chance so if you would like to be in with a chance of owning it, please do drop an email into the show :O))


Right, I shall away... thanks for looking!!  Have a great day! TTFN

Hels x

Tuesday, 4 December 2012

Tattered....

...Poinsettia's!  Have you got that new Tattered Poinsettia Alterations die?  I have... and I loves it... very lots!  I have used it a few times using papers, Grungepaper and cardstock... so I decided to use it a slightly different way for my DT for the Stamp Attic today.  Being as I am incredibly organised (ahem) my Melt Pot is still sitting on my desk after my play the other day... so I decided to use it again and Faux Porcelain some Tattered Poinsettia's.... oh, I loves the effect of the UTEE on the cardstock, it just looks so clever but it is SO easy to do!  I have a tut on my sidebar from a yonk ago... and it is HERE if you fancy a nosey... the rose that I made in the tut is actually not as easy as the Poinsettia - in fact you could bung any shape into the Melt Pot and come out with a gorgeous creation.  Anyways... HERE is the post on The Stamp Attic blog with all the deets on how I made this tag:


I am planning a nice lazy afternoon today... the old war wound is still playing up... I mean, I took it easy yesterday - well, relatively easy, we went shopping and then to friends for dinner afterwards... oh lalaaaa, I think I may have learned how to make soup - I watched very closely whilst it was being made and I think I can remember it all... I shall be trying that very soon (cooking has never been my strongest point lol) and then after dinner I had a little play with a Melodeon and a Mandolin.  I have always had this idea that one day I will learn an instrument... and I think that the time has arrived.  Our friend Richard is an ace Melodeon player - you should hear him... he is brilliant.  And... I said "can you play the Sailor's Hornpipe?"  He says he has never played it... and proceeded to do it ... yes, he is that clever!  Anyways, the Melodeon is lovely but not for me... too energetic with all that pulling and squeezing... so I had a play with the Mandolin... well, my nails are too long and fingers too sausagey... and there are EIGHT strings!  Yikes!   Anyways... I have come back to the conclusion that I want to learn the Ukulele... so that is my New Years Resolution, to learn how to play the Ukulele.  I am getting a bit excited actually, I might even play it and sing along!   With that terrible thought, I shall say... thanks for looking... TTFN!

Hels x

Saturday, 10 September 2011

Saturday Show & Hels... T'Pouch Instructions...

...Wow, I have had so many lovely comments and emails about how to make my latest invention... the T'Pouch... so... here I am with some piccies and the measurements etc. If you haven't heard of the T'Pouch... here's a little bit of history: I love to make tags... and was getting a bit bored of just doing the old tag... so I decided to make a pouch for the tag to sit in... that way I could really go over the top and decorate that too.


The name came about after I had been discussing "what to call this here pouchy thing" with Dan... and he said... why not call it the T'Pouch! So I have! So.. on with the pics etc... Oh before I do... the T'Pouch is designed to hold a Size 8 tag... which is the size that the Sizzix Alterations Tag Die is... and also the size of the standard Ranger tags :O) Right...here we go!


STEP 1

Cut a piece of cardstock or double sided paper to measure 25cm x 13cm


STEP 2

Score at the following along the longest side:

1.5cm
1.5cm
9cm
1.5cm
1.5cm
9cm
1cm

And score along the shortest side at:

11cm


STEP 3

Fold along the score lines... the 1.5cm measurements will form the expanding part at the sides of the T'Pouch. The 9cm lengths are the front and back and the 1cm will form a flap for gluing the T'Pouch together. Fold along the 11cm measurement... this will form the flaps for the base.


STEP 4

Snip out the little extra pieces that are along the bottom of the cardstock - this will make assembling easier. All you need are the two 9cm long flaps. One will go over the top of the other to glue together.


STEP 5

I have marked on the template where to glue. Cut two pieces of card/paper to measure 10cm x 8cm. These will be the front and back pieces that you can ink/stamp/decorate before attaching to the T'Pouch.


And there you have it. If you do make a T'Pouch, please do let me know... I would love to see lots of little T'Pouches taking over the world (mwaha... mwhahahahaaaaa - said in Dr Evil voice) Anyways... here's the tag and T'Pouch that I have finished..


And... the tag... I am entering this into the Tag It On challenge this week which is ... RED... and I can see lots of red on this one so hopefully it is acceptable.


And finally... last week I did the Watermark Resist Technique and had some candy to win... so, I had 61 comments and Mr Random.Org chose #52 which tallies with the comment left by Craftimamma. So... thank you all for your comments... muchly appreciated... and if Craftimamma could email me her addy I will pop the card and Pad into the post! Right, enough waffling from me for a day... tomorrow is a brand new Sunday Stamper theme... please do pop back to visit... oh and there are still a few days left to enter into the Bloggy Birthday giveaways I am doing... all the deets are up there in the sidey bar... Right.. am offski... thanks for looking... TTFN

Hels x

Friday, 26 August 2011

A Bit Of This... And...

... a bit of that. Today's post is a mish mash of stuff that I have been creating... starting off with some rather delish Faux Porcelain flowers. These are just so gorgeous and you really can't get the proper "feel" of them unless you see them in the flesh but I have done my bestest with the photo... in fact, I took several until I got the flash to behave lol The colours are actually like that too... tis Distress Stains ... and before they went into the Melt Pot of UTEE they were quite pale... whatever that UTEE stuff does, cor blimey and thrice, it works a treat! I will be using these flowers on a little something I have planned... I just have to get a wiggle on and make it.


So... next in the mish mash is a snippet of my DT piece for Bubbly Funk... which is in more detail HERE... I had much fun making my own foamy stamps with Kling On and Alterations... and Gesso, I lurve Gesso :O))


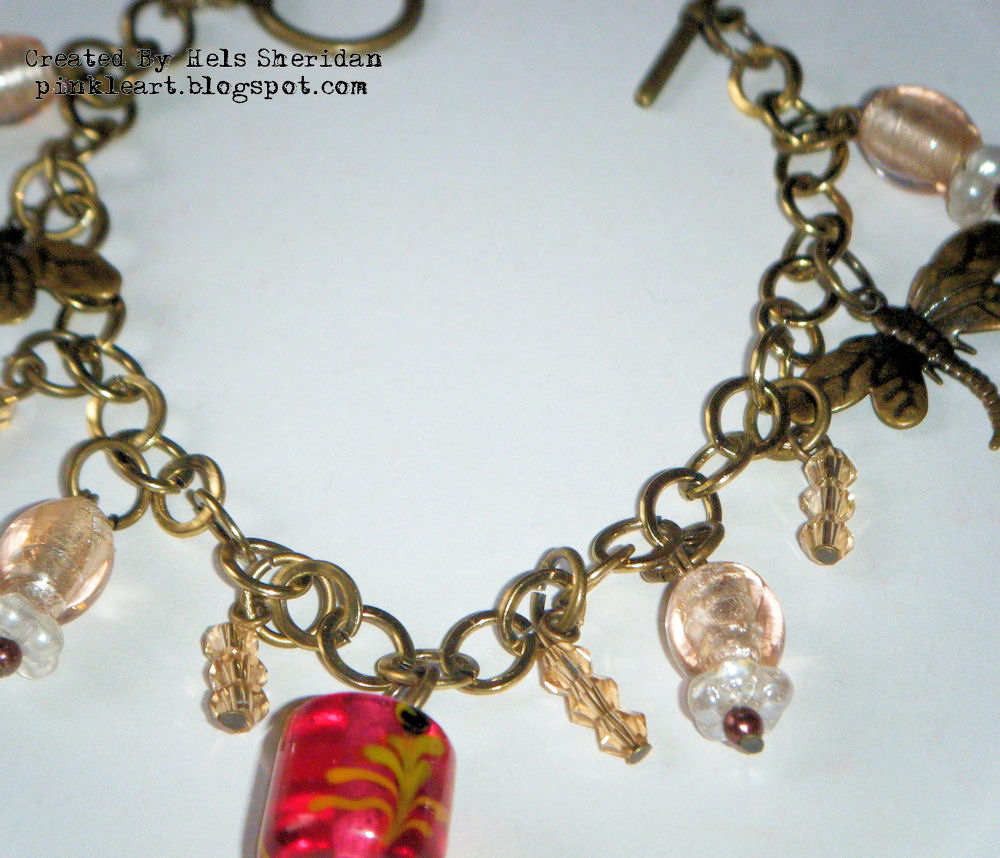
And then finally I have a couple of bracelets that I have made this week. Yes, it is true, I have a major league crush on all things beady and pearly. Now, you remember I said about that journalling lark and that I would be doing more? Well, I have done some backgrounds and I am loving the freedom of playing... but I can't very well do that when I am sitting watching EastEnders now can I? I can, however, do some beading things... I have one of those lap trays that have a beany bag underneath, so I have a very comfy "table" to work at... there is a drawback however... AlfieCat... he decided that he wanted to sit on Mummy's lap... and have absolutely no regard for the bead mat, beads, pearls, findings etc that were already on Mummy's lap... ahem, picking up beads is not much fun... neither is trying to dig them out from the back of the sofa either... Anyways, I am going to be listing both of these bracelets on my Folksy shop in a mo :O)


And... speaking of AlfieCat... he has been a little beggar again. He came in the other day with a mouse... one of the d e a d variety. He was flicking it up and running around the laundry room and kitchen like a div. So, I tried to shoo him out but he was having none of it. So, I shut him in the laundry room and let him take himself and his "present" back out side through the newly installed cat-flap. (that is a whole other story) Anyways... several hours later I, being of a forgetful disposition at the moment, went to put my shoes on... and iiieeeeeeeekkkkk... my barefoot touched something very soggy and furry. Oh yesh, AlfieCat had left his little present in my shoe again. Memo to self: from now on, check shoes before inserting foot!


Right... time for me to get shifting... I have a date with some rather delightful Distress Stains that just won't wait! Thanks for looking... TTFN

Hels x

PS... for all my friends in the USA... please stay safe if the Hurricane hits... finger's X'd it will pass you all by X

Sunday, 7 August 2011

Sunday Stamper - Week 166 - Wish You Were Here

Goodly Morning Stampers and a very happy Sunday to you all. Many thanks for the fab arty entries for last weeks challenge. This week the challenge is actually totally different to the one I had chosen... more of that later though. So the challenge theme this week is.... WISH. A simple one and can be interpreted how you like. To join in all you need to do is make a little something, it can be anything you fancy, then add in some stamping and the theme... leave a comment for me here with a link to the place you are showing your entry and I can then hop on over to visit you. The challenge will remain open until 21:00 Saturday August 13th 2011.


So... the theme this week - total change of heart, mainly because I have been in the wars again and let's just say, sitting for any length of time at all is proving to be rather more painful than usual... yes, I slid on the stairs... again... and this time have the most horrendous sciatica... akkk. Anyways... the entry I was planning was one of those that needs a lot of time spending on it... so instead, because Mr "Waltzes Off At The Jar of a Buttock" Mojo has...erm... waltzed off, I rummaged through my tag basket for ideas... and ended up making a simples tag. I know, it is so similar to all the other 839 I have made recently but... I am rather enamoured with the big blousy Faux Porcelain rose... I made one for yesterdays post and another tonight, I can see a habit forming!


And... the colours on the tag... truly are that shockingly bright! That is the Distress Stains I used... Spiced Marmalade, Barn Door and Aged Mahogany. The background text is stamped in Monarch Orange Archival ink... I have to say... I am LOVING those new Archival colours and am gradually building up the collection... Vermillion is another stunner too! Anyways... whilst the Melt Pot was out, I stamped the word Wish into an Ornate Frame and then poured UTEE into the frame... oooohlalala, I forgot how fab this look is... in fact, I have rekindled my lurve-affaire (posh spelling as befits such a lurve!) with the Melt Pot... in fact, to the point that if it isn't tied down it is either being dunked into the pot or poured over.


Actually, that reminds me... to remind you... (and yes, it was written on a note which is filed in a safe place lol) I have a couple of Melt Pot workshops coming up this month and next month... so if you fancy getting hot with me... (oh dear, no matter how many times I try and write that a different way it just sounds soooo wrong... you know what I mean though lol) Where was I? Ah yes, workshops, The Stamp Attic... deets in my sidebar. Right.. tis waaaay past my bedtime folks so I better stop with the waffle and go and rest my aching buttock!! Thanks for looking... TTFN

Hels x

Saturday, 6 August 2011

Simon Says...

...Show a Tag... the theme over on the Simon Says Stamp & Show challenge this week is to make a tag. Well, what a trial that is for me... ahem... ok, it isn't a trial at all... in fact it is the perfect excuse to get a bit inky and messy.


The tag base was coloured with Distress Stains - and that really is the colour of the tag... no PhotoShopped wotsits going on here! A mix of Mustard Seed, Spiced Marmalade, Barn Door and Fired Brick... and then overstamped with Vermillion and Jet Black Archival. The ticket is cut using mountboard and the Movers & Shapers Ticket die... and au naturellement, it has my all time fave Tim saying on it.. I just lurve that one... and it is a perfect fit too!


The main part of the tag is the flower... another fave of mine, making those big, blousy flowers using the largest of the Tattered Florals flowers... but this time it was made with a difference... ah yes, I got the old Melt Pot out and turned it into a Faux Porcelain rose... oh and I did some Faux Porcelain leaves to go with it too. This is a really simples yet effective technique - there's a link in my sidebar on how to make them :O)) Once the UTEE had cooled down I used Biscoti Perfect Pearls Mists to give the flower some "dewdrops" and Kiwi Perfect Pearls Mists to give the leaves some dewdrops too. The banner at the bottom of the tag was double stamped - my bestest and favouritest woodie, DREAM, in Vermillion and Jet Black Archival and this was then cut and 3d'd to the tag.


So... have you seen the new logo in my sidebar? *points upwards* Oh yesh indeedily, there is a game afoot! Over on The Artistic Stamper Creative Team blog there is a brand new competition... to design your very own stamp and have it made into rubber! How exciting! All the deets etc are HERE if you fancy yourself a little go at it. Anyways... tis waaaay past my bedtime, I have just spent an hour re-inking all my Distress Pads, I am covered in ink, honestly I don't know how I managed to get Spiced Marmalade on my forehead but there it is... either that or I have the lurgy lol Thanks for looking... have a fabby Saturday! TTFN

Hels x

Friday, 29 July 2011

I Was Going To Call This Post...

...Say Youhoo for UTEE... but nay and thrice, I am calling it Say Ouch For Clumsiness With UTEE... actually, that sounds rubbish, however, the revenge of the Melt Pot has struck again! I guess it isn't fair to blame the actual Melt Pot because really, it just sits there, getting hot and stuff... rather the operative should be blamed for being a clumsy-clot. So... it is my Bubbly Funk day and I have had this idea popping about for a while, so I thought to myself, I have a few hours to play, I know, I will get the old Melt Pot out and have a faff... and see if this here idea actually works.


All was going swimmingly, I had altered the box, got the colours how I wanted (and what is it with this Aged Mahog look on everything at the moment???) Well, whatever, I was happy with the colours, I had some Faux Porcelain paper roses already done, but the main thing I wanted to play with was... butterflies! I cut them from Crowded Attic (er...what else would I use huh?) using the Mini Butterflies Movers & Shapers... edged with Aged Mahogany ( I am so going to ban myself from using this colour all the time) and then gave them a dunk into the clear UTEE that was melted in ... erm... the Melt Pot.


Not difficult at all... no, bung them in, jiggle about a bit and then out they pop and go hard on the craft sheet - you know, AWAY from where I am working... ha! That is a laugh, when have I ever forward planned? Actually, I did once forward plan (for our wedding and it all went swimmingly but... I digress) So... hot little UTEE butterflies are sitting there, cooling down on the craft sheet.. but not quite quick enough... and believe me, when you accidently dip you little finger into boiling hot, molten lava like UTEE... it kinda smarts!


And they say, if you get a burn you should immediately put cold water on it... well, bearing in mind the mess that is the Room of Stash at the moment... and the fact that I have let things slip ever so slightly *for that read a very lot* Well, I just grabbed the nearest source of water... the paintbrush pot.. that was half full of phosphorescent water... and dunked said little finger into it... akkk... it is no good... I have a little blister in the finger now... and... I am a bit paranoid that dunking into such a pot of yukkiness may not have been the best move.


Well, that's all from me for today... I need to go and check the date of my last tetanus... I mean come on... a zit from hell on my chin, plus the broken nails... and now the third degree burn of the little finger... what else could happen? No, don't answer that, I do not want to tempt fate! Anyways... time for bed... a late one again tonight... hurrah and thrice it is Grim's last night-shift, back to normal **whatever normal is in this house lol** tomorrow.. phew! Thanks for looking... TTFN

Hels x

Tuesday, 2 March 2010

Taking a Dip...Step By Step...How to...etc...

...In UTEE! And ... making Faux Porcelain flowers! You know I went to Stamperama on Sunday and helped Jennie out and did a Make & Take, well, as I said yesterday, quite a few of the Make & Takee's asked if I had Step by Step instructions on how to do this...doh! I knew there was something I forgot, and I know that when you sit and make something it is almost impossible to remember exactly how to do it...so, as promised, here is a Tut on ... er.. how to do It....*no...not "it" that would be far tooooo silly and rude - lowering the tone as usual Hels* But first of all, I must say thank you to Jennie - 'cos before Friday evening last, I had never made one of these flowers and I love love love making them now - they are addictive...and also to Sherry who started this off, where Jennie got the idea from in the first place :O)


So, here goes - I hope the Step by Steps are clear for you...if you can't read the writing on the pics, please just click on them, this will make 'em big and you should be able to see what it says...oh, and ... I would love your feedback so please leave me a comment and tell me whatcha fink...*only if it is nice though ROFL*


STEP 1

Pour some clear UTEE granules into a Melt Pot - straight into the pan - don't use a Project Pan, it won't get hot enough for UTEE *these are for Beeswax etc* and set the thermostat to UTEE and pop the lid on.


STEP 2

While your UTEE is melting, stamp several flowers onto lightweight cardstock. This stamp is the large flower from the Flower Power set. Use a permanent ink for stamping.


STEP 3

Your UTEE should be melted and ready for dipping in about 10 mins - but this depends on the amount of granules you pop in the pot...you will need quite a bit if you are doing a few flowers at a time, so fill to the MAX level marked inside the pot.


STEP 4

Use Distress Inks to colour your cut out flowers - Distress Inks are special because they keep their true colour when wet - use a background stamp to make a pattern on the flowers. Cut *as shown* to make four layers which will form a rose once dipped and placed. Use clips to secure your petals together when gluing - I always use Glossy Accent to glue 'cos it dries super fast and doesn't affect the UTEE. *note, new DI colours :O))*


STEP 5

Once your petals have dried together, make a peak in the first layer - which has five petals...do this by popping your fingernail under the pointy bit at the bottom and pushing upwards gently, this will give the other layers something to sit on. You will need to make some larger holes in the bottoms of the next layers so they nest together properly.


STEP 6


Use your Cool Tool tweezers and pop the first layer into the UTEE, flip it over and give it a wiggle so it is completely covered in the UTEE both front and back.


STEP 7

Drain off the excess UTEE over the Melt Pot and immediately transfer your layer to a non stick craft sheet. You can leave this alone now...it will begin to harden off and be ready for the next layer.


STEP 8

Repeat the dipping with your next layer - you will see that sometimes the UTEE will bubble, this is normal and it is only because of the water content in the inks and card


STEP 9

Once your four petals are covered in UTEE, drain it a bit, take it out of the pot and immediately place it onto the five petals waiting patiently for you :O)) Now is the time to use your Cool Tool and move the layer around so it sits nicely...*don't be tempted to use your finger to move it...IT IS STILL MOLTEN RED HOT!!!!* Mmm, the voice of experience speaking there LOL


STEP 10

Repeat the process with the next two layers, so eventually, you will have a four layered rose - I have tried to pop the middle single petal into the centre on these roses but the UTEE is a little thick and it wouldn't sit right...so I improvised...which leads me to the next step :O))


STEP 11

First of all....sorry, this is a really baaaad pic and out of focus...typically, the battery was conking out on my camera so I was rushing!! Take a pearl or a bead and pop it onto the end of a pokey tool and dip it into the UTEE, rolling it gently to cover it all the way around....BUT!!! Don't cover over the top and onto the pokey tool...1) it gets HOT and 2) it goes hard instantly and the bead/pearl will not budge! *as I found out on Sunday morning on my first flower....but of course I did that on purpose to show how not to do it LOL


STEP 12

Immediately, pop the pearl into the middle of the top layer of the rose, the UTEE will hold it in place...and....voila! Here is your finished Faux Porcelain Rose, ready to add a badge pin to to make into a brooch or to use as a decorative piece on your art.


VARIATIONS

Whilst fiddling about with the flowers I have made a few variations for you to see;


Five & Four petals - like what we made at Stamperama :O)


Graduating Stamp Sized Layers with Pearly Centre - for this one, simply cut each flower like the first layer of the rose, right up the middle of one petal and draw these together to make five petals, make a peak in the bottom of each layer so they nest...cute huh? The colours used here are...Barn Door, Rusty Hinge and Wild Honey...my fave new DI colours!


Full Rose made using K&Co papers; Large flower, stamped 3 times as before


Hey! Are you still awake???? I know, this has to be the longest post ever, ever, ever ... but... I hope this has been of use to you...and if you did come along to the Make & Take, please leave me a comment to let me know if you enjoyed it...AND...did your badge pin stay put? *we had sooo many probs with those pesky things LOL* All of the products used in this Tut are available from The Artistic Stamper.

Thanks for looking...I am off for a rest now...am worn out with all this typing LOL

Hels x

Related Posts with Thumbnails