Showing posts with label Distress Glitter. Show all posts

Sunday, 1 March 2015

Sunday Stamper - Week 347 - Happiness is a Warm Gun

Goooodly Afternoon Stampers and a happy Sunday to you all!  Thanks for your fab orange entries to last weeks challenge.  The new theme this week is... USE WARM COLOURS You can interpret the challenge how you like: use paints, papers, inks, embossing powders... any medium you prefer ... the choice, it be yours!   To join in with the challenge is simples: make a little something, it can be anything you fancy.  Add in the theme AND some stamping *this is THE important bit guys, please remember your rubberstamps!*  and then hop back here, leave me a comment with a link to the place you are showing your entry and I can come see you.   If you haven't got a blog, you can join in via Facebook (just tag me name) or by emailing a small res.pic to me or by leaving me a link to your Pinterest or any other photo hosting site.  The challenge will remain open until 21:00 Saturday 7th March 2015.


Uh-oh, it's that butterfly again!  Actually, I made this tag a few weeks ago during a class - I have been right proper poorly again this past week so haven't felt up to getting inky :O(  So poorly that I completely forgot to post the Sunday Stamper today!  Anyways, I am here, better late than never right?  I have chosen "warm" as the theme because I can't remember the last time I was actually warm... I think it is a symptom of this thing I have going on...


Anyways, here's my entry... a Distress Spray Stain background on the tag, I used Wild Honey, Crushed Olive and Broken China and then stamped with Ranger's Sticky Embossing Powder and popped Rock Candy Distres Glitter over the top to add a little sparkle.  The butterfly is stamped twice, coloured with the same DI's and then layered up.


I won't stop and yak today, I am still feeling mighty crook so it is time for me to get back on the sofa again.  Hope you all having a goodly weekend!  Thanks for looking... TTFN

Hels x

Saturday, 31 January 2015

Curiously Rock Candied...

Gooooodly Morning to all you lovely Compendium-ers!  Today sees the start of another brand new Compendium of Curiosities 3 Challenge.  To see all the details on how to join in with the challenge, CLICK HERE.  Also, if you pop across to Linda's blog, you will see all gorgeous creations that my talented teamies on the Curiosity Crew have made... they never cease to amaze me with their inspirational ideas and art!   The challenge is sponsored by the Inspiration Emporium this time... so you will have a chance of winning a very generous Gift Certificate to spend there.  Tim & Mario have, as ever, very kindly donated goodies for an extra prize... which will be awarded to the "Curiosity Crew's Choice"... so you have two chances of winning fabby prizes!  If you haven't got your Compendium book just yet, you can order a signed copy directly from the man himself... HERE.  And... Linda has also done a FAQ page for you.. HERE it is... all the info you will need is listed there.   This week we are turning to Page 55 of the book and playing with Rock Candy Distress Glitter.  As ever with the Compendium Challenge, neither I, nor the Curiosity Crew, will be posting the technique instructions and participants must not do so either. We all want to encourage people to buy Tim's awesome book; giving away the instructions wouldn’t be fair to him. Linda will have no choice but to un-link any entries that don’t follow this rule.  


As per usual I have made a tag for my entry.  Before I waffle on, I shall answer a couple of questions I have been asked recently: "what do you do with all the tags you make?"   Well, that depends!  For example, the ones for the Compendium Challenge, have made it onto a big old book ring and will eventually be turned into wall art... the rest... they usually go into a basket and serve as a "mojo-buster" should the Old Cad Mojo swan off on his holibobs.  Occasionally I will pop one onto a card blank.   Another question: "why do you make mostly tags?"  I love tags, the size is perfect for me to work on, I love the manila surface to play on and I guess, they just make me happy.    And another: "What size tag do you use?"  My favourite size is Ranger's Size 8 Manila... I LOVE this cardstock SO muchly!  Hope that answers a few of you :O)   Anyways.. on with the challenge!  My tag! I started with my tag and spritzed Milled Lavendar, Antique Linen and Seedless Preserves Spray Stains over it, misting with water to get a nice drippy effect and dried it with a heat tool. 


Now, 213 years ago I was lucky enough to see a rare demo morning with Tim himself in a little craft shop in London.  It was upon that day that I fell hook, line and sinker for all things Tim and Distress!  I treated myself to a couple of wood-mounted Tim stamps (this was just as Tim released his very first 10 unmounted sets and the shop didn't have them in yet!) One of the stamps was Peacock Flourish - which is now on the unmounted set Tattered Elements - and it has remained a much beloved stamp of mine.   I used Seedless Preserves Distress Ink and did the technique as outlined on Page 55 of the book.  Isn't that glitter just soooo pretty?  I don't normally "do" glitter, I hate the way the stuff flies all over the place and ends up in places that glitter really has no business of being!  However, Distress Glitter is a complete different animal... it doesn't flap about, it isn't static and... best of all, it looks realllly chunky but is so smooth.. oh and better than best of all... you can ink it!  YAY!


Once I had the background how I wanted it (and.. ooopsie-daisies, I forgot to get a photo of the background before I decorated it) I set about layering up some decorative bits.  I used manila cardstock (Ranger) and did the same Spray Stain spritzes to colour it, die cut it with the Tattered Florals die and made a rose *points left - see full photo tut in sideybar on how I make my roses*   I then cut some Garden Green leaves, added bits and bobs of trim and ruler ribbon and Idea-ology and then got out the old Underwood (ahem, did I mention I loves my old Underwood?) and typed a few words... and voila, assembled!  I liked the look of it but it still needed something... so I grabbed some Crinkle Ribbon and followed the awesome Paula Cheney's bow tutorial... I LOVE how she makes those bows soooo easy... thank you Paula!  I make no secret of the fact I think she is a ROCK star in this world of craft we inhabit.


Anyways... that's it from me for today... don't forget, you have two whole weeks to enter the challenge... and a bat at the chance of grabbing the Crew's Choice prize which is a mahooosive haul of stash donated personally by Tim & Mario... so if you are joining in, remember to comment on all the Crew's blogs and you will be in with a chance of winning that too *believe me, this is one gigantic pile of goodies* Thanks for looking, have an inky and inspirational day!  TTFN

Hels x

Monday, 22 December 2014

Sparkling Baubles!

...nay and thrice!  I made a Christmas card!  This is a DT project for Darkroom Door... you all know how much I loves my Darkroom Door stamps and these Brushed Christmas stamps are just so gorgeous to play with. CLICK HERE to head on over to Darkroom Door to see all their beautiful stamps... and HERE for the blog to see what my talented teamies have been up to.


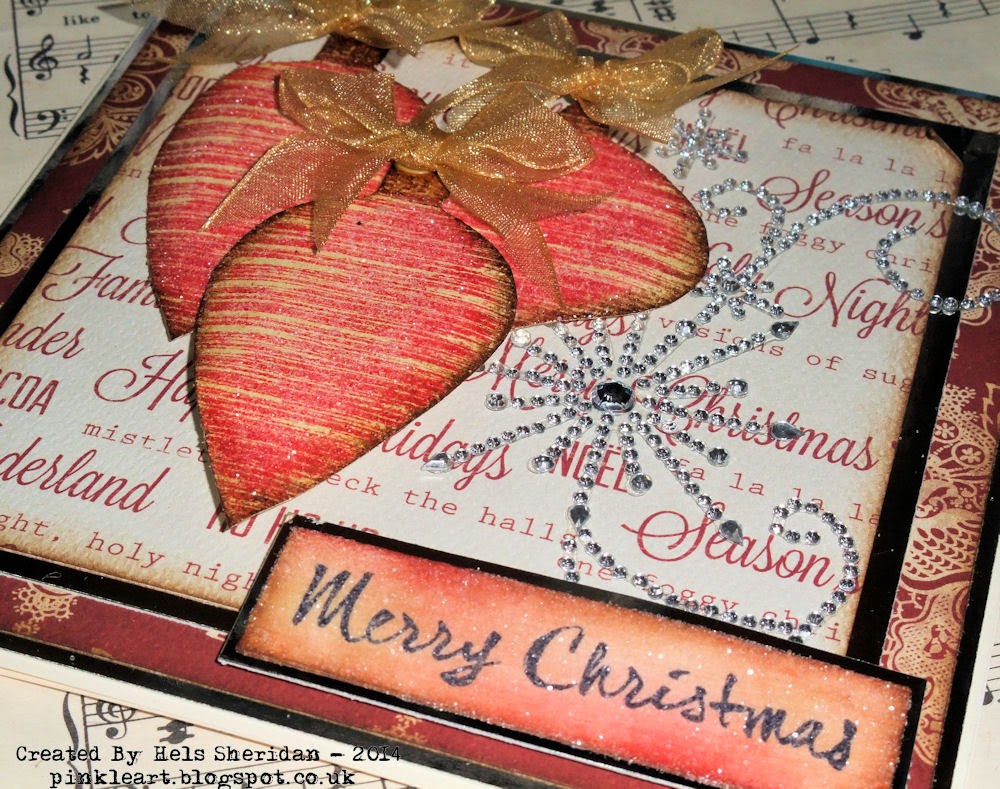
I have been wanting to try this technique for a yonk and a half and have had the ingredients to do it... just not had chance to play.  I used Distress Ink (barn door and gathered twigs) to ink my baubles and then stamped them, sprinkled Sticky Embossing Powder over the top, heated it, added Rock Candy Distress Glitter and then let the magic happen.


I love the subtle sparkle from the glitter and yet you can still see the beautiful detailing on the baubles.


Check out the words... this was a lightbulb moment.  I inked a piece of cream card with the same DI's and then stamped the greeting (from Brushed Christmas Vol. 1) onto card using Jet Black Archival (it has to be a permanent ink and the best is Archival) and zapped it with a heat tool to dry it and set it.  Then I painted Glue & Seal over the top and immediately  sprinkled Rock Candy glitter right over the top.  Then comes the "ewwww, what did I do" moment... the Glue & Seal isn't see through so now it looks like a blob of mess.  Give it a few minutes to dry and voila, see through again... so the sentiment is right there along with that subtle sparkle again.  Cool huh?


I used some papers that I have been covetting for faaaar too long for my background... are you like me?  Keeping those special papers forever because cutting them would be painful?  Cut away, go on, they don't scream.. much! :O))


I shall away now.. I have more blog posts to get ready... and the next one is a biggie.. oh yesh, I have reached a milestone... all will be revealed next time.   Thanks for looking, have a goodly day!  TTFN

Hels x

Sunday, 16 November 2014

Sunday Stamper - Week 333 - Baby's In Black

Goooodly Morning Stampers and a very happy Sunday to you all!  Thank you for your great sewing themed entries for this past two weeker challenge.   The theme this week is USING BLACK You can interpret the challenge how you like: use black sprays, black ribbons, black papers, black embellies...  the choice, it be yours!  To join in with the challenge is simples: make a little something, it can be anything you fancy.  Add in the theme AND some stamping *this is THE important bit guys, please remember your rubberstamps!*  and then hop back here, leave me a comment with a link to the place you are showing your entry and I can come see you.   If you haven't got a blog, you can join in via Facebook (just tag me name) or by emailing a small res.pic to me.  The challenge will remain open until 21:00 Saturday 22nd November 2014.


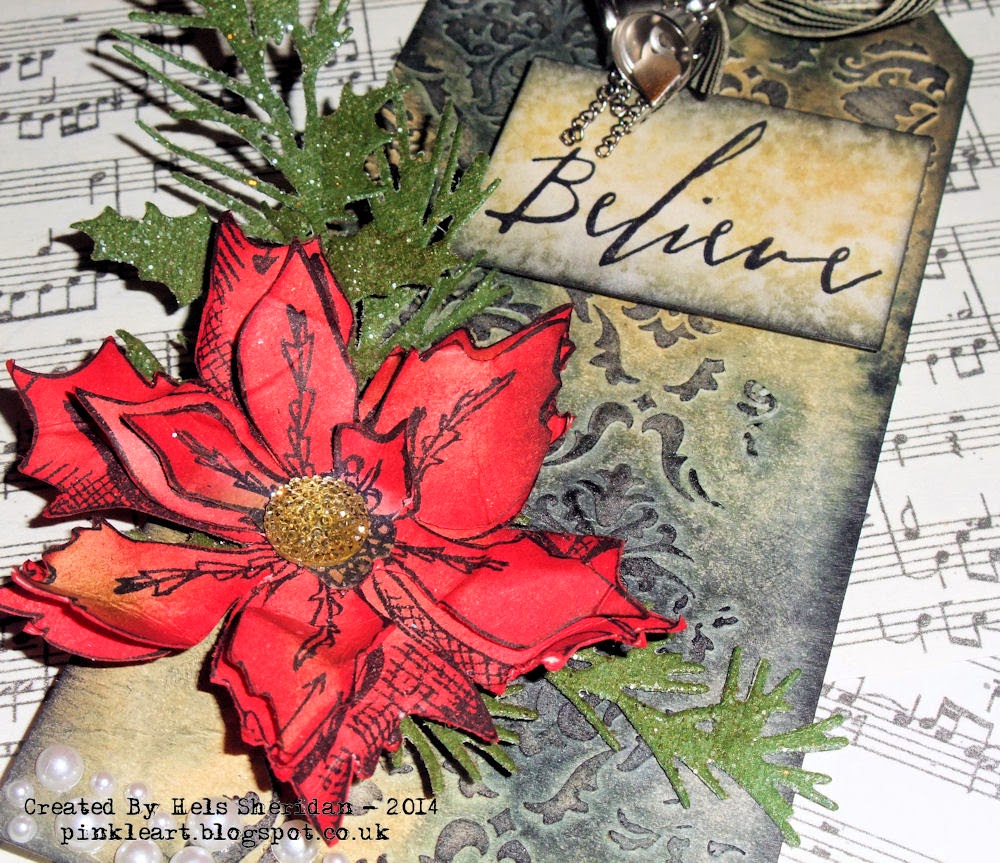
My entry this week is a tag I made whilst demo-ing at the NEC a few weeks ago.  I have used lots of new goodies on it - starting with Ranger's fabby Texture Paste which was spread through Tim's Gothic Layering Stencil.  Once I had dried it, I used Antique Linen and Black Soot Distress Spray Stain smooshing the inks about the tag with a spritz or two of water.  A zap with a heat tool to dry the inks and then a smidge of blending Black Soot Distress Ink over the tag to make the stencilling really pop and voila, background completed.    The decoration is one of the stamp from Tim's latest Christmas Blueprints sets - I love that poinsettia - perfect for stamping a few times and cutting out and layering up, decoupage fashion... and finished with a Gumdrop which I coloured with Tree Branch Archival Ink.  I added a pearly strip to the bottom of the tag, die cut some of Tim's new Winter Greens and used Stick It on the card so I could sprinkle Rock Candy Distress Glitter over the surface - if you haven't tried Stick It yet... HERE's the info and where to buy - seriously FAB product folks, it is so thin that you can use it with thinlets dies and all your fancy thin dies too and it also acts like a waxy paper so the diecut pops out of the die without any huffing and puffing to release it...cool huh?  I used Tim's new Handwritten Christmas 1 stamp set for the word, how cool is that handwritten font!  A few bits and bobs to embellish and my tag was finished.


I shall away now - this is a pre-scheduled post as I am away teaching at Pickwell Farm in Southampton this weekend... and I am not going to even think about what day it should be when it is actually a different day completely lol   Thanks for looking, have a great Sunday!  TTFN

Hels x


Saturday, 25 October 2014

Curiously Coloured & Crackled...

Gooooodly Morning to all you lovely Compendium-ers!  Today sees the start of a brand new Compendium of Curiosities 3 Challenge.  To see all the details on how to join in with the challenge, CLICK HERE.  Also, if you pop across to Linda's blog, you will see all gorgeous creations that my talented teamies on the Curiosity Crew have made... well worth taking a cuppa and a packet of Digestives :O)    The challenge is sponsored by the Funkie Junkie Boutique this time... so you will have a chance of winning a very generous Gift Certificate to spend there.  As ever, Tim & Mario have very kindly donated goodies for an extra prize... which will be awarded to the "Curiosity Crew's Choice"... so you have two chances of winning fabby prizes!  If you haven't got your Compendium book just yet, you can order a signed copy directly from the man himself... HERE.  And... Linda has also done a FAQ page for you.. HERE it is... all the info you will need is listed there.   This week we are turning to Page 53 of the book and playing with Colored Crackle .  Now, as usual with the Compendium Challenge neither I nor the Curiosity Crew will be posting the technique instructions and participants must not do so either. We all want to encourage people to buy Tim's awesome book; giving away the instructions wouldn’t be fair to him. Linda will have no choice but to un-link any entries that don’t follow this rule. 


My entry this week is another tag to add to my collection.   As ever, I won't be blabbing about the technique but I can tell you the colours I used on the snowman... which were Milled Lavendar, Broken China and Stormy Sky Distress Paints.


The tag itself was coloured with the same Distress Paints, smooshed and spritzed to get a nice washy effect and then overstamped with a script stamp and Tumbled Glass Distress Ink - I have, as usual, covered most of the background but if you look closely, it is there!  Also appearing is my fave little harlequin stamp (well, I loves it so muchly)   I added some frosty bits using Glossy Accents and Rock Candy Distress Glitter, I love the sparkles that shimmer with this glitter!  The wordy bit is one of Tim's new thinlet dies - cut from Distress Core-dinations cardstock and adorned with a mini Idea-ology star.


I added another bit of sparkle using the snowflake from the Winter Wonder die  I used for the snowman and frosted this with Pumice Stone Distress Glitter and popped a Gumdrop into the middle of it.  Finishing touches are the tinsel and pom pom trims and fancy bow which started out as a cream ribbon and I dyed it with Distress Stain Sprays (which I am also in lurves with!)


That's all for now - don't forget, you will have two weeks to enter the challenge... and a bat at the chance of grabbing the Crew's Choice prize which is a mahooosive haul of stash donated personally by Tim & Mario... so if you are joining in, remember to comment on all the Crew's blogs and you will be in with a chance of winning that too *believe me, this is one gigantic pile of goodies*  I will just say a big thank you to every one of you who has taken part in the challenge so far, it has been great to visit your blogs and see your wonderful interpretations of the challenge themes!  Thanks for looking, have an inky inspirational day!  TTFN

Hels x

Sunday, 19 October 2014

Sunday Stamper - Week 330 - Fake Plastic Trees

Goooodly Morning Stampers and a very happy Sunday to you all!  Thank you all for your fab entries for last weeks starry challenge - it was great to see all the different ways you did interpreted the theme.   The theme this week is FAUX TECHNIQUES You can interpret the challenge how you like: faux rust, faux porcelain, faux metal...  the choice, it be yours!  To join in with the challenge is simples: make a little something, it can be anything you fancy.  Add in the theme AND some stamping *this is THE important bit guys, please remember your rubberstamps!*  and then hop back here, leave me a comment with a link to the place you are showing your entry and I can come see you.   If you haven't got a blog, you can join in via Facebook (just tag me name) or by emailing a small res.pic to me.  The challenge will remain open until 21:00 Saturday 25th October 2014.


My entry this week is my class sample for today's Melty Distress Pot class at Daisy's Jewels in Coventry so I won't go into great detail on how I made it... I can tell you that I used Graphic 45's Twas The Night Before Xmas papers for my florally embellishment which I then dipped into clear UTEE in the Melting Pot and turned them into Faux Porcelain flowers and leaves... I LOVE doing this... in fact, it is probably the main thing I use my Pot for!


The background of the tag is Distress Ink - Antique Linen, Gathered Twigs and Walnut Stain... and then some stamping using Tim's flourishy stamp *this is one of my fave stamps ever* and a music score - both from old Xmas sets.  A smidge of beeswax appears on the tag... and there you have it.... I know, secretive today aren't I?  *teehee* :O)


I hope you enjoy the challenge theme this week - so often I chose a colour or a particular item, I thought that this was a nice one so you could go and get thoroughly messy in your arty spaces today - or all week for that matter as the challenge is open all week.   I shall away now... thanks for looking and have a goodly day!  TTFN

Hels x

Sunday, 20 July 2014

Sunday Stamper - Week 317 - In Dreams

Goooodly Morning Stampers and a very happy Sunday to you all!  Thank you for all your fabby entries for last weeks challenge - it was grand to see so many different interpretations of the theme.  The theme this week is a nice easy one to get your chops around... and it is DREAMS.   You can interpret the challenge how you like: add the word to a project, include it in a sentiment on your project, make something that you have dreamed about or something that is your dream... the choice, it be yours!  To join in with the challenge is simples: make a little something, it can be anything you fancy.  Add in the theme AND some stamping *this is THE important bit guys, please remember your rubberstamps!*  and then pop back here, leave me a comment with a link to the place you are showing your entry and I can come see you.   If you haven't got a blog, you can join in via Facebook (just tag me name) or by emailing a small res.pic to me.  The challenge will remain open until 21:00 Saturday 26th July 2014.


As I mentioned on Friday, this last week has been one of those weeks... you know, when you get a few days set aside to play and then up creeps a lurgy and puts the kybosh on any ideas of getting inky.  Well, last Sunday I was teaching in Essex (last weeks Sunday Stamper was the project I was teaching) and I usually do a "class sample" as I am teaching, I find it easier to show and tell rather than just tell (believe me,  my ladies have the patience of saints trying to decipher what I am saying!) so my entry this week is my class sample.. which I came home and jazzed up a wee bit more - you know, cos I loves a good sesh embellishing stuff!  My word of 2014 is DREAM... and I haven't used it for a yonk and a half so here it is again today!


The base is a canvas board and it was painted with various Paper Artsy Fresco Paints - Mermaid, Bora Bora, South Pacific... and then I spied that one of the ladies was using a similar palette and she had Limelight on her desk... I loved what she was doing with it so I nicked the idea and added Limelight to my creation and wow, it really perked it up perfectly!     My stamping is using Ellen Vargo's gorgeous stamps (CLICK HERE TO SEE HER BLOG)- look closely *if you click on a photo it will pop up bigger!* and you will see lots of different images nestled on the board, all stamped with paint.. and then the very smidgiest of script stamping in Jet Black Archival just to tie the whole design together.   There be stencilling and Grungepasting (mixed with Limelight *this is my new FAVE colour!*) using JOFY and Lin Brown stencils.   I added shading to the stencilling using my Stabilo ALL pencil.


No self respecting canvas would be complete without a rose... and a tattered rose at that.  This one was made using watercolour paper painted with the same as the board, overstamped with Limelight and a text stamp and then, once formed, smidged with Jet Black Archival to give it a bit of definition.  The title banner is actually a metal tag that was painted with more Fresco's and I added the letters using Tim's Alphaparts.  A few bits of Idea-ology and some Distress Glittered bits that I had kicking around the Room of Stash finished off my canvas... aren't those colours just LUSH!!!


I am all excited today... I have a Sunday off... which means that for the first time in about 392 years, me and Ellen will be having a good old catch up on Skype!  I am *hoping* that we don't have the forecast storms cos that usually kicks out yonder t'internet and that wouldn't do at all!  Hope you all got a great day planned... keep cool... tis gonna be a hot one again by all account... phew!   Thanks for looking... TTFN

Hels x

Saturday, 10 May 2014

Curiously Glittered...

Gooooodly Morning to all you lovely readers!  Today sees the start of a brand new Compendium of Curiosities 3 Challenge.  To see all the details on how to join in with the challenge, CLICK HERE.  Also, if you pop across to Linda's blog, you will see all gorgeous creations that my talented teamies on the Curiosity Crew have made... well worth taking a cuppa and a Hobnob with you :O)    The challenge is sponsored by the Funkie Junkie Boutique this time... so you will have a chance of winning a $25 Gift Certificate to spend there.  As before, Tim & Mario have very kindly donated goodies for an extra prize... which will be awarded to the "Curiosity Crew's Choice"... so you have two chances of winning fabby prizes!  If you haven't got your Compendium book just yet, you can order a signed copy directly from the man himself... HERE.  And... Linda has also done a FAQ page for you.. HERE it is... all the info you will need is listed there.


This time we are turning to Page 56 of the book and playing with Distress Glitter.  Now, most of you will know that "I don't do glitter" is a very common utterance out of my mouth.  Oh no, I am not a glitterer kind of gal. However! There always be an exception to the rule and yes, it is in the form of Distress Glitter!  So, what is so special about it?  Well, first up, the colours match the palette of Distress (and seeing as I live my life in Distress colours, it is perfect for me)  AND... you can ink it!!!  Oh yesh indeedily!   Anyways, I won't spill the beans on how you use the Glitter... I will tell you about how I made my tag though :O)


I used a bit of Tim's 8 x 8 Menagerie paper collection, sticking it to a Size 8 tag and then blending Gathered Twigs around the edge to cover the white bits at the edges.  I made three mini Tattered Florals roses from Tim's papers and cut some Spring Greens using his Wallflower papers (LOVE these sooo muchly!)  The glittered bits are Grungeboard cut using Tim's Movers & Shapers Branch, Butterfly and Leaves.   The floral trim along the bottom was coloured with Tumbled Glass and Victorian Velvet DI's and then I added Rock Candy Distress Glitter to it to add a bit of bling before adding a few little taupe coloured pearls.


The rest of the Glitter colours used are: Tumbled Glass and Broken China on the butterflies, Peeled Paint and Shabby Shutters on the leaves and Vintage Photo & Tarnished Brass mixed together on the branch.  As the papers underneath are beautiful, I kept the stamping to a minimum and just added a few diamonds to the edges and added a Remnant Rub along the top.  The wordage is also made up from Remnant Rub's.  Finishing touches were the Linen Ribbon and some tulle that I coloured with a smidge of Gathered Twigs DI and a few bits of Idea-ology and some pearly dangly bits.


Don't forget you have two weeks to play along with the challenge so plenty of time to get nice and inky.  I shall away now... as ever, thanks for looking... have a great day! TTFN

Hels x

Thursday, 20 March 2014

Dotty For Diamonds!

... oohlalalaaaa... I been a-playing again with the fabby new Texture Stamps from Darkroom Door.  This time I  used the Dots and Harlequin backgrounds for my canvas... and also used up a "playtime practice piece" of greyboard too.  A couple of weeks ago I was faffing about with the brayer and some Fresco Paints and made a few backgrounds, just practicing with different ways to apply the paints.  As ever, I don't chuck owt in the bin so this piece was sitting on my desk, just behind the pile-of-other-stuff-that-needs-attention-and-has-not-been-sorted-yet and I spied it and thought to myself "aha, I shall use this and be tidy"  Actually I didn't really think that at all, I just thought "wonder what the Dots would look like stamped with Wendy's red Archival inks... "  So that is exactly what I did....


Inking up the Dots stamp whilst it was in my hand - not on a block - with Carnation Red Archival Ink and then pressing the stamp down onto the painted board... mmm, yummo!  Love that random stamped effect of using fingers to support the stamp and not a block.  I then added Geranium Archival Ink for a bit of contrast in Dot colours.  Next I inked the Harlequin Texture stamp in the same way, this time with Watering Can Archival (have I mentioned this is a GO TO ink?  Oh yesh, not as in your face as black but dark enough to see it... perfect Wendy... thank you you STAR!!!)  


Anyways, enough wafflings... on with the how I maded this:  So, I dried off the Archival Inks with a heat tool I inked up the Sprig from Full Bloom Vol. 2 in Black and stamped this onto the base.  I then set about making some florally embellishments... starting with the large Frangipani flower, stamped onto cream card and to make the big one a medium size one, I used my fine liner pen and sketched smaller petals within the larger ones and cut them out... voila, medium flower!  I stamped ickle blooms and cut those out and then coloured them all with Spiced Marmalade, Barn Door and Fired Brick DI's.  I die cut some leaves and coloured these with Forest Moss DI and also stamped a butterfly from Wings.. coloured with red DI applied with a waterbrush for a softer look.  Black Distress Glitter in the middle of the flowers to make them pop a little and then smidges of Treasure Gold around the edges.  Oh and I forgot! I had added Grungepaste mixed with Little Black Dress to the top of the board using Dina's sunray stencil... that got some Treasure Gold slapped onto it too. 


Now, all this is very well but... it is a bit small!  I am never one for making mahooosive pieces but this was a bit diddy so I grabbed a 5 x 7" canvas and then applied some more paints using the brayer to the edges of it... making sure I kept it a wee bit darker than the base board so it made a frame for it.   Once I was happy with that, I inked up the Dots again with Jet Black Archival and stamped around the edge of the canvas.  NOOOOO!!! It looked awful!  Yikes! What to do???  The Dots were too "in yer face" and I didn't like it one bit... so I grabbed the Fresco's and brayered some more over the top... and cos they are different grades, I used translucents ones and then a smidge of Little Black Dress over the top... phew! you can see the Dots but they are not jumping out at you and waving in your face!  Happy with all of that, I then glued it all together, adding smidges of Treasure Gold around the edges of the canvas so it toned it nicely.


Cor blimey, you still with me? That was a very lot of wafflings!  Anyways, CLICK HERE to see what my talented Teamies have been up to with the new release of Texture Stamps... ohlalaa... Rachel has told me that there's a special stamp on its way to me, am SO excited, can't wait for it to chuff into the Room of Stash.... *wink*   HERE is the page for all the new Darkroom Door releases too...   Thanks for looking, have a very goodly day!  TTFN

Hels x

Thursday, 30 January 2014

Hazy Shades of Winter...

... I am a self confessed Winterite you know.  I loves nothing more than seeing chilly icy patterns on the windows, bright blue skies and spiders webs sparkling like filigree silver and hunkering down on the sofa with a nice cuppa and a furry warm AlfieCat sitting on me knee.  However, I have a complaint this Winter.  Plain and simple we have had not a single day like that!  Rain?  Oh yesh, deluges of it (mm, bit of an exaggerations but you know what I mean)   Everything is brown... and grey... and I figured that whilst I am writing my complaint to the Person In Charge of Weather, (known from here-on-in as the PICOW) *railway folks will totes understand where I got that from* I would show you a card I made for last weeks' tellybox shows... cos the colours match the weather (see what I did there... teehee)


Now, don't get me wrong, I loves the old muted beiges, browns and creams on my art... just not out of my window! (or worse, out of the car window!)  So, I decided that today I shall start up a petition to the PICOW... get Spring out of bed, wake her up, give her a good old shake and tell her to get out there sprinkling her bright green and yellow sparkles... and fast!   Maybe it is asking a  bit much being as it is still only January (just!) but hello?  Bright sunshine and frosty mornings have been non existant this Winter... so let's get onto Spring already... right?


I shall away now... mini rant is over but I am now wondering if you all agree with me?  Maybe we should all sign the petition and send it off... either that or maybe I should just go and sit and grumble... until March!   Thanks for looking, have a great day!   TTFN

Hels x

Tuesday, 28 January 2014

Oranges and...

...glitter!  Whatever next eh?  I have well and truly gone over to the Sparkly Side haven't I?  But then again, in my defence, Distress Glitter is rather delightful to use.   Here's another demo card from last week's tellybox shows.  This one uses Clear Texture Paste to hold onto the glitters and it was applied through the Flower & Butterfly That Special Touch mask.


I used several different colours on the main design so I got a nice light and shade look to the flower but if you don't want to have different colours, you don't have to... just use the one.   The little flower cluster was made using the Heartfelt Creations stamps on the shows, stamped onto cardstock, with Jet Black Archival, cut out and then coloured with Distress Inks with a smidge of DG in the middles using Glossy Accents to help them stick.


A short and sweet post today...  Thanks for looking, hope you having a great day! TTFN

Hels x

Monday, 27 January 2014

Sunday Stamper - Week 292 - Orange Crush

Goooodly Morning Stampers and a very happy...erm.. Monday (!) to you all!  Big thanks for all the entries to last week's challenge and apologies that I haven't had chance to visit you all yet, life has a way of sending in a big old rock to climb over sometimes  but hopefully things are getting back to normal (soon!).  The new challenge for this week (and apologies for the late posting of the new theme - please see post below for the reason) is... ORANGE.   To join in with the challenge is simples: make a little something - it can be anything you fancy.  Add in the theme and some stamping and then pop back here, leave me a comment with a link to the place you are showing your entry and I can come visit.  If you haven't got a blog, you can also join in via Facebook (just tag my name on your upload) or via email by attaching a small res. pic to the email.  The challenge will remain open until 21:00 Saturday 1st February 2014.  (Feb! Already!)


This week my entry is one of my sample cards from last weeks tv shows.  I love using lots of different masks and stencils on one project, layering the designs with different colours and making my own background papers.  Here I have used Eyetlet Lace, Chicken Wire and Small Polka Dot That Special Touch masks, colouring with Antique Linen, Broken China and Seedless Preserves Distress Inks to make a patterned design.   I stamped out lots of the Heartfelt Creations Sunkissed Fleur images, cut them out and coloured with the same Distress Inks, layering them all up and adding a splash of orange in the form of Spiced Marmalade Distress Glitter (did I say, I loves this stuff!) into the centres of the flowers.  A few little embellies half hidden behind the flower clusters adds some little bits and bobs of sparkles and I also added some flourishy bits using Jet Black Archival ink.


Sorry I am late posting the challenge - as I said, the internet access in the hotel this weekend was plain weird... it was an unsecured network and Lionel Laptop was having none of it.    I shall away now... busy day ahead!  Thanks for looking, have a good week folks... TTFN

Hels x


Wednesday, 22 January 2014

Sparkelicious!

Corrrrr Blimey!!!  What a fab response to the tellybox shows yesterday! Thanks ever so much to you all for your messages, Tweets, emails etc  It warms the heart of my cockles to know that you enjoyed the demo's and the goodies I had picked for the shows.  My card today was made using the gorgeous papers and Heartfelt Creations stamps...I just love those browns and cream papers in the Teresa Collins paper pad... very vintage and very me :O)


This is a 6" square card base and I cut some brown Bazzill and a piece of the paper to fit.  I always like to edge my card/paper with Distress Ink, this covers up any white cores of the card and makes the edges neater and a little bit distressed.  I used Walnut Stain to do the inking around the edge and then stamped the Heartfelt Creations Sun Kissed Fleur stamp in Black Archival. A zap with a heat tool to set the ink and then I set about colouring the image in using Forest Moss Distress Ink, squidged onto my craft sheet and then painted in using a waterbrush. I stamped the flowers again twice on more of the papers and cut out the little flowers, some are really teensy but I think it is worth the faff to have them on the card.  Once cut, I used Walnut Stain DI again and edged these and coloured the backs of the flowers... again, a little attention to detail :O)  I used Glossy Accents to dot into the centre of the flowers and then poured Black Soot Distress Glitter over the top and tapped off the excess. I LOVE the Black Soot... muchly!!!  I then added a piece of twine and a Fancy Key and couple of the Sparklers/Dazzlers under the flower pile.  A sentiment from the Thoughtful Sentiments CE stamp plate and a bit of bling in the form of the pearl swirl and there you have it... uno finished card!


I am blogging later than intended today.  This morning it was time for Ferdy to go in for his MOT.  I absolutely hate that hour long wait... whilst the mechanic man is prodding and measuring and revving and testing my little car... but... hurrah and thrice!  He passed!  I loves my car (and I loathes the thought of mahoosive repair bills... just think of all the stash you could get for that!!)  Then I spent the day cleaning (I didn't say the H word... hope no one is offended lol)   and tidying and sorting and putting away.   Anyways, I now have a stack of cardstock cut and ready to diecut for my retreat classes this weekend... tonight I shall mostly be cutting and kitting.   I shall away... to cut and kit!  Once again, thanks for all your lovely messages and kind support, makes me very smiley happy!   Thanks for looking... TTFN

Hels x


Tuesday, 21 January 2014

What Is Normal???

...indeedily!  Today is the day that I shall be on yonder tellybox doing a couple of Creative Expressions Stamping shows.  Times are 11am and 7pm and all the deets on how to view the channel are over there *left hand sideybar*   So, what is normal?  Well, normal for me is a little bit dull, a little bit monochrome, a little bit brown with a little bit of blue thrown in for goodly measures.  I guess you are going to be a little bit surprised to see this creation from my own fair hand....


Customary to the trend I seem to have set meself for 2014 is the use of purple.  And pink!  I know, whatever next... glitter?  YOU BET!  Well, it is Distress Glitter after all so don't worry, I haven't completely gone over to the "sparkly side" ... just a wee bit.  This was created using a That Special Touch stencil - Fuchsia - love this one because I love fuchsia's and now I have my greenhouse, I am planning on have very lots of them so I can keep them over winter.  Also appearing on this card are some Heartfelt Creations stamps (yip, loves these too!) and Distress Glitters in Seedless Preserves, Picked Raspberry, Spiced Marmalade and Peeled Paint. I will be demo-ing the technique I used to get the multi coloured image so I hope you can tune in to see it.


I really must get a wiggle on... tis nearly midnight and I have to be up early to get to the studio's and as usual, my nails needs attentions and I really should be getting myself some sleeps!  Have a great day and hope you can join me on the shows.. don't forget to email in if you can as there will be giveaways!   Thanks for looking... TTFN

Hels x

Monday, 20 January 2014

Dandelion Butterflies

...cor blimey, I don't know about you but this year is whipping past super fast already!  Tomorrow I shall be on Create & Craft again with two stamping shows - times are 11am and 7pm and the deets on how to view are over there *points left*   I have been busily beavering away in the Room of Stash making some samples for the shows.


Today sees my fave of the bunch so far... this one I have called Dandelion Butterflies.  I love the word dandelion - and I loves dandelion & burdock too... Morrie's do a lovely diet version of it too.  anyways, enough of the waffles... this card has been made using the Dandelion stencil from That Special Touch... and some Texture Paste... and a bit of Distress Ink and a brace of 490 butterflies... and... something else!


Can you guess what it is yet???  Something very unusual for me you know... but I am on the turn!  Oh yesh!  Glitter!  Distress Glitter in fact.  Mind you, I did have a wee mishap yesterday afternoon... when my clumsy elbow knocked the Seedless Preserves pot off my desk... and onto the carpet below.   A few curses and bleepy words followed... because I had left the lid off!  Yikes, the Room of Stash actually got a vacuum!  Well, it has to happen every so often right?   I shall away... more samples to make and demo's to prep... hope you having a great day!  Thanks for looking, TTFN

Hels x

Sunday, 24 November 2013

Sunday Stamper - Week 284 - Fields of Gold

Goooodly Morning Stampers and a very happy Sunday to you all.  Big massive thanks for all the gorgeous entries for last weeks challenge.  This week sees a return of a theme... and one of my fave songs ever too.  The theme is... GOLD.  To join in is simples: make a little something, it can be anything you fancy.  Add in the theme and some stamping and then pop back here and leave me a comment with a link to the place you are showing your entry.  If you haven't got a blog, worry not, you can also join in via Facebook (just tag my name on your upload)  or via email, attaching a small pic and description how you made your entry.  You can find my email addy by clicking on my piccie over in the left hand sidebar.  The challenge will remain open until 21:00 Saturday 30th November 2013.


My entry this week is my class sample from Friday's class at Birds in the Barn.  Thanks to Janet for hosting the class (and making me so welcome, as usual) and to the lovely ladies who came along to play.  As it is a workshop sample, I won't go into too much detail how I maded my creation... all I will say is that tonnes of ink, Distress and Archival, paint, embellies and gorgeous Tim Holtz Alterations dies were used.  The gold element is from the little snowflake embellies - simply coloured with Treasure Gold and some other bits and bobs that I popped onto my creation to make it pretty.


Each year, since 2007, I have made an 8" x 8" piece for Christmas... be it a canvas, shadowbox or frame.   Every Christmas they are displayed in the living room along with the rest of the decorations.  It is nice to unpack them every year - they get stored in the loft for the rest of the time - and remember what I used and how I made the creations... and also, I can see the different techniques I have learnt over the years.  I have been playing around this year, making Christmas stuff... but, no cards yet!  I know!  I am a baaaaad girl!  I was planning on a mammoth card making sesh today... but I have a much better plan for today now... oh yesh, me and Ellen are having one of our Skype Sunday sessions... I can't wait... it is toooo long since we had a chance to sit and get crafty together!


But before I can do anything remotely crafty, I needs to get my Room of Stash sorted out.  Going out teaching is brilliant, I loves it... what I no likey is the unpacking of the boxes at the end of it all.  And last week I put it off... but no!  This week I am going to be uber organised and get it all done and dusted so I have two desks for me and Ellen to play at.  I usually pop her onto the spare desk, well, not her really, that would be hilarious though... no, I pop the laptop onto the spare desk so it is just like she is right here with me.  Thank heavens for whomever invented Skype!  They are a genius!!!


I had a bit of a "do" in the night last night!  I haven't been sleeping too well of late.  You know that thing when your brain won't shut off and it keeps on buzzing like it is on a treadmill?  Well, mine has been even bossier and has been on a cross trainer for the past few weeks.  Add to that the old war wound is playing up... sleeps has been a bit elusive.  Last night I was sooooo knackered (although I managed to watch Dr Who, OMG, how amezzzzin' was that!!!) anyways... knackered old carcass in bed and bam, sleeps!  Not even a full page of book read!  Hurrah!  Well, not so much hurrah when two hours later I somehow managed to fall out of bed!  (again at that!) When I say "fell", it was more of a slither!   I am blaming pyjama's.  And now I just typed that I am wondering... have I mis-used the apostrophe?  Pyjamas?  Pyjama's... uh-oh!  Well, I blame my pyjama bottoms!  *ha got around the apostrophe quandry there ... teehee*   And why do I blame them?  Well, they are a bit slidey and the legs are too long - on account of me being... ahem... a smidge on the sort side.  So... I conclude that the wearing of a pyjama ensemble (see, got out of the apostrophe thing again) is dangerous for your health!  And on that bombshell I shall bid you a very goodly day and say.... thanks for looking!  TTFN

Hels x

P.S - don't forget, I have a giveaway running until 23:59 GMT tonight... CLICK HERE to be in with a chance...

Sunday, 17 November 2013

Sunday Stamper - Week 283 - String of Pearls

Goooodly Morning Stampers and a very happy Sunday to you all!  Big thanks for all the cracking carmine creations (oooh, la!la!) entered for last weeks challenge.  This week the new theme is.... STRING.  To join in with the challenge is simples: make a little something, it can be anything you fancy.  Add in the theme AND some stamping and then pop back here to leave me a comment with a link to the place you are showing your entry.  If you haven't got a blog, you can join in via Facebook (simply tag my name on your upload) or via email and attaching a small res pic for me to see (my email addy can be found by clicking on my photo over in the sidebar)  If you wish to view other peoples entries, simply click on their link in the comments box and you will be transported to their blog.   The challenge will remain open until 21:00 Saturday 23rd November 2013.


My entry this week is a rather festive tag.  I saw Tim do a fab technique ages ago and I haven't had a chance to play til now.  Basically, you get some rub on's. Rub them on and then ink over the top and the rub on is resisted... so whilst you can still see it, it also has a great light outline around the edge of the image.  I used a Wrinkle Free Distress technique for my tag, adding Iced Spruce, Broken China, Pine Needles and Salty Ocean Distress Inks to the tag... I love the little dapples you get with this technique.   I added some stamping to the base of the tag - firstly, using Aquamarine Archival and a Diamonds stamp from Kaisercraft... and then a gorgeous flourish stamp from a really old Tim Xmas set and Jet Black Archival so that popped from the background.


I used grungeboard to die cut the Pine Tree and then coloured it with Pine Needles and Vintage Photo DI's.  Then I got the old Rock Candy Distress Glitters out and by running Glossy Accents around the edges of the boughs, I made some "snow" for the tree.  I have had this leaping reindeer lurking around on the shelf above my desk for 376 years so I thought I would allow him to become arty... I coloured him with Frayed Burlap, Vintage Photo and Walnut Stain DI's and then again, using Glossy Accents, added Tarnished Brass Glitter to his antlers and Vintage Photo Glitter to his body.  A length of string around his neck with a bell finished him off nicely.   I added some more string to the tree trunk and also to the top of the tag... et voila! 


I am scheduling this post today - Friday - as I am away this weekend... hoping it posts at the right time!  So, if you entered later in the week to last weeks challenge, sorry I haven't had a chance to visit, I shall be on my way around on Monday (tomorrow... )   Thanks for looking, have a great day!  TTFN

Hels x

Related Posts with Thumbnails