Showing posts with label I Challenge Thee. Show all posts

Sunday, 30 November 2014

Sunday Stamper - Week 335 - Have a Holly Jolly Christmas

Goooodly Morning Stampers and a very happy sunny Sunday to you all!  Thank you for your fabby lurve entries into last weeks challenge.   The song title for the theme this week has been chosen by my BFF Ellen... and it is CHRISTMAS You can interpret the challenge how you like: which isn't that difficult this week as Christmas is such a big old theme :O))  To join in with the challenge is simples: make a little something, it can be anything you fancy.  Add in the theme AND some stamping *this is THE important bit guys, please remember your rubberstamps!*  and then hop back here, leave me a comment with a link to the place you are showing your entry and I can come see you.   If you haven't got a blog, you can join in via Facebook (just tag me name) or by emailing a small res.pic to me.  The challenge will remain open until 21:00 Saturday 6th December 2014.


My entry this week has come about because of a fabby Skypey sesh I had with Ellen yesterday.  As usual, we had an I Challenge Thee... basically, we put together a recipe and get crackalacking making stuff.  Only this week we are both barren of Mojo so Ellen grabbed her Ranger U tags... and I grabbed mine... and we chose the Nostalgic Batik technique. Now this is a technique I haven't used for several hundred years and it was so lovely to revisit it.  And... I decided I would do a little step by step to show you how to do it too :O) 


But first.... the recipe!
Technique - Nostalgic Batik
Base - Manila Tag - any size
Theme - Christmas
Must Include: Tinsel/Festive Garlandry, Bow, Bells
Stamps of own choice
*this is the killer*  NO PAPER FLOWERS OF ANY DESCRIPTION!  *Ellen chose that... the vixen lol*

Please do feel free to use our recipe... and we'd love to see what you come up with too :O))

Here's the technique:

STEP 1 & 2
Using a couple of colours of Distress Ink, ink and stamp your image. Immediately cover with clear embossing powder, heat until shiny.


STEP 3
Use a co-ordinating colour of Distress Ink (and let's face it, they all co-ordinate) and blend ink right over the entire piece.  As usual, I added some Frayed Burlap around the edges... I always do that, I do!


STEP 4
Use a hot iron (for those of you who aren't sure what this is, it is a little metal electric jobby that gets red hot, perfect for getting creases out of clothes *snort* but also perfect for crafty stuff too!) with a piece of absorbent paper over the top of the stamped card, press firmly and hold the iron in place, the heat from the iron will re-melt the embossing powder which will soak up into the paper and remove said embossing powder giving a lovely nostalgic look to the art.  If you find that the paper is stuck to the card, simply rub the iron over the top again and it will lift off whilst still hot.


It is worth noting at this point that I GOOFED up... big styleee.... but actually, I liked my goof up so I kept it.  What did I do?  Well, I was so chuffed with the fact that I managed to stamp and emboss and it looked great that I skipped the Step 3 and went and ironed off the embossing powder before I had coloured over the card.  Ooops.  Well, I decided that seeing as there is always a residual amount of embossing stuff left on the stamped image, I would see if inking over the top actually would kill the whole thing or if the residual stuff would be enough of a resist.  And it didn't kill it completely... but what it did do was create a little bit of a halo.. which I likes!  Happy accident right?  To finish the tag, I added my bow, made with crinkle ribbon and Pine Needles DI, some Idea-ology (and how chuffed was I when I found the Christmas Word Band with the right song title words on it!)  The ickle rusty bells attached to Pine Twine around the Prancing Reindeers neck checked the bells and garlandry off the recipe and of course, no paper flowers so... I used real pine cones instead!  Teeehee!


And there you have it!  Please do go and check out what Ellen has been up to HERE... she was making mini tags the last time I saw... and she was up to about 87!   As ever, thanks for looking... have a grand day!  TTFN

Hels x

Sunday, 7 September 2014

Sunday Stamper - Week 324 - Lavender's Green

Goooodly Morning Stampers and a very happy Sunday to you all!  Thank you all for your fabby entries to last weeks bright challenge - it was great to see all those eye popping summer colours on display.   The theme this week is colour based one... this time, USE PURPLE TONES.  You can interpret the challenge how you like: go for deep purples, add a smidge of violet, a little flash of mauve, the choice, it be yours!  To join in with the challenge is simples: make a little something, it can be anything you fancy.  Add in the theme AND some stamping *this is THE important bit guys, please remember your rubberstamps!*  and then hop back here, leave me a comment with a link to the place you are showing your entry and I can come see you.   If you haven't got a blog, you can join in via Facebook (just tag me name) or by emailing a small res.pic to me.  The challenge will remain open until 21:00 Saturday 13th September 2014.


 My entry this week is actually the very first page of a new "I Challenge Thee" project that Ellen and I started last Sunday during our Skype session.  We have a recipe to follow and over the next few months we will be making pages and then altering covers to make a special little book.  The main ingredient is Studio 490 - it has been too long since we both got our heads together and did an homage to our Wendy...   My base is a bit of manila cardstock, measuring 7 x 5" (ish) and I coloured it with Milled Lavender, Tumbled Glass, Dusty Concord and Tattered Rose Distress Paints... I made a nice smooshy background and then once dried, I set about adding more layers using lots of inks and stencils.  All stencils used are Wendy's... and the inks are Wendy's Archivals.  Starting with diamonds and Cornflower, moving on to dots and Hyacinth.   I made up my own colour embossing paste - popping a couple of drops of Hyacinth and Cornflower Archival re-inker's into Wendy's white embossing paste and then spreading it thru the stencil (can't remember the name of this one)  Now, the embossing paste colour is shown better on the butterfly - that was the colour I chose... and then once I had used it for the flowers, it looked tooooo pale, so I rectified that and use Hyacinth Archival to colour over the embossed flowers - I just popped the stencil back in place and inked over the top so I didn't get any overspill inky bits on the base card.


I added the wreath, inked in Fern Green Archival, adding dots and Glossy Accents and a sentiment to finish off that bit... I wasn't happy with the overall look tho, it looked bare!  So I did some "second generation" stamping, using Wendy's massive script background and Watering Can Archival and randomly stamping onto the background.... ahhh, better!   I added some embellies - Wendy's Embellish Your Art and some bits of ribbon and lace and stuff and that was about enough for this page.  At the moment, the page is curling up - it will be glued to the next page finished and flatten out then... I made a schoolgirl error tho, I didn't punch the holes yet... ooopsies... I might have to fashion a fastening if I can't get the holes lined up properly!  I won't be making that mistake again.


I am excited today!  We are away to Rockingham to watch the British Touring Cars.  This is the first live meeting we have been to this year and I can't wait!  I need to feed my inner petrol head!  As ever, I shall be cheering along and shouting GO PLATO!   Thanks for looking, have a goodly day!  TTFN

Hels x

Wednesday, 27 November 2013

I Challenge Thee... A Revisited Recipe!

...cor blimey, it has been toooo long since Ellen and I did a good old I Challenge Thee!  Seriously, the last time was August!  Anyways, we had a proper Skypey sesh on Sunday... and being as Ellen has a bit of a Mojo deficit going on, I suggested we do a "revisit" of an old one to see how differently we would make it now.  The one I chose was from 6th January this year... not that long but enough for styles and preferences to change right?  Well, erm... in my case... wrong!  Cos whilst I did the whole recipe, I still managed to go right OTT with the embellies... nowt new there then eh?  Here's the recipe - please do feel free to use the recipe too, if you do, please show us what you created too :O)

Large Canvas
Scraped Paint Technique
Embossing/Texture Paste
Stabilo ALL Pencil *aka The Magic Pencil*
Word - not stamped
Tissue Paper Stamping collage
Ink Sprays
Drawn border/edging
Embellies of choice *uh-oh, I knew I would go OTT!*


So. My canvas is a 12" x 9" canvas and isn't deep edged, which I do prefer but being as this was the only one I could find, I used it.   The colours are predictable for me aren't they?  Well, if you CLICK HERE you will be transported away on the back of a giant paper flower to see the original canvas I made.   When you get back I will prove that it is different... sort of....  ok, yes, that one is predictable too... brown!  I know, browns, greens, blues... one day I will use bright colours and shock myself stupid (mmm, stupid already so not much shocking needed for that!)


The scraped paint is done with a spatula.  Ellen uses a plastic credit card scrapery thing... I prefer the spatula method as I feel more in control... plus, don't tell anyone but my hands are rubbish and I tend to drop the plastic credit card scrapery thing all over the job... teehee.  Tissue stamping - using Wendy's fabby Watering Can Archival from the Ranger Designer series... that colour makes my heart sing!  It is THE perfect and proper shade of grey to *be there* without *being there!* if you know what I means.  The stamp is the gorgeous background from Heirloom Art from Wendy Vecchi too. And the tissue is always a cosmetic tissue... whilst it is more delicate to work with, to me it kind of dissolves in the Glue & Seal so you can't see the edges so much.   The stencil is from Imagination Crafts and the embossing paste is my fave Wendy Vecchi Dreamweaver Matte Black... this stuff is THE best... like a moussey lushly smoothy bouncy paste.  Perfect.  
  

Once all that dried, I painted a two tone border (yep, predictable... but I loves it...) and then the embellies.  LOTS of them.  I haven't seen Ellen's finished creation... but I kind of know that there won't be many embellies... because that is the massive difference with us.  I go totes over the top with chucking flowers and metal and stuff... Ellen is more restrained... mmm, I needs to try and be more restrained... just to see how I gets on!  The ink spray part of the recipe came in with the coloring of the flowers - check out Kaisercrafts new paper blooms... they are GORGEOUS... and the base colours of the roses are Sage (wish I hadn't gone so mad with the Black Marble Dylusions, over did those a wee bit) and I added some blue Cosmic Shimmer spray for blingyness too.  Then the tonne of embellies... all were tinted with Treasure Gold Pewter and Sapphire to tone them in.  Oh and the leaves... painted with Forest Moss Distress Paint.  Do you like the word???   That is like a big metal buckle.  Dan got me it from Michael's for my birthday... and I been saving it for a spesh project... so thanks Dan, excellent taste my friend!    And there you have it!  So, you wanna see the original one now?  I have to say... out of the two, I prefer the first one... I think it is because the size of canvas is perfect for me. I get a bit scaredy kittycat when I start on a larger size.. but hey, it is a challenge after allAnd I also prefer the colours on the original... and it was a deep edge canvas...


Don't forget to bob over to our Ellen's place for a nosey at her amazing creation.  I am saying amazing even though I ain't seen it finished cos it will be... I just know it.  I saw it after the painty bit had been done and I was a-drooling big stylee. Anyways, I guess that is more than enough wafflingtons from me for one day.   I have class kits to get ready for my classes this weekend at Busy Bee's weekend retreat in Sheffield... and also, my old war wound is really playing up again... grrrrr... so I will be resting up too.  Well, thank heavens for Victor the Vagabond, he die cuts all my stuff so efficiently... saves straining meself lol   Thanks for looking, have a grand day... TTFN

Hels x

Sunday, 1 September 2013

Sunday Stamper - Week 273 - That's What Friends Are For

Goooodly Morning Stampers and a very happy Sunday to you all!  White Rabbits btw... tee hee... 1st of the month and all that!  Thanks for all the great entries for last weeks challenge too... I do love to visit and see your gorgeous creations.  This week is a very special theme which has been chosen by a very special person!  Oh yesh, this week the theme is FRIENDS and it has been chosen by my BFF Ellen.  More of that in a mo... but first... to join in with the Sunday Stamper is simples: Just make a little something - it can be anything you fancy.  Add in the theme and some stamping and then pop back here with a link to the place you are showing your entry.  If you don't have a blog/web-photo-hosty thingy, worry not... you can also join in via email - my addy is where my pic is over there *points left* just click the pic... or via Facebook - simply tag my name on your photo and I can pop by to see it.   The theme will remain open until 21:00 Saturday 7th September 2013.


Now, as you may have gathered, just recently I have been suffering with my pain and the old cad Mojo has decided it was high time to go off on his jollies.  Well, I had had enough of walking into the Pit of Doom - the new name for the Room of Stash - and walking back out again in disgust.  So yesterday morning I set myself a challenge to clear some shelf space and get rid of stuff I don't use.  So I did!  Oh yesh, I got rid of tonnes of stuff... only into boxes into the garage but it is a start right?   Next up was a lovely long Skype sesh with Ellen... only 5 hours this time... ahem... but it sure got my Mojo dancing as we had a little I Challenge Thee!  Hence, the title for this weeks' challenge... Friends... cos Ellen helped get my Mojo dancing again!   Here's the recipe for our Art Part Fest:

Using Wendy Vecchi's Art Parts:
3 x 5 1/2" x 7" Large book covers
Large Queen
Wings
Small square Frames
Scroll Leaf
Small Hand
Scallop Borders
Pencil
Crayon
Gears
Plus: Wendy's new Ranger Archival Inks (LUSH!)
Other Art Parts as desired.


What a list huh?  I was a bit afraid because it was BIIIIG!  And I haven't done a biiiig Art Part piece before... but hey ho, Mojo was creeping back slowly... almost like he was playing "What time is it Mr Wolf?"  Everytime I glanced over, thinking I could see him, he slid behind a rubber stamp or scootled under a craft sheet.  Then a lovely warm fuzzy feeling overtook me and voila!  He was HOME!  After grabbing him by the scruff of the neck and bunging him in a Really Useful Box,  I got into my Art Part Fest with great gusto!


I kept the background of the Covers very simple... covering them with the backsides of the Tim French Industrial papers (who snikkered then huh?) and sanding the edges and then blending some Gathered Twigs DI around to make them look a bit distressy.  The frames were covered with Gathered Twigs Stains, dried, sanded and then overstamped with Potting Soil Archival (my NEW FAVE!!!!  LOOOOOVE THIS ONE!!!! THANK YOU WENDY!!!!)  The leaves were coloured with Forest Moss and overstamped with Fern Green Archival, the wing was coloured with Scattered Straw Stain and overstamped with Orange Blossom Archival, the little flower was coloured with Barn Door Distress Marker and overstamped with Red Geranium Archival, the little scallops were coloured with Black Soot Stain and overstamped with Watering Can Archival... so the only one I didn' use was the Cornflower Blue... not bad going though eh?  I love all the new Archivals muchly... they are just my colours and hues... lushness indeeeedily.... you needs them!   You might now be able to see the crayon Art Parts immediately... that is because four of them are actually the "holder togetherers" of the three covers... and then a fifth was cut up to make stabilisers for the layers of Art Parts on the front bits.  Cunning huh!!!   Finally, the addition of some metal bits and bobs and some Embellish Your Art resin goodies were my little decorations... I know they were not on the list but.... if you don't tell, I won't ;O))  To see Ellen's amazebobs piece, CLICK HERE.  Ellen has created an amazing piece of art... and the complete polar opposite to mine... very unique and very Ellen.  


I must away!  I have fair worn myself out with all this creativity... but seriously, it has been tooooo long since I actually made anything.  I have never had a barren stretch like this before.  I don't think the pain has helped but I know for sure that the old Mojo is well and truly home (I can hear him hammering against the lid of the Really Useful Box as I type!)  Today I plan to get inky again and see if I can actually manage to blog during the week for a change!  I still can't believe that I haven't blogged from one Sunday to another... this is a first for me... 6 years of blogging and I haven't ever been so quiet!  I shall remedy that PDQ!   Anyways, thanks for sticking with me... I truly appreciate your support you know!   Thanks for looking, as ever, have a fabby day!  TTFN

Hels x

Wednesday, 14 August 2013

I Challenge Thee - Finnabair Stylee

..cor blimey and thrice!!!  Thank heavens for unlimited t'internet because on Sunday last, I had a very muchly needed Skypey catch up with my bestie Ellen.  SIX hours!!! Yes, SIX!!!  Well, it has been too long since we had a chance to catch up properly and we had both said that Sunday was the day we both needed an I Challenge Thee.  If you haven't heard of our special recipe challenge before, basically,  a few years ago we were doing a Sunday Skype sesh and Ellen said "My Mojo has gone!"   So, I said "I challenge thee to make.... " and then listed a load of stuff she could use... like a proper recipe!  It worked a treat so it is a little something that we do whenever we get the chance because, whilst we both use the exact same products (colours too sometimes) the things we make look totally different.  Tis all in the interpretations I guess.   A couple of weeks ago, Ellen went to a class with Finnabair (Ania Dabrowska).  And not only was she doing a class with the wonderful Finn, she was also sitting next to none other than THE Wendy Vecchi!  How Peeled Paint am I?!!!   Anyways... Ellen shows me the art that she made on the class and I am like "ooooh, I neeeeds to try that.... "   We put together a list of goodies we could use and here it is:

  • Large rectangular canvas - mine is 12" x 9" deep edged (bargain £2.99 from the Works!)
  • Dimensional embellies - to include Finn's Mechanicals line from Prima
  • Paint
  • Stencils
  • Finn's 9th Wave papers (omg... LUSH!)
  • Stabilo ALL Pencil
  • Treasure Gold
  • Wendy Vecchi's White Embossing Paste
  • Paper Flowers 


So, it wouldn't be fair to tell you exactly how this creation was made because this is Finn's technique... tbh, if I had the dosh I would be going to one of her classes when she is here later this month... but I haven't, so I won't be!  Anyways.... all I will say is that it is FUN!
I have long since admired Finn and the art that she makes is just simply breathtakingly beautiful.  Now, if you haven't heard of Finn (that won't be many of you I know) or even if you have heard of her... check out her amazing blog HERE.  Seriously, before you go, get a cuppa and a packet of HobNobs and settle in for hours of eye candy.  I had the pleasure of meeting Finn at CHA in January... she is adorable and totally unaware of just how amazing she is... brilliant artists are oft like that I have found... Wendy Vecchi is another...  which links me in nicely to the Wendy Vecchi part of my canvas.


Now, I make no secret of the fact that I am Wendy's Numero Uno stalker ahem, fan.  And being as I had a couple of weeks of crafty barrenness (not sure that is a word but I likes it) I was itching to incorporate some of her stashly goodies into my creation.  So, the Studio 490 White Embossing Paste was the first thing.  Hey!  Have you tried it???  I LOVES it.  It is kind of whippy looking and spreads beautifully... and what I did was a goof up that turned out happy accident.  I only possess 6" stencils because working on such a large piece is positively unheard of for me... so I am using the checkerboard stencil from Finn's last release and 490 paste.  And I not only stick my elbow into the already pasted bit but I drop the stencil too!  Because it was warm in the Room of Stash, the paste already had a "crust" on it... oohlalalaa... I loves that look, it has already part set but because I had goofed up, I scraped the goof bits up .. and it left an imprint... verrrry happy with that I was!


And of course, any chance to chuck a ton of embellies at something makes me verrry happy.  So, out came the Mechanicals embellies (these are sooo gorgeous) I added in some Junk Yard stuff from Prima, some old embellies from my stash and of course, my Embellish Your Art from Wendy Vecchi (see the theme here?)   Once I had got everythng done, I used my Stabilo pencil to whip around the textured bits to add shading... and did the same with the embelllies just so they popped a bit more.  Of course, I added my two tone border to the edge of the canvas (I do this all the time I know but it makes me happy).  Finally I dry brushed Treasure Gold all over the canvas and then smudged parts of it with my fingers.  This then meant the canvas was BLING!  So I used some black paint, applied with my finger, to just dull it all down again... Personally I wouldn't chose these colours again as they are waaay too bright for me... so I am going to have another go at this fab technique using my fave browns and creams... but it is good to step out of the comfort zone right?   Oh and... I personalized this canvas for me... the numbers are my birthday and the plaque is... erm... the age I will be in... ahem... 22 years!!!  *yeah right!*   To see Ellen's amazing creation, CLICK HERE... it is LUSH!!


I shall away now... we have a very special visitor coming to see us today and we needs to get the house sorted.  Oh yesh, Rich and Mary are coming over for dinner and Jerry the Springer will be coming with them... I will get some pics of him and pop them on here tomorrow.   And I know you will be thinking "what about AlfieCat!!!"   Don't worry, he will be safely ensconsed in his usual position (our bed) with a tin of tuna and water and toys in case he gets a bit peckish and fancies a play.   As ever, thanks for looking... have a great day!  TTFN

Hels x

Saturday, 11 May 2013

I Challenge Thee... Chunky Stylee....

...what a wonderful way to spend an afternoon!  Yesterday Ellen and I had an inpromptu Skypey sesh, it was indeedily a lovely surprise when the phone went and there was my lovely arty sister's happy voice saying "hello"  Turns out Ellen had a free afternoon... as I did (which has been unheard of since mid February!) and we did a Skypey I Challenge Thee.  We realised it was exactly THREE months since our last recipe challenge... how mental is that!!!  Anyways... we soon put that right and came up with the following recipe and challenge:

Chunky Canvas - any size
Distress Paints
Tissue Stamping Collage
Stencils
Texture Paste of choice
Embellishments of choice
Idea-ology
Alphapart to make word of choice
TIME LIMIT = 75 mins.


Well, it started off as me saying a time limit of 90 mins and Ellen got all exciteable and said "no, 60 minutes"  So I said  "gulp... erm.. how about we meet halfway and make it 75 minutes...."   Which we agreed upon.   Now folks, please do feel free to lift the recipe and go and have a play - especially handy when one's Mojo has naffed orf (as mine has a habit of doing...)  The recipe is quite flexible... just the bones of a creation really.  And if you do makes somethings... please do let me and Ellen know - BTW... to see Ellen's gorgelous creation HERE.   What I love most about our Skypey sesh's is that we get to really play.  This is not work.. it is all about the process of getting involved in creating... which makes my l'il ol' heart sing.  The other thing I loves about is that it makes me feel closer to my arty sister who is soooo many miles away... the wonders of yonder t'internet eh?  A marvelous thing indeedily!


The base of my canvas (which is a cool 4 x 6" and available from Paper Artsy) was coloured with Antique Linen, Bundled Sage, Broken China and a smidge of Salty Ocean Distress Paints... all blended and spritzed and blended some more with Cut & Dry ... and then I went a bit mental with some drippage (loves that word, thank you Ellen for educating me on that one)   This is SIMPLES with the Distress Paints as they are sooo liquidicious and lushulous (like the new words huh?)  I got some paint on a spatula, ran it along the top of the canvas and then spritzed like mad with water to get the paints to really go watery.  The brilliant thing about Distress Paints is that because they are 100% waterproof when dry, the drippage bit didn't ruin the base I already made.  Normal paints would have had a fit of the vapours and gone mucky.  Hurrah!   The stamping - well, the heart strings is a Stampotique stamp - available from The Stamp Attic... and the stalks are an ancient Magenta stamp also from The Stamp Attic, not sure if they are still available but if you give Wendy a bell, am sure she will help you out.   I stamped onto a single ply of Kleenex tissue with Black Archival ink and used Glue & Seal to apply the stamping... I loves how the tissue just melts into the background with the Glue & Seal (which is why I use cosmetic tissues and not proper tissue papers)   The texture pastey bit... that is Wendy Vecchi's Studio 490 Embossing Paste (black) mixed with my fave Crafty Notions Puff Paint (also black) and then spread through a Donna Downey for Prima stencil... and heat dried to make the puffy bits ..erm.. puffy!   As ever, the "trademark" (as Ellen called it) two tone border on the sides... that is another reason to loves (notice a lot of loves going on here today!) chunky canvases.  The stripes were made using Antique Linen and Black Soot DP's... and defined with my Stabilo All pencil... just to make the lines less clinical and more arty.   I used some Treasure Gold to bling up the edges, the stencilling and the embellies... Florentine and Emerald came into goodly uses... especially the Florentine which seems to be my "go to" colour at the moment.  I changed the colour of the Faucet Knob (a-top the canvas) and also the Bead Chain and Pen Nib (Idea-ology) and added smidges of it to the letters ... and of course, the word has to be WISH as that is Hels' word of 2013!   And there you have it... one very happy Hels and a very nice recipe challenge!  Oh and ... BTW... we... ahem... didn't quite finish it in the alloted time... to be honest, for me, it was more like 2 hours... which isn't tooooo bad... ahem!


In other news... the Case of the Missing Butterfly has now been solved.  In yesterday post (which also has a giveaway so please do scroll down to see how to join in) I mentioned about the clear butterfly on a stalk lighty thing I have in the garden and how the stalk was there minus butterfly after the high winds of Thursday.  Well, I have to admit, I was thinking AlfieCat had had his paw in its disappearance... but no, I apologised to him and gave him some treats to make up for doubting him... after some searching, I found it, nestled in the Borrage that I have been growing (ok, it is growing itself from last years seeds lol) and... it had severed a stalk of Borrage at that too!  Blimey, it is only a small thing too!    Anyways, to make up for his Mummy doubting his honesty, AlfieCat decided to turn into the Black & White Assassin!  Oh yesh, this time it was the turn of an unwitting Cabbage White that fluttered into the garden yesterday afternoon.  Alf the Assassin was having a mooch araaand 'is manor (said in my best Ray Winstone voice) when he happened across said butterfly.  Not only did he pounce and pat it and pounce again, he then proceeded to eat it!! Ewwww... and then we wonder why he leaves us very smelly parcels in the litbox.. you know, he goes out - can be out for a few hours at a time... and still comes home and dumps in the lit tray.  I have tried moving it outside but no, he waits til it comes back in!   And on that delightful (if ever so slightly smelly) note... I shall bid you a very goodly day!  Do check back tomorrow for a brand new Sunday Stamper theme. Thanks for looking... TTFN

Hels x

Thursday, 14 February 2013

I Challenge Thee...

... Ellen and I have been at it again you know!  Well, actually, we set this challenge as a recipe for a crafty Skypey sesh way back in January and then poor Ellen got very sick so we decided to finish it "later" and blog "later".   Last Sunday we were yakking, as we do, and Ellen said "oh here's my I Challenge Thee from last time... finished!"  And I said... "oh whoops, I completely forgot about that...."  *or words to that effect lol*   So, we decided to blog this week and then poor old Grim got sick so we delayed it for a day (again, because mine was still languishing unfinished - hey, it wasn't even started!)  Finally, here it is!  Oh and the recipe... here's that too:

4" x 12" canvas
3 x mini square canvases - any orientation
Brand New &/or Unused Stamps
COLOURS:
Blue
Green
Black
White
"Pop" of Red
1 Metallic of choice
Washi Tape
A Crown


BTW, if you fancy using our recipe, please feel free... and do let us know what your creation looks like, we like to be nosey :O))   I used Claudine Hellmuth Studio paints... they are creamy and gorgeous and they blend perfectly, which means the way I applied the paints worked a treat.  I use one piece of Cut & Dry and imagine it is half and half for colour.  So, the Landscape Green is on one half of the foam... the Sky Blue is on the other half... so where they meet they blend together meaning no harsh lines when applying the paint to the canvas.  I apply it in a pouncy motion too, lots of light dabbery-tapping goes on and whilst the paints are still wet, I make sure I am blending them... once they dry, they are almost impossible to blend nicely - this goes for all kinds of paints too btw.


My mini canvases are about 3" square... each was covered with the paint and I edged all of them with Charcoal Black applied with a small piece of Cut & Dry Foam.  I tend to mask the fronts of the canvases so it isn't too messy.   I spied on the list "white"... well, where was that going to go huh?  White!  Pah!  So, I came up with a cunning plan.  Stamp my fave new background from Heirloom Art onto cosmetic tissue using Blank Canvas paint (which is white btw) and dry it, then pop it over the mini canvases with Glue & Seal... voila! It worked a treat and the stamping shows up without being too over the top.


I also added a smidge of white paint stamping behind the canvases but they got lost a bit by the time I added the mini ones on.  Measuring is never my strong point lol   The flowers are also new Studio 490 stamps, I popped the same green and blue paints onto cardstock and then overstamped with the flower... and gave them a spritz with Dirty Martini and Calypso Teal Dylusions sprays to add a bit of extra colour.  The sentiment was made by using my original piece of Cut & Dry and pouncing this onto cream cardstock.. you can see the blendy bit better on this.  The stamp is another new Studio 490 one, isn't it a FAB saying!  I realised I hadn't used "washi tape" so I made my own!  I coloured a strip of masking tape with A Dash of Red paint, drew a heart, cut it out and then popped it onto the middle canvas with a pen drawn line from the sentiment to the heart.  I used my Stabilo All pencil to add some shading around the sentiment and the heart too.  The ickle birdies have been living in my stash for 372 years so they were coloured with Distress Paints and I cut out some little crowns, coloured them Gold Dabber stylee and popped them onto the birdies.  The finishing touch is the Embellish Your Art resin blooms in the flower middles... how cute are they!  


Again, huge thank you's for all your lovely get well messages for my poorly man.  Oh bless him, he has been ever so ill this past few days and is still feeling rotten.   Right, I shall away... I have some more of those new Studio 490 stamps and I feel a late night playing coming on!  Don't forget to pop over and see Ellen's gorgeous creation... HERE.  Thanks for looking, Happy Valentine's Day y'all!  TTFN

Hels x

Monday, 11 February 2013

Schpeedy Gonzalez...

...ha! That has foxed me good and proper... what would the plural of Gonzalez be?  Gonzalez's? Gonzali?  Well, whatever it is, that's what Ellen and I were doing yesterday afternoon when we decided to have a "speed recipe challenge".  Being as we had spent most of the Skypey time yakking (what? us? yak? hell yeah!) we only had a short time left afore I had to go and have my tea... so we set ourselves a schuper schpeedy challenge which was as follows:

Size 10 Manila Tag
Painted Background
Collage
Paint Stamping
Dylusions Sentiment (ahem... I cheated)
Time limit - 30 mins... (ahem... yep, guessed it... cheated...)


So... that there tagingtons is where my effort was at after the alloted 30mins.  Pretty background, very plain and boring foreground (ok, non-existant foreground)  I had some butterflies and the sentiment sorted but that was it.  Let me tell you about how I got to this stage though:  Distress Paints - OHHHH MYYY!!!!   I loves them!!!  Well, I used Bundled Sage and Broken China and scraped the paint on with my palette knife.  The paint is sooo smooth and liquid, it scrapes on perfectly.  Once that was done, I added some torn bits of music score paper and lightly scraped a smidge of black Gesso... and then slapped a good old layer of  Glue & Seal to seal the whole lot.


Next I did the paint stamping... who decided on that one huhWasn't me (lol) but it was me that decided in my infinite wisdom to use the biggest stamp I own to do the paint stamping... so not only did the stamp, the tag, the sleeves of my hoody and my inky binky get covered in black paint, so did ever other thing in the Room of Stash!  (ok, slight exaggerations but... feels like it... I am finding splats of paint all over the shop!)  The stamp is a Donna Downey one, think it is called Holly Hocks and I do loves it very muchly and it is perfectly sized for the big Size 10 tags.


I made up some more card using the same method of paint application for a message mat... this time I added some background stamping using Broken China DI and a brand new Studio 490 stamp that is on Heirloom Art... and then stamped the sentiment in Jet Black Archival.  What?  No Dylusions sentiment?  Well, no.. basically the only set of wordy stamps from the Dylusions range that I own are the newest ones... and they are all in the first person.  And there's no way a butterfly would talk so... I cheated!  Oh yesh, rules are there to be stretched right?  


Finally, after much deliberating I decided to get up at stooopid o'clock this morning ... like 4.30am stooopid (Grim is on earlies lol) and came back to look at said tag again... well, it looked, to coin a phrase, pants!  So I cheated a little bit more and grabbed some Studio 490 florally stamps and stamped and cut them out from patterned paper and then popped them together with an Embellish Your Art button for the middle... sooooo much better!  So, all in all, it took 30 mins for the base tag and then about 25 mins for the florally bits... I am a big fat cheater lol     Do pop over to Ellen's blog and see her gorgeous creation... she didn't feel the need to cheat... and her creation is gorgelous... CLICK HERE to be whizzed off on a giant snowflake.      Right, I shall away... I am snow watch at the moment... it is snowing here in wintery Wellybobs and I cannot wait for it to get deep enough so I can faff about in the garden and make a snowman... I thinks it may be a tidgy one but a snowman is a snowman isn't it?  Thanks for looking.. have a fabby day!  TTFN

Hels x

Thursday, 24 January 2013

I Challenge Thee... The Live Version...

..well, normally we are "live" but not so much "in the real" as we were the other day!  Oh yesh indeedily, whilst staying at Chez Vargo, Ellen and I took plenty of time to get inky and came up with a brand new I Challenge Thee Recipe... only, erm... once we had completed said recipe, Ellen was flicking back through her book and saw that, ahem, the last challenge we did?  Same recipe, different wording... rofl   Must try harder!!  Anyways, here's the recipe:

Size 10 Manila Tag
2 1/2 Inch cut off bottom of tag
Book Page collage
Tissue Stamped Collage
Scraped Paint technique
WORD/THEME - Friends
Distress Ink Blending
Three Embellies of choice in a row
Stencil & Spray inks
Decorations of choice

And here's what I came up with:


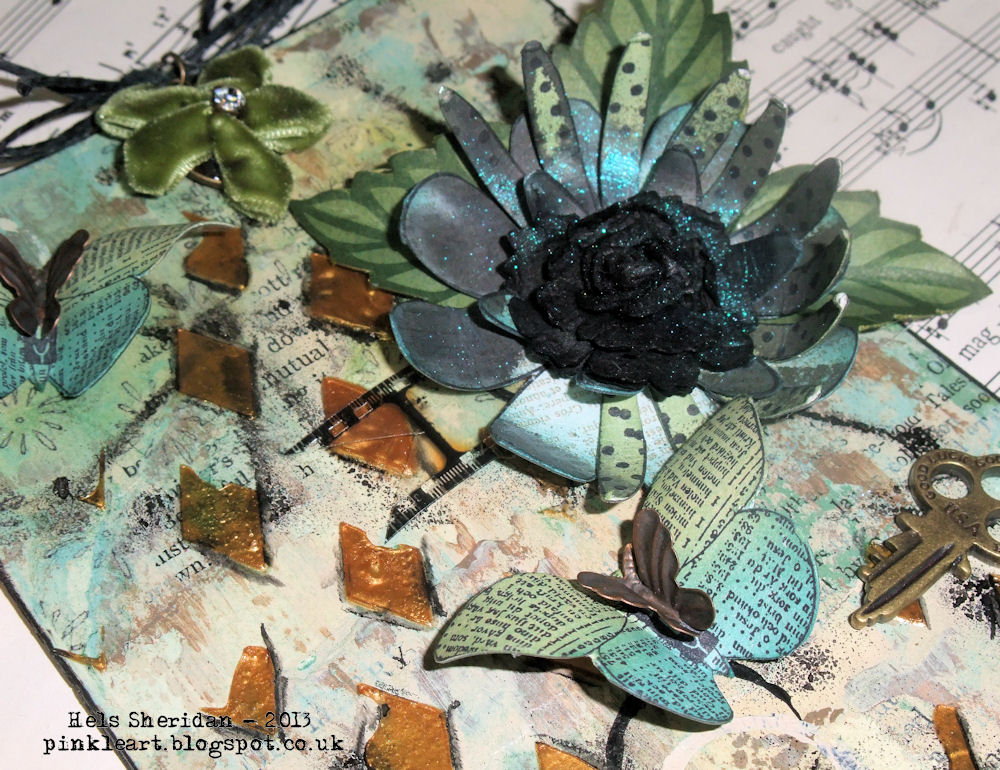
I cheated... I know, nowt new there then... but I am SO in lurve with the new Studio 490 Gold Embossing Paste that I had to use it... using one of the brand new Studio 490 Stencils for Art (diamonds) and just as it was set, I stamped into it.  My decorations of choice are made from Clearly For Art that was covered with patterned papers and then stamped with Studio 490 flowers and leaves.


Once the flowers were all cut out and layered, I got all exciteable with Turquoise Perfect Pearl Mists and Black Marble Dylusions spray and coloured them up a bit.   My butterflies are also Clearly For Art, these were coloured with Distress Inks - Bundled Sage and Broken China (cos I never use those... much lol) 


The letters are Alpha Parts that got a smidge of Treasure Gold rubbed onto them to make them a bit more blingy and the embellies are from Michael's... oh how I wish I had gotten more of those birdies... they are black metal, I just slapped Treasure Gold onto them and wow, how pretty they are!


I would love to say I am back to "normal" but alas, I am still reeling a bit... maybe a good sleep and I will be feeling more like me again... I hate how I get so jet-lagged, when I was driving trains and working daft shifts, I never got jet lagged you know... and Grim never suffers with it... maybe I should go back to working shifts, only doing them in the Room of Stash instead?  Let me think about that for a moment...erm... nope! I do not miss those 3am early starts at all lol   Right, I shall away... please do visit ELLEN, she is blogging her creation right this very minute too... hers, as ever, is totes-different... amazing how the same recipe can concoct different art... if you fancy using the recipe, please help yourself, just let us know so we can come and visit you!  Thanks for looking... TTFN!

Hels x

PS... back tomorrow with muchly requested photo's of the stash I dragged back from the US of A (teehee)

Monday, 7 January 2013

I Challenge Thee... 2013 Version...

...cor blimey and thrice, it has been a yonk and a half since Ellen and I last had a chance to have a proper Skypey sesh and do an I Challenge Thee crafty... erm... challenge!   Yesterday afternoon saw that rare opportunity, when I wasn't working and Ellen was free too... so we put the time to goodly uses and set ourselves a challenge to use the following ingredients:
Rectangle Canvas
Stencils
Studio 490 Embossing Paste
Scraped Paint Technique
Stabilo ALL Pencil (aka, the magic pencil)
A Word but NOT stamped
Tissue Paper Stamping Collage
Ink Sprays
Two Tone Drawn Border
Embellies of Choice


Now, if you read my blog last week you might have seen me waxing lyrical about the word WISH and how it is going to be my word of 2013.  So, being as I am having that as my buzz word, I thought I would use it on this canvas.  I die cut letters using mountboard and the Word Play Alterations die and then used the 490 Embossing Paste mixed with a smidge of Ferro and applied it to the letters in a pouncy fashion so the paste was pointy in places.  I was ever so careful and even though I used my utmost concentration, I kept dropping the letters... and yep, they landed face down each time... just like toast, butter side down!  After much cursing and several minutes of faffing, I finally got the letters how I wanted them.  In order to allow them to dry without me putting my paws all over them, I set them aside on the other desk.  And then promptly leant over to show something to Ellen and put my hand right on top of them.  So, I had to start all over again!   Finally, after several more minutes had passed, I could start on the canvas.  I do love the Scraped Paint Technique and it is one I haven't done for a while so it was nice to revisit this.  If you haven't done it before it is a complete doddle.  Use a spatula/palette knife/Ranger scraper/old credit card (one that hasn't melted... hahahaaa) and scrape the paint onto the surface.  Really, that simple!  I then decided that being as my fave colours are browns and creams and blacks and being as I was making this to make me happy, those are the colours I would use (just getting that in there before Mrs Anonymous decides to say "oh Hels, can't you think of any other colour than brown?"  Yes, that has happened a couple of times!  If you don't like it, don't look at it! Simples!)  Sorry, I went off on a tangent there.  Anyways... the colours: Traditional Tan first to cover more or less the whole of the canvas.  Then scraping Sable Brown. Dry in between scrapings btw.  Then Stone colour. Another zap with heat tool.  Then a smidge more Trad Tan mixed with Sable Brown, scraped and then dried.  Then a very light scrape of Sand colour, dried again and then finally, a smidge of Black Gesso to break up the design slightly.


Once this was dry, I used my very fave Studio 490 Stencils For Art - the one I used in the Florals... I have actually been a bad girl and have cut out each flower individually because then I can layer them next to each other and not have to wait for the first flower to be dry (if that makes sense) I used a palette knife to mix a dollop of Ferro into the Black Embossing Paste, this gives it a lovely sparkle to the texture.  I then used the palette knife to spread the paste thru the stencil, making ridges in the paste so it is more textured.  I repeated this another two times so I had three nice flowers on the canvas.  While that was drying, I then used the Stencils For Art Stripes and applied more of the black Embossing Paste along the top of the canvas. 


Next came the tissue stamping collage bit. Except I have just had a mammoth tidy up in the Room of Stash haven't I?  Where I found a big wodge of tissue paper... which I thought "uh, I never use that... bye bye" and put it in the bin!   Isn't that always the case huh?  Anyways.. .not one to be thwarted, I got a cosmetic tissue (ie, Kleenex) and separated the ply's so I had a single ply.  Then I stamped the Studio 490 polka dot border in Jet Black Archival and gave it a zap to dry it.  I then tore bits of the tissue and applied them to the canvas using Matte Glue & Seal.  This stuff is brrrrilliant... you can't see where it is and nor can you see the edges of the tissue... cool.  Next came the hand drawn border.  I used a pencil to mark off the sections and then used Trad Tan and Black Gesso to paint around the edge and once that was dry, I used a Stabilo All pencil to add some black smudges.  The Stabilo All pencil then went around the flowers to make them shaded a bit.  Once that was all done and dried, I then decided to try something a little different.


In years of old, I used to use Terra and add Rock Candy Cracklepaint over the top... so I thought I would try it with the Embossing Paste... ohhhlalaaa, it looks good... the pics aren't showing up the crackles like they do look but you get an idea.  Once that had dried, I used Espresso Colorwash and the old Dylusions Worn Leather to add some ink sprays into the crackles and then dabbed off the excess with a paper towel.  The finishing touches were smudges of Treasure Gold wax, the addition of some Embellish Your Art buttons, a brass charm, the Idea-ology Clock Key, a corner and three little printed butterflies that I coloured with Vintage Photo DI and added mini bead chains for the bodies.  And that was it. Challenge completed!


Please do pop on over to see Ellen's masterpiece... it never ceases to amaze me that even though we are using the exact same list of ingredients, our creations are always so different. I love what Ellen made... it is totally her and totally unique... CLICK HERE to go and see her.  I shall away now, I am scheduling this post to publish at the same time as Ellen's... next week I won't have to do that cos...erm... I will be with her!!!  Oh yesh, 4 days to go!  Am I excited?  Ah.... a smidge (lol)  Thanks for looking... TTFN!

Hels x

Thursday, 5 July 2012

I Challenge Thee...

... I know I say it all the time but I do love a good old Sunday Skypey sesh with Ellen because invariably we do an "I Challenge Thee" where we are really strict and have a list of stash we are allowed to use. This weeks sesh was a bit different... we are both feeling in a rut with ink and stuff so we decided to chose some different items... and... old/neglected stamps. Here's the list of goodies useable: Canvas board, Paint, texture paste, old/neglected stamps, masking tape, Alterations Strip Die, Prima Flowers, Embossing Powder, Stencils, Scraped Paint technique, Splatter technique and a theme of circles and diamonds. Cor blimey... it was SO nice to get out of my comfort zone and try some new stuff.


Who knew that painting and stamping Masking Tape would be such fun!!! (I know, you are gonna tell me you have done it before but... it would seem I have been lurking under a rock lol) A lot of the inspiration for my piece has come straight from the marvel that is Anna "Finnabair" Dabrowska. If you haven't seen her work before, take a look HERE. Seriously, she is an inspiration. Her style is loaded and yet it looks clean... it is hard to describe really, you have to see it to understand it. Anyways... she is, as I said, totally inspiring me at the moment.. you know, to try something else, something different to what I normally do.


This canvas was one of those things that I just couldn't leave alone... like 3am can't leave alone. I have gone back to it a couple of times to add a few extra bits of beady things... and I have also re-discovered my love of embossing powder. I think because most of my artwork is grungy and inky, I neglect these things badly. I used Queen's Gold Embossing Powder, which is IMO, the best gold powder I have used so far. It is fine and a proper gold... sometimes a gold powder can be a bit greeny, not this one :O)) The stamping on the edges are some Catslife Press stamps I have had for 272 years and haven't used since I moved house over two years ago (naughty Hels) and the word in the middle is a gorgeous grungy stamp from The Artistic Stamper. You might be able to see some script on the masking tape... that's also an Artistic Stamper stamp - they have some cool backgrounds and scripts you know :O))


Well, I reckon I have waffled enough for today... please do hop on over to see Ellen's GORGEOUS creation - HERE it is. I am off to play again... can't keep me away from paint and texture paste at the moment lol Thanks for looking... TTFN

Hels x

Monday, 31 January 2011

I Challenge Thee...

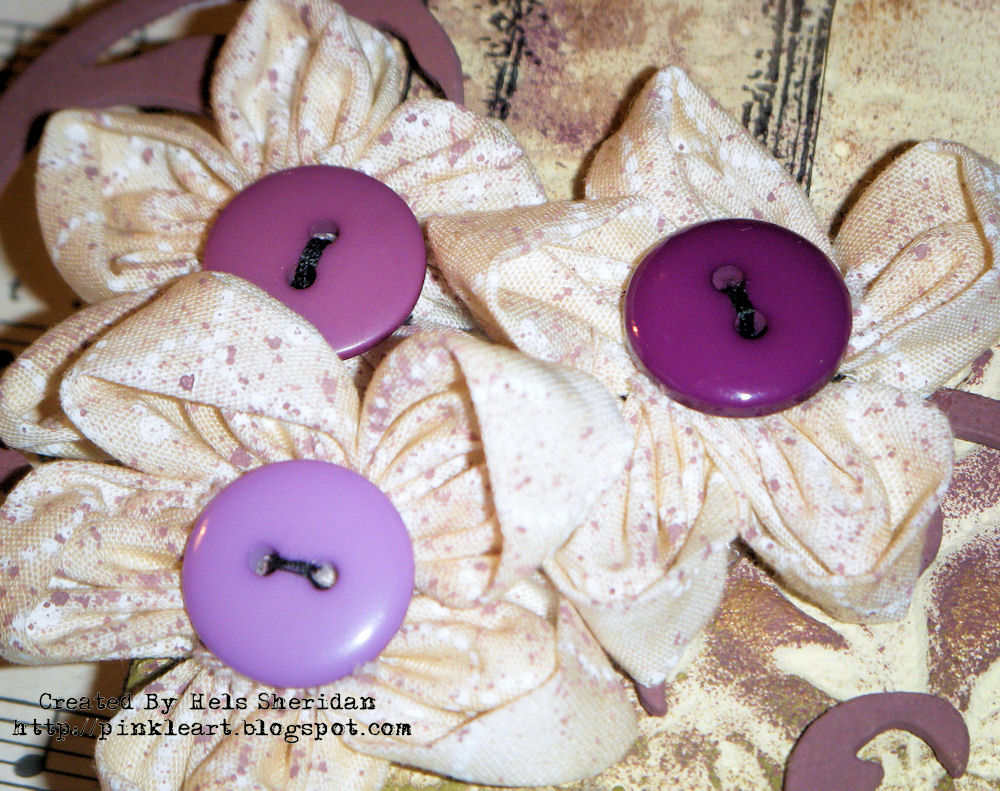
...oooh, I do love a good challenge and this week sees the 4th "I Challenge Thee" (already!!!) between me and Ellen. This week we decided to make things a little tougher... in as much as we weren't allowed to use any inks for colouring etc... nay and thrice! We were only allowed to use ink for stamping the sentiment!!! So, the item to play with was a 4" square canvas and the ingredients were: Terra, Paint, Stamping, Sentiment/Word, Grunge Flourish, Clearly 4 Art and... HANDMADE fabric flowers! **gulp**


Ah for the love of the God of Crafting!!! I can hardly thread a needle, let alone sew a button on, so how on Earth was I to make a fabric flower??? Well, it just so happens that thanks to the miracle that is Skype and the cleverness that is Ellen, I had an "online" live tutorial. Well, you would think that there would be a bit of a hurdle to start off with being as I don't do "fabric" - like I wouldn't have any... aha! Ellen very kindly bought me some when she came (all the way from America!) to stay with me last year. So, with said fabric, a pricked finger and a bald patch from the hair pulling, I finally finished my very first handmade flower... I shalln't show you it because I fear you would fall off your seat laughing at it... and then you could sue me for not warning you about offensive content on this post!!! LOL Oh and do hop on over to see Ellen won't you... I haven't seen her canvas yet and I just know it is so going to be gorgeous!!


So... a whole lot of waffling later, I did it! Yes sirreee (said in my best American accent) I made a flower... and then, as ever, I got ever so slightly excited and plonked myself onto the sofa to catch up several episodes of Doctors that I have on the Sky wotsit and, several decades later, I had made three that were... well, usable, for want of a better word. Anyways... all the pics here... they are of my finished canvas, which I hasten to add, looks nowt like I envisaged because I made the flowers too big (blame the cack-handed sausage fingers for that one) But... I do love the colour, which is... well a mix of purple, green, Trad Tan and gold.


Anyways... moving on, like you do... this here is a little sneaky peepings at my entry for the brand new Artistic Stamper Creative Team challenge... which has just been posted HERE. To see all of this bit of art... and the gorgeous projects from the other girls on the team, please do hop on over, oh and as ever, there is a fabby candy prize up for grabs too!


Anyways... again... blimey, this is a long old post, maybe I should have warned you when I started waffling... oh but, I just had a thought, maybe you have nodded off already LOL Well, I promised photo's of the drive... and photo's of the drive I have... only two because the others were a bit...erm... poo really... I need to get them jazzed up in Photo-wotsit-thingymajig... however, I have been going on alarmingly about this here "distressing for drives" and the concrete being laid... well, it was!!! Huzzah and thrice! and... I have a piccie of the "stamps" they use!!!


How coolio are they!!! And... here is a piccie of what these here stamps do to the concrete. It is still mega dusty as it has a special thingy-doofer on it at the moment... but then once the concrete has "gone off" the nice man from AJ Imprinted Driveways **I said I would give them a shout... if you decide to ask them to get your drive done, tell them "Coffee Lady" sent you... I will share the commish with you ROFL** is going to come back and wash it off, then seal it and then do some other stuff to it... oooh, I am even more excited now to see what it will look like. Apparently the colour is, from what I can gather... a mix of Frayed Burlap, Pumice Stone, Walnut Stain and a smidge of Fired Brick, just scattered in patches...


Oh, and if you really fancy a giggle... imagine this... from the front door out across the drive is a plank of wood, balanced on a crate at one end, and a crate at the other... so we can get in and out of the house...errrrrm... well, I walked the plank, or should I say, wobbled.. and suffice to say, I shalln't be doing that again in a hurry...I have visions of it snapping and me landing face down in the still slightly wet concrete... I shall leave you with that vision... and I shall say... Thanks for looking... apologies for waffling on ... and... TTFN!

Hels x

Related Posts with Thumbnails