Showing posts with label Christmas 2014. Show all posts

Monday, 22 December 2014

Sparkling Baubles!

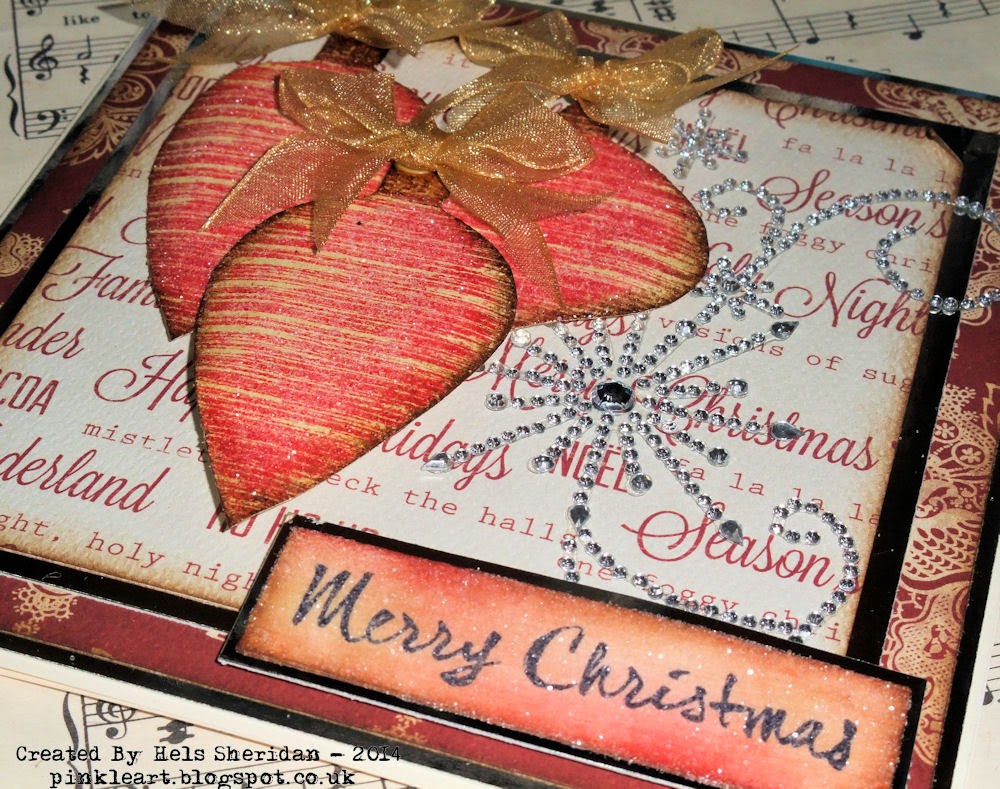
...nay and thrice!  I made a Christmas card!  This is a DT project for Darkroom Door... you all know how much I loves my Darkroom Door stamps and these Brushed Christmas stamps are just so gorgeous to play with. CLICK HERE to head on over to Darkroom Door to see all their beautiful stamps... and HERE for the blog to see what my talented teamies have been up to.


I have been wanting to try this technique for a yonk and a half and have had the ingredients to do it... just not had chance to play.  I used Distress Ink (barn door and gathered twigs) to ink my baubles and then stamped them, sprinkled Sticky Embossing Powder over the top, heated it, added Rock Candy Distress Glitter and then let the magic happen.


I love the subtle sparkle from the glitter and yet you can still see the beautiful detailing on the baubles.


Check out the words... this was a lightbulb moment.  I inked a piece of cream card with the same DI's and then stamped the greeting (from Brushed Christmas Vol. 1) onto card using Jet Black Archival (it has to be a permanent ink and the best is Archival) and zapped it with a heat tool to dry it and set it.  Then I painted Glue & Seal over the top and immediately  sprinkled Rock Candy glitter right over the top.  Then comes the "ewwww, what did I do" moment... the Glue & Seal isn't see through so now it looks like a blob of mess.  Give it a few minutes to dry and voila, see through again... so the sentiment is right there along with that subtle sparkle again.  Cool huh?


I used some papers that I have been covetting for faaaar too long for my background... are you like me?  Keeping those special papers forever because cutting them would be painful?  Cut away, go on, they don't scream.. much! :O))


I shall away now.. I have more blog posts to get ready... and the next one is a biggie.. oh yesh, I have reached a milestone... all will be revealed next time.   Thanks for looking, have a goodly day!  TTFN

Hels x

Monday, 1 December 2014

The First Noel...

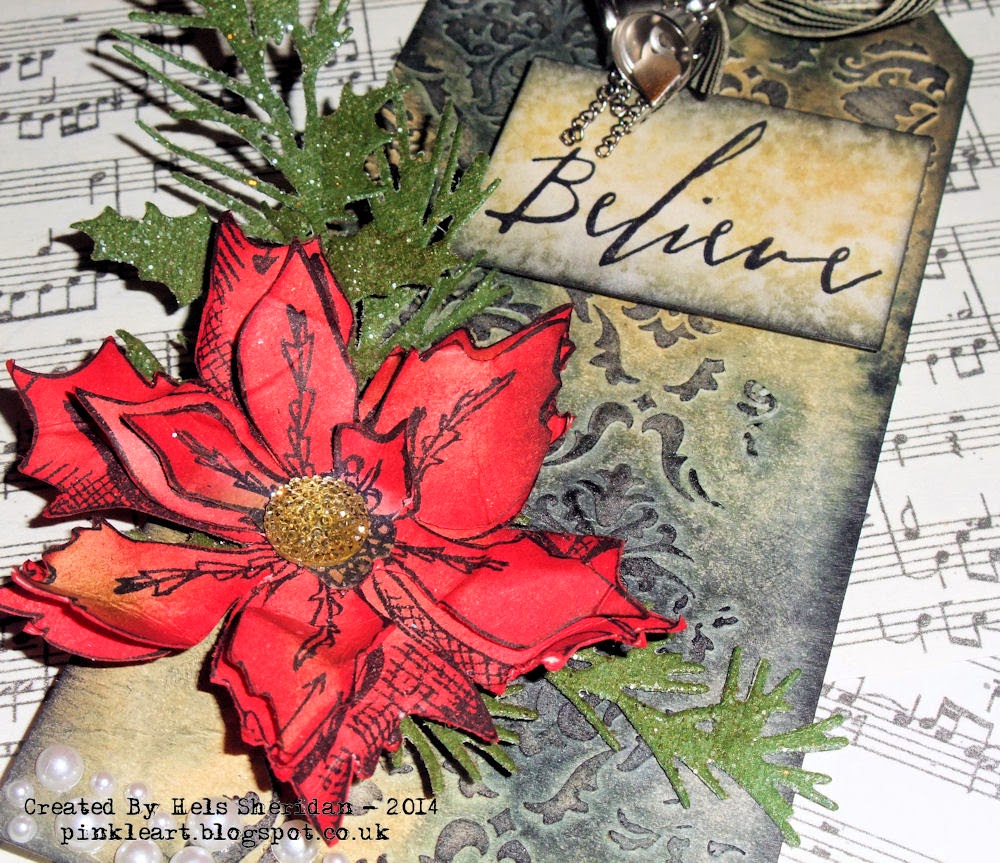
...uh-oh... I is singing!  Christmas Carols... I love a Christmas Carol, I do!  Well, it is December 1st so I am allowed to now... aren't I?  A few weeks ago I had the pleasure of demo-ing all things Tim and Ranger for Craft Obsessions at the NEC and I just found a few piccies I took of the bits I made whilst demo-ing... so here's one of them.


It is a Size 8 Manila tag, Ranger Texture Paste through Tim's Christmas Layering Stencil and then lashings of Black Soot and Antique Linen Distress Spray Stains... you can't really see the texture paste now though... I managed to cover most of it with the embellies!  Once I had dried the base colours, I did a very light spritz of Tarnished Brass Distress Spray Stain to add a bit of bling to the background.  The flower is one of Tim's Blueprints... I love this poinsettia and it is cool to stamp a few times and then cut out decoupage stylee and layer up. HERE is another tag I made using similar stuff.  The flower is coloured with Barn Door and Fired Brick DSS's and then I blended a bit of Fired Brick DI over the top to add a bit of light and shade to it.  The holly is also from the same Blueprint set... made in exactly the same way as the flower so tis nice and layered.  The sentiment is another of Tim's new Xmas stamps and I added a strip of blingy gems and some Idea-ology to finish.


That's all for today... we are off to that London this afternoon to have a look in the shops (yes, we are mental) and it would be very rude not to go and visit Five Guys too... NOM!  Have a great day.... thanks for looking.  TTFN

Hels x

Sunday, 30 November 2014

Sunday Stamper - Week 335 - Have a Holly Jolly Christmas

Goooodly Morning Stampers and a very happy sunny Sunday to you all!  Thank you for your fabby lurve entries into last weeks challenge.   The song title for the theme this week has been chosen by my BFF Ellen... and it is CHRISTMAS You can interpret the challenge how you like: which isn't that difficult this week as Christmas is such a big old theme :O))  To join in with the challenge is simples: make a little something, it can be anything you fancy.  Add in the theme AND some stamping *this is THE important bit guys, please remember your rubberstamps!*  and then hop back here, leave me a comment with a link to the place you are showing your entry and I can come see you.   If you haven't got a blog, you can join in via Facebook (just tag me name) or by emailing a small res.pic to me.  The challenge will remain open until 21:00 Saturday 6th December 2014.


My entry this week has come about because of a fabby Skypey sesh I had with Ellen yesterday.  As usual, we had an I Challenge Thee... basically, we put together a recipe and get crackalacking making stuff.  Only this week we are both barren of Mojo so Ellen grabbed her Ranger U tags... and I grabbed mine... and we chose the Nostalgic Batik technique. Now this is a technique I haven't used for several hundred years and it was so lovely to revisit it.  And... I decided I would do a little step by step to show you how to do it too :O) 


But first.... the recipe!
Technique - Nostalgic Batik
Base - Manila Tag - any size
Theme - Christmas
Must Include: Tinsel/Festive Garlandry, Bow, Bells
Stamps of own choice
*this is the killer*  NO PAPER FLOWERS OF ANY DESCRIPTION!  *Ellen chose that... the vixen lol*

Please do feel free to use our recipe... and we'd love to see what you come up with too :O))

Here's the technique:

STEP 1 & 2
Using a couple of colours of Distress Ink, ink and stamp your image. Immediately cover with clear embossing powder, heat until shiny.


STEP 3
Use a co-ordinating colour of Distress Ink (and let's face it, they all co-ordinate) and blend ink right over the entire piece.  As usual, I added some Frayed Burlap around the edges... I always do that, I do!


STEP 4
Use a hot iron (for those of you who aren't sure what this is, it is a little metal electric jobby that gets red hot, perfect for getting creases out of clothes *snort* but also perfect for crafty stuff too!) with a piece of absorbent paper over the top of the stamped card, press firmly and hold the iron in place, the heat from the iron will re-melt the embossing powder which will soak up into the paper and remove said embossing powder giving a lovely nostalgic look to the art.  If you find that the paper is stuck to the card, simply rub the iron over the top again and it will lift off whilst still hot.


It is worth noting at this point that I GOOFED up... big styleee.... but actually, I liked my goof up so I kept it.  What did I do?  Well, I was so chuffed with the fact that I managed to stamp and emboss and it looked great that I skipped the Step 3 and went and ironed off the embossing powder before I had coloured over the card.  Ooops.  Well, I decided that seeing as there is always a residual amount of embossing stuff left on the stamped image, I would see if inking over the top actually would kill the whole thing or if the residual stuff would be enough of a resist.  And it didn't kill it completely... but what it did do was create a little bit of a halo.. which I likes!  Happy accident right?  To finish the tag, I added my bow, made with crinkle ribbon and Pine Needles DI, some Idea-ology (and how chuffed was I when I found the Christmas Word Band with the right song title words on it!)  The ickle rusty bells attached to Pine Twine around the Prancing Reindeers neck checked the bells and garlandry off the recipe and of course, no paper flowers so... I used real pine cones instead!  Teeehee!


And there you have it!  Please do go and check out what Ellen has been up to HERE... she was making mini tags the last time I saw... and she was up to about 87!   As ever, thanks for looking... have a grand day!  TTFN

Hels x

Sunday, 16 November 2014

Sunday Stamper - Week 333 - Baby's In Black

Goooodly Morning Stampers and a very happy Sunday to you all!  Thank you for your great sewing themed entries for this past two weeker challenge.   The theme this week is USING BLACK You can interpret the challenge how you like: use black sprays, black ribbons, black papers, black embellies...  the choice, it be yours!  To join in with the challenge is simples: make a little something, it can be anything you fancy.  Add in the theme AND some stamping *this is THE important bit guys, please remember your rubberstamps!*  and then hop back here, leave me a comment with a link to the place you are showing your entry and I can come see you.   If you haven't got a blog, you can join in via Facebook (just tag me name) or by emailing a small res.pic to me.  The challenge will remain open until 21:00 Saturday 22nd November 2014.


My entry this week is a tag I made whilst demo-ing at the NEC a few weeks ago.  I have used lots of new goodies on it - starting with Ranger's fabby Texture Paste which was spread through Tim's Gothic Layering Stencil.  Once I had dried it, I used Antique Linen and Black Soot Distress Spray Stain smooshing the inks about the tag with a spritz or two of water.  A zap with a heat tool to dry the inks and then a smidge of blending Black Soot Distress Ink over the tag to make the stencilling really pop and voila, background completed.    The decoration is one of the stamp from Tim's latest Christmas Blueprints sets - I love that poinsettia - perfect for stamping a few times and cutting out and layering up, decoupage fashion... and finished with a Gumdrop which I coloured with Tree Branch Archival Ink.  I added a pearly strip to the bottom of the tag, die cut some of Tim's new Winter Greens and used Stick It on the card so I could sprinkle Rock Candy Distress Glitter over the surface - if you haven't tried Stick It yet... HERE's the info and where to buy - seriously FAB product folks, it is so thin that you can use it with thinlets dies and all your fancy thin dies too and it also acts like a waxy paper so the diecut pops out of the die without any huffing and puffing to release it...cool huh?  I used Tim's new Handwritten Christmas 1 stamp set for the word, how cool is that handwritten font!  A few bits and bobs to embellish and my tag was finished.


I shall away now - this is a pre-scheduled post as I am away teaching at Pickwell Farm in Southampton this weekend... and I am not going to even think about what day it should be when it is actually a different day completely lol   Thanks for looking, have a great Sunday!  TTFN

Hels x


Related Posts with Thumbnails