Friday 28 February 2014

Schneezy Greetings!

...aaaatchoooo!!! Oh yesh, here we are at the end of February and I have my nose all a-bunged up and I am sneezing like Sneezy McSneezy from the little town of Sneezington in Sneezeshire!  Yikes!  So, not only am I all of a moan and a groan, my face has also taken on the appearance of a Moomin... just call me Moomin Mamma and let's have done with it lol   Anyways, a brief interlude in my bemoaning... here's another sample I made whilst demo-ing at the NEC trade show last week.  This is another Pronty MDF heart, again painted with the new Cosmic Chalk Paints.


I used a brayer to apply several layers of the paints to the heart.... btw, answering your questions: no, I never gesso the MDF before playing... am lazy like that :O) That isn't to say you can't, you can, if you want to :O)  I added circles using the top of a water mister bottle and lines using my Ranger scraper and then popped the new That Special Touch Fleur De Lys stencil over the heart and blended Jet Black Archival through it to add some details.  Next up, I stamped the Dandelion in Jet Black Archival and then applied the Cosmic Shimmer Crackle Glaze over the top of the image and then applied more paint over the top whilst it was still wet.  The butterflies were stamped onto cream card and then cut out, coloured with Distress Ink and added to the heart with some gems for the bodies.

 
Today I am getting my stuff together in preparation for my trip to Crafty Bunch in Telford this weekend.  I am so looking forward to returning to Crafty Bunch, the ladies are all brilliant - they love getting covered in ink and paint... and remember me talking about Margaret, the gorgeous lady whom I want to kidnap and bring home?  Well, she will be there too! Hurrah!!!   I couldn't mention Crafty Bunch without mentioning our Sue, the owner, who makes THE best salmon sammiches in the world *yep, best Jeremy Clarkson voice for that....* and who also kept me topped up with coffee and Creme Eggs during the trade show!  I shall away now, to my germ ridden Room of Stash, where, you will be gobsmacked to hear, tidiness prevails! Oh yesh!  It took me several long hours to get it resembling normality but... well, it will do, the desks are clean and tidy... just don't look at the floor!   Have a good day all!  TTFN

Moomin Mamma x


Tuesday 25 February 2014

Take A Note...

...or even a Notelet Box!  New for my Jones DT this month is a great MDF blank Notelet Box by Candy Box Crafts.  Now, as you all know, I am stooopid when it comes to assembledge... and therefore I was a bit perturbed when I saw the Notelet Box in kit form... lots of bits of wood... but actually, it fits together really easily, which is a good thing right?  


In order to ensure I didn't waste my fabby Kaisercraft 75 Cents papers, I made a pencil mark on the side of the woody bits that I needed to cover... and then covered the rest of the bits with Kaisercraft Black paint, applied with Cut & Dry foam so it was a nice smooth finish.  Once that had dried I used good old Cosmic Glue and stuck the papers to the woody bits... using a craft knife to make the fit perfect and then sanding the edges to reveal the white core of the paper and make the box look a little older than it is.  I also got my Texture Hammer out and gave it a bashing so it has gnarly bits too... and I also used me Tim scissors to snip the edges of the front of the lid and then sanded these back too.  My aim was to make the box look like it has been around a few decades.  Check out the stamping... that is an ancient date stamp I picked up on eBay and I used the bottom of a Diet Coke can to add the circles...well, it is more authentic!


Also from Kaisercraft are the fabby Attic Stickers... I used the ruler, cutting it to fit the lid, blending with Distress Ink (good old Walnut Stain) and then scruffing it up with the edge of my Tim scissors, tearing bits out and then sticking the sticker onto the lid using a smidge of Cosmic Glue for extra adhesions.  Next came the "fixing it all together" moment... a moment I always seem to hold my breath for because no matter how many times I check I have done the measurements right and the colouring and paper covering, I always seem to drop a doo-doo.  Well, I did this time too... not because of the design of the box, oh no, that was a doddle.. no because I am, as I mentioned earlier, completely stooopid!  Right at the very front, I didn't factor in the little tabs that fix it all together, thankfully cos of the design of the papers it doesn't stick out like a sore thumb... unlike my real thumb which was sticking out as I had inadvertantly stabbed it with my Tim scissors!  I need those chainmail gloves that butchers wear... 


Now for the decorations.  As you may have also noticed, I have a bit of a penchant for the embellishing bit of any project.  Now this box would have been lovely left as it was... bit oh ho, why not slather a pile of stuff onto it and jazz it up?  So, out came my mahoosive Tattered Florals and regular size Tattered Florals dies along with my Tattered Leaves die and I cut some flowers, making them into roses (sanding the edges of the petals before assembledge to make them shabbier looking) and addin Forest Moss DI to the leaves to make them...erm.. greener!   Of course, being as Jones are button makers (what, you mean you ain't checked out their website???  GO NOW!!! No, hang on a mo, finish this and then go *rofl*)  Yes, Jones have the most amazing array of buttons and it just so happens that they have some new steampunky geary coggy ones... so it was only natural that I bung them into the floral embellishment pile... along with a few bits of Idea-ology and... check out the ickle lightbulb... that is a proper, real, actual lightbulb from my Dad's car!  Don't worry, I didn't just randomly nick his tail light, he changed it cos it had "gone" and I asked if I could have it... he looked at me as if I am bonkers (he doesn't realise just how mad his only child is I fear) so on that went too! 


I took a few days off over the weekend... the busyness of the past few weeks had caught up with me and after the 7 hour drive home from Cornwall on Friday, I felt I needed a few days away from everything... so I spent Saturday asleep - well, for about 18 hours of it!!! And then Sunday I went to Costco with Rich & Mary.... then came home and Skyped Ellen for 4 hours (we hadn't Skyped for yonks so it was a mega catch up!) and then yesterday I spent the whole day happily ensconsed on the Sofa of Slouchiness, watching daytime tv and generally being mouselike as Grim is on nights this week so I needs to be uber quiet... not normal behaviour for me I can tell you (he will too!)   Today I am back to work, sample making for classes I have coming up and catching up on DT stuff... so that means that last night (yes, actually just after I finish typing this as I am scheduling it) I spent several hours unpacking work boxes, storing stash and tidying the Room of Stash.  And I know, I said a week ago I had plans to attack the Room of Stash... and no, I didn't!!   With all this in mind, I shall cast aside my slatternly behaviour get a wiggle on a get tidying!  Thanks for looking.. have a great day!  TTFN

Hels x

Sunday 23 February 2014

Sunday Stamper - Week 296 - Anyone Who Had A Heart

Goodly Morning Stampers and a very happy Sunday to you all.  Many thanks for the fabby entries for last weeks challenge - it was grand to see some newbies too!  The theme this week is a nice easy one ... and it is... HEARTS.  You can interpret the theme as I have, using a heart shape, add a hearty word or add some stencilling or stamping with hearts.   To join in is simples: make a little something, it can be anything you fancy.  Add in the theme and some stamping and then pop back here to leave me a comment with a linky to the place you are showing your entry.  If you haven't got a blog, you can join in via Facebook, simply tag my name or via emailing a small res photo to me.  The challenge will remain open until 21:00 Saturday 1st March 2014.


My entry this week is one of my demo samples from Stitches... I haven't had a chance to do any crafting this week (!) and all goodly intentions of getting the Room of Stash sorted have gone out of the window!  That is a job for tomorrow now methinks.    Anyways, the heart is a Pronty MDF heart, covered with Teresa Collins/Creative Expressions papers and then I got going with the decorating.  I did a smidge of stencilling using Texture Paste and a new That Special Touch mask.  I added some stencilling and Wendy's Archival Inks for the Fleur De Lys and then spritzed the whole heart with Black Cosmic Mist (love the new Cosmic Mists... they are fab!) The floral decoration is made up of Heartfelt Creations flowers, stamped onto more of the papers, cut out and then inked with Wendy's Orange Blossom and Cornflower Archivals - don't forget, you can blend with Archivals with Cut & Dry foam :O)  Smidges of Mustard Seed Distress Glitter for the flower centres and then some Embellish Your Art and metal embellies finished the floral assemblage.  I added scrawled lines around the edges of the heart with a Micron pen and voila, done!  This is the piece I made for Tanya, one of the CE reps, I promised her a tag last year and never got it done so this year I made sure I did something special for her!


That's all from me for today... I hope that you have a great Sunday and you like the theme this week.  Thanks for looking... TTFN

Hels x

Thursday 20 February 2014

Crown of Love...

...brrrrr, cold day here in not so sunny Wellibobs and I think that calls for a day in the Room of Stash... sorting out stuff, putting stuff away and then perhaps a few moments of crafty play to make it all messy again.  I am fighting a losing battle with the Room of Stash, problem is it is just so disorganised (and too small!)  I have a (very rare) weekend off coming up so I am planning to get things sorted, once and for all (what will probably happen is I will do ironing, cobweb removal and oven cleaning as distraction activities!)   Anyways, a bit of art using the new Cosmic Chalk Paints... this one is an MDF crown that I altered using the paints and Crackle Glaze, here's how I did it:


Using a brayer to apply different colours of paints, starting with Grey Sky, moving into the purple tones (can't remember the names, oops) I added extra texture by applying a squidgy layer of paint and dried with a heat tool - yes, you can heat set the paints, fab!  Next, I used a brand new That Special Touch Fleur De Lys stencil, adding the Fleur's using Wendy's Cornflower Archival Ink.   Next up comes the Crackle Glaze Hels' Way... ie,  painting it on and applying the top coat of paint right away before it dries... a gorgeous mottled smooshy effect, I loves it!   I added some flowers and leaves - Heartfelt Creations stamps - and piled them all up with a few pearls and pearly swirls and then added the word onto 3d foam to make it stand out a little more.  Oh and I forgot to say, I edged the crown with Chalkboard Paint to make it darker and give it a frame.


As I said earlier, I shall be trying to sort out the Room of Stash today and Dad is arriving this afternoon as we are setting off at 4am tomorrow to drive to Cornwall for my Aunty's funeral.... long drive so we are sharing it.   And Dad is bringing proper northern fish n chips with him.. nom nom nom, so this afternoon I shall be stuffing my chops and ooing and ahing about the deliciousness that is proper northern fish n chips!  I shall away now... thanks for looking and have a great day!  TTFN

Hels x

Wednesday 19 February 2014

Painty Painty...

...cor blimey! What a whirlwind three days I just had!  It was the annual Stitches trade show at the NEC in Birmingham and I was demoing some lush new paints from Creative Expressions.  Here's the info about them:  37 brand new colours in a yummy natural palette, these paints are semi-opaque, super smooth, chalky and dry fast too.  As well as the 37 new colours, there are also four new Glazes added to the range.  A Pearl Shimmer, Gloss and Matt Glaze... and then best of all... a Crackle Glaze.  Armed with some MDF and some cardstock I set about creating some demo samples over the three days... and over the next few days I shall be blogging all about what I made.


Check out the Fleur De Lys, stencilled underneath the Crackle Glaze, so it is revealed when it goes blotchy!


This card shows the new Crackle Glaze.  Having not used it before I figured it would help if I read the instructions... so I did... and did a really pretty crackle on the card.  Then I decided to ignore the instructions and try it my own way... and what happened next was amazing!  So, it says to paint on a base coat of paint... dry it and then paint on the Crackle Glaze, nice and smoothly avoiding brush strokes... and then dry it.  Then apply a top coat of paint and watch the crackles appear.  Oh yesh, lovely!  Next I decided to pop the top coat of paint on whilst the Crackle Glaze was still wet... ohlallaaaa... I love the blotchy resisty effect that happened... so did everyone who came to see the demo's too.  The crackle in on the left side of the card, the resisty blotchy is on the right side.   A couple of tag bases that I demo'd... they needs decorating and embellishing at some point...
*excuse photo's, I had to take them using me phone and the light was pants...*


This tag has the Crackle Glaze used properly


And this tag has it used my way :O)

 I will be back tomorrow with pics of a project I made at the show... today I am mostly being a lazy old bat... after three days of constant yakking my voice is glad of the rest!  At least I haven't lost it this time (the voice, not *it* although....)   Thanks for looking, have a great day!  TTFN

Hels x

Sunday 16 February 2014

Sunday Stamper - Week 295 - And Your Bird Can Sing

Goodly Morning Stampers and a very happy Sunday to you all.  Many thanks for all your gorgeous diamond creations last week, it was great to see so many different interpretations of the theme.  The theme this week is rather poignant... more of that later... but first, the theme is... BIRDS.  To join in with the theme is simples: make a little something, it can be anything you like.  Add in the theme and some stamping and then pop back here, leave me a comment with a linky to the place you are showing your entry and then I can pop over to visit you. If you haven't got a blog, you can join in via Facebook, simply tag my name... or via emailing a small res pic to me.  The challenge will remain open until 21:00 Saturday 22nd February 2014.


As I mentioned, a poignant theme for me this week... in memory of my dear Aunty June who sadly passed away last week after a short illness.  I could have chosen so many different themes that remind me of her... but birds was the theme that stuck with me because I share her love of our feathered friends, especially owls.  When I was a kid I spent many a happy summer holiday staying with her, my uncle and cousins in "that London"... being a northerner in the south during those hazy summer days whetted my appetite for all things southern and I eventually ended up living in the south.  Aunty June always spoilt me, when I was little her birthday and Christmas pressies were always a little bit special, like a fancy pair of socks with golden threads woven into them, a beautiful red leather purse (which was sadly stolen) and in later years she bought me silver charms for my charm bracelet, all of them had a special meaning too; the Owl & The Pussycat because she used to say that poem to me when I was a kid.   She was a very special woman in my life and this piece of art is dedicated to my Aunty June... and the happy memories she left with me.


I won't go into too great a detail on how I created this canvas as it is my class sample from my workshop yesterday at Neil Burley's The Studio.  Big thanks to the lovely ladies who came along to play and get painty with us... and again to Neil for hosting the class.  I used a selection of Kaisercraft paints to create the background colours - Eggshell, Wisteria and Eggplant... aren't they gorgeous colours?  I don't know what is going on with me this year but I seem to have turned a little purple!  I had actually chosen to use soft mossy tones with smidges of mocha but changed my mind at the last minute!!! And then spent half an hour trying to dull down the purples until I was happy with the colours.  The sentiment is from The Artistic Stamper - available HERE... I love these lovely big wordy stamps - perfect for a mixed media project like this.


I must away now - I am up at stoopid o'clock today (scheduling this late last night... ) to travel to Birmingham for the Stitches Trade Show at the NEC.   I am demo-ing for Creative Expressions for the next three days so I might not be about much (social media might be a bit scarce too as the signal in the NEC is pants!) And as I hinted earlier in the week... I shall be demo-ing a brand new product from Creative Expressions... I am hoping to be able to make up a few samples whilst at the show so I will be able to blog as soon as possible to share all the goss on this fabby new ***** .... whoops, nearly let the cat out of the bag then!   As ever, thank you for looking... have a great day all.  TTFN

Hels x

Friday 14 February 2014

Craft Stamper - Make It, Take It Challenge

...tis that time again... oh yesh a brand new challenge over on the Craft Stamper blog... and the challenge technique this month is to use repeat stamping.  This is a fabby technique and perfect for jazzing up background papers and your own inky backgrounds too.  For my creation, I have made a tag and used Distress Inks and Archivals to make my background... here's how I made it:


Starting out with a Size 8 manila tag, I blended Antique Linen DI all over it and then blended Stormy Sky DI around the edges and in towards the middle, leaving some of the Antique Linen showing.  I then used Faded Jeans to blend a bit darker around the edges and finally used Black Soot DI to give the tag a frame.  Using a watermister, spraying water into my paw and flicking it at the tag, I achieved a nice bleachy splatty effect.  The repeat stamping was done using a really old PSX stamp I have - it was the second rubber stamp I ever bought about 271 years ago... and I still loves it.  I used Wendy's Cornflower Archival ink - this is perfect to go with Stormy Sky and Faded Jeans... however, I did a "second generation" print... basically, ink the stamp as normal, stamp onto paper and then onto the tag... this way the ink is slightly lighter and that is what I wanted as I didn't want the butterflies to be too prominent.

 
Adding in a smidge of black stamping around the edge always pleases my eye, adding to the "frame" of Black Soot, so I did a few impressions of the shabby diamond stamp using Jet Black Archival... and remembering to dry the ink too as Archival needs to be heat set to ensure no smudgey paw marks.  The big old butterfly is an Indigo Blu stamp, isn't it gorgeous!  That was coloured with the same DI's as the tag... and then pearls added to jazz his body up.  The sentiment is one of Tim's from Stuff to Say, stamped onto card, 3D'd and torn along the bottom for a bit of extra texture.  A few pearly swirls added a little bit of prettiness... and there you have it! 
 

Don't forget to CLICK HERE and visit the Craft Stamper blog... also, there be a prize for one lucky entrant too!!!   Today I am mostly going to be prepping for my class tomorrow at Neil Burley's Studio tomorrow... and also, playing with something *brand new* that will be launching at the Stitches trade show this weekend... ohhhlalaaa.. I am loving this new **********.... teeheee!!   Thanks for looking, have a grand day!  TTFN

Hels x

Wednesday 12 February 2014

Beautiful Heart...


...another sample from last Sunday's shows... this time an MDF heart.  I loves working with MDF, it is forgiving, sturdy to play with and also... such a lovely surface to make stuff on!  These hearts are part of a 6 pack and I just used my Crop-A-Dile to punch holes into the top to make the hangy bit.


Covered with more of the Teresa Collins papers (mmm, I keep banging on about these but I can't help it, I LOVE them!!!)   I wanted to make a nice background over the papers so picked pretty plainish ones, added some Frayed Burlap DI around the edges and then a smidge of Walnut Stain to darken it and then sanded to reveal the white core and making it look nice and shabby.  I used Black Archival ink to stamp the Eco image of the flowery leafy stamp up from the bottom and down from the top of the heart, zapping with a heat tool just to make sure the ink was set.  Stencilling with Distress Inks to add more interest and then the Small Polka Mask with Gold Pearl Texture Paste spread through to add the...erm... texture!!


The decorations are made from the smallest bloom of the Flora Grande Heartfelt Creations stamps - they are a bit of a fiddle to make as they are small but they are quite sweet... I made three, added in some leaves (Eco stamps) stamped in Wendy's Fern Green Archival Ink and then stamped a couple of moths (also Eco stamps) and popped those onto the heart with some embellies to decorate... and there you have it!


Today I am going to be pacing about, waiting for the phone to ring.. biting nails and pulling my hair out because... Ferdy is having major surgery today!!!  Oh yesh, he has reached the grand old age of 34,000 miles (wow! how many!!!) and is having his Cam Belt and Water Pump changed.  I hate leaving him at the garage, I know he needs it doing and I stupidly gave him a "human" name so I have gotten this strange attachment to him but...  all the same, I shall worry (yes, I am bonkers lol)  And, in true typical stylee, yesterday when I set off from home to drop him off at the garage, he failed to start!  Yep, first time ever, he coughed a bit, spluttered a bit and then the Engine Management light flashed a few times... huh?  Finally he got going (after a lot of revving and praying from moi and the light went out so I am hoping it was just a hiccup!   Anyways, to prove that I am not as bonkers as everyone thinks, I related this to the chap at the garage... you wanna know what he said???   These were his exact words... "well, he knew you were taking him to see me!"  See, not just me that thinks cars are either male or female!  At least he will get cleaned though... he is absolutely minging filthy dirty (thanks to all the rain/salt/mud on the roads and my inherent slatternly nature) and the nice garage chap will give him a spruce up *just hope they don't attempt to clean inside, it is a bit skip-like in there you know... well, it is my travelling "office" lol*   I shall away now... this post is being scheduled as I have my lovely Dad visiting us and knowing how we have a tendency to yak late into the night, I figured I would schedule something just in case I get sidetracked lol   Anyways...  have a goodly day and thanks for looking!  TTFN

Hels x


Tuesday 11 February 2014

Just Hanging Around...

...see what I did there huh?  A play on words indeedily today as I have one of the hanging projects I made for the shows on Sunday.  This one is actually just one panel from the Three Hanging Panels MDF set... I love the fact you can use them all together as they have holes drilled... or use them on their own (thus making one's stash go further!)  For this project, I used some of the gorgeous Teresa Collins papers and yep, there's that big old bloom again.  If you missed yesterday's post, please do scroll down to see the photo tut I did on how to make one :O)


The base was covered with the papers, edged with a smidge of Walnut Stain DI and then sanded back to neaten up the edges and I whizzed around the edge with some Black Soot DI to give the design a frame.  Next I used the script mask and Walnut Stain DI, randomly stencilling onto the base and then used the quilt mask, this time with Black Soot DI, again, stencilling randomly for that shabby effect.  Because the papers aren't quite long enough to fit onto the base, I cut it into two pieces and used a strip of the back side of the paper to cover the gap - you can just spy that poking out at the bottom of the flower.  I also added a smidge of stamping to the background... the Tattered Backgrounds dots... love these... stamped with Wendy's Signature Archival Potting Soil ink... lush!


The flower... oh, be still my heart, I have a new fave!!!  Made in the same way as the tut and then embellished around it to add some detail... check out the ickle butterfly too.  That is an Eco stamp, stamped onto card using Flake & Glitter Glue and then gilded with Autumn Leaves Gilding Flakes... I love the instant metal look achieved by doing this.  I poked a couple of holes in the top of the papers (thru the original drilled holes) and attached some rusty wire to make the hanging, added a sentiment and voila, finished!


That's all from me for today... busy week ahead of me - I am teaching in Leicester at Neil Burley's Studio on Saturday and then Sunday, Monday, Tuesday it is the Stitches Trade Show at the NEC and I am demoing for Creative Expressions so I needs to get myself shifting and making some samples... I will be demoing a *new* product too and I can't wait to have a play and then show it to you... til then, I will leave you in suspenders!!  Have a great day... Thanks for looking... TTFN!

Hels x

Monday 10 February 2014

Flora Grande Bloom Tutorial

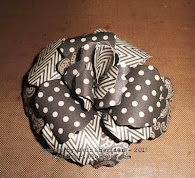
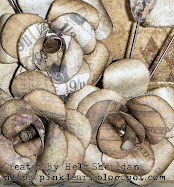
...as promised, here's the tutorial on how to make the mahoosive beautiful bloom from the Heartfelt Creations Flora Grande flower stamp - this method would also apply to any other stamp you have that has more than 6 petals (the usual way to make a big rosey type of flower)   Before I go on though... huge thanks for all your lovely messages and emails about yesterday's shows... they were great weren't they?  The "crow/parrot" will forever make me laugh my socks off... I thought I did quite a good job... alas I didn't get a photo of this rare of endangered breed, so perhaps if Liz is reading this she could take a piccie and send it to me... for posterity and all that.  Anyhow, on with the tutorial... you might want to grab yourself a cuppa and a packet of Hobnobs mind you, it is very photo heavy :O)  *~please also excuse the state of my hands and nails.. these pics were taken after three intensive days sample making and therefore my nails are a tad battered and the hands...well, mucky inky dirty will suffice~*  Here's a pic of the finished bloom:


And here are your ingredients:

Four stamped flowers, pokey tool, Cosmic Glue, paper clips, scissors, paintbrush or similar for curling the petals (+stamp!)


Through the tutorial I will post photo's of each step, plus extra photo's (labelled a or b, which show you how the step should look once completed)

STEP 1
Cut up in between two petals to the middle of the flower.


STEP 2
Where your cut is is where one petal will overlay the next one - you need to cut the top off this petal as when it is glued, it will be double thickness and won't curl as nicely as the other petals. Leave a nice "tab" at the bottom of the petal for gluing.


So your first flower will look like this with 7 petals.


STEP 3
Cut out one petal plus a semi circle from the centre (makes it easier to assemble) and the top off the petal that will be underneath once glued.  KEEP THE SINGLE PETAL.


Your second flower will look like this with 6 petal.

Rusty Hinge makes ones fingers look nicotine stained!

STEP 4
Cut out two petals together - set them aside as you will need them. Cut out another semi circle from the centre as before and also the top off the underneath petal.  


This is how flower number 3 should look when glued - 5 petals.

please excuse the sausage thumb shot!


STEP 5
This should be your fourth stamped flower. Cut out three petals together, repeat the process as before, cut a semi circle from the middle, chop the top off the petal that will sit underneath... KEEP THE THREE PETALS


This is how it should look - 4 petals

yep, another sausage thumb


STEP 6
For this step, you need to use the three petals you cut from the previous flower.  Snip a little way into the petals, this makes them easier to curl once assembled.


Use your paintbrush to gently curl your petals inwards, add glue as shown and stick the edges together where they meet.


It should look like this


STEP 7
This step needs the two petals you cut from flower #3 - again, snip a little way into the petals to help them curl once assembled.


Use your paintbrush to curl the petals inwards, this helps it come together for gluing


And it should look like this - as before, just add glue along one edge and stick where they meet. Use a clip to assist the gluing and freeing up your hands for the next step.


STEP 8 
This is using the single petal you cut from flower # 2. Use your paintbrush to wrap the petal around it, glue at the base and use a clip to hold it in place.

for continuity, Hels kept her hands mucky

You are now ready to assemble your bloom!

STEP 9 
Use a pokey tool (or similar) to curl the edges of your petals.  Pop your finger underneath the point at the base of the flower and push upwards to form a little peak inside the flower. This will be the "nest" your next layers sit around.


Add a generous dollop of Cosmic Glue around the base of the "peak".


STEP 10
Remember the semi circles we cut from the middles of each layer?  This eases assembly!  This photo shows that you can now get your scissor tips into the hole and make it slightly larger so it nests neatly within the base flower.  Repeat this process with each layer.


Place your layer into the base flower - you may need to jiggle it around a little until it sits neatly.


STEP 11
As before, snip around the hole in the bottom of the layer to make it the right size to fit into the layer below... add glue around the edges of the hole and pop into place... 


...like this...


STEP 12
As before, snip down the size as necessary and place into the every growing bloom.


STEP 13
Remember we snipped into the petals in Step 6?  This is why!  It makes life easier to curl the petals when they aren't so snug together.

ewwww, don't look at those manky nails!!!

When popped into place, it should look like this:


STEP 14
And again, snipping down between the petals makes it so much easier to curl these back on the layer that has two petals... curl the petals back and pop glue around the base of the layer.

or those manky nails, no! don't look!


STEP 15
Can you believe I deleted the photo for Step 15??? After all those other ones!!! Eeek!! Anyways, all you needs to do with the single petal is cut it to size and pop it into place with a dob of glue.

~~~~~~~~~~~~~~~~~~~~~~~~~~~~~~~~~~~~~~~~~~~~~~~~~~~~~~~~~~~~~~~~

And there you have it!!! Are you still with me or have you nodded off?   I hope that you found this easy to follow and if you are planning on making some beautiful blooms, I would LOVE to see the results! 

I shall away now... as ever, thanks for looking, have a great day all!  TTFN

Hels x

Related Posts with Thumbnails